大家好,又见面了,我是你们的朋友全栈君。如果您正在找激活码,请点击查看最新教程,关注关注公众号 “全栈程序员社区” 获取激活教程,可能之前旧版本教程已经失效.最新Idea2022.1教程亲测有效,一键激活。
Jetbrains全家桶1年46,售后保障稳定
本文目录
RecyclerView概述
RecyclerView是官方在5.0之后新添加的控件,推出用来替代传统的ListView和GridView列表控件。
RecyclerView使用-基础篇
第一步:添加RecyclerView
**方法1:**点开任意一个布局文件,找到左边的RecyclerView控件,点击旁边的按钮即可添加RecyclerView。


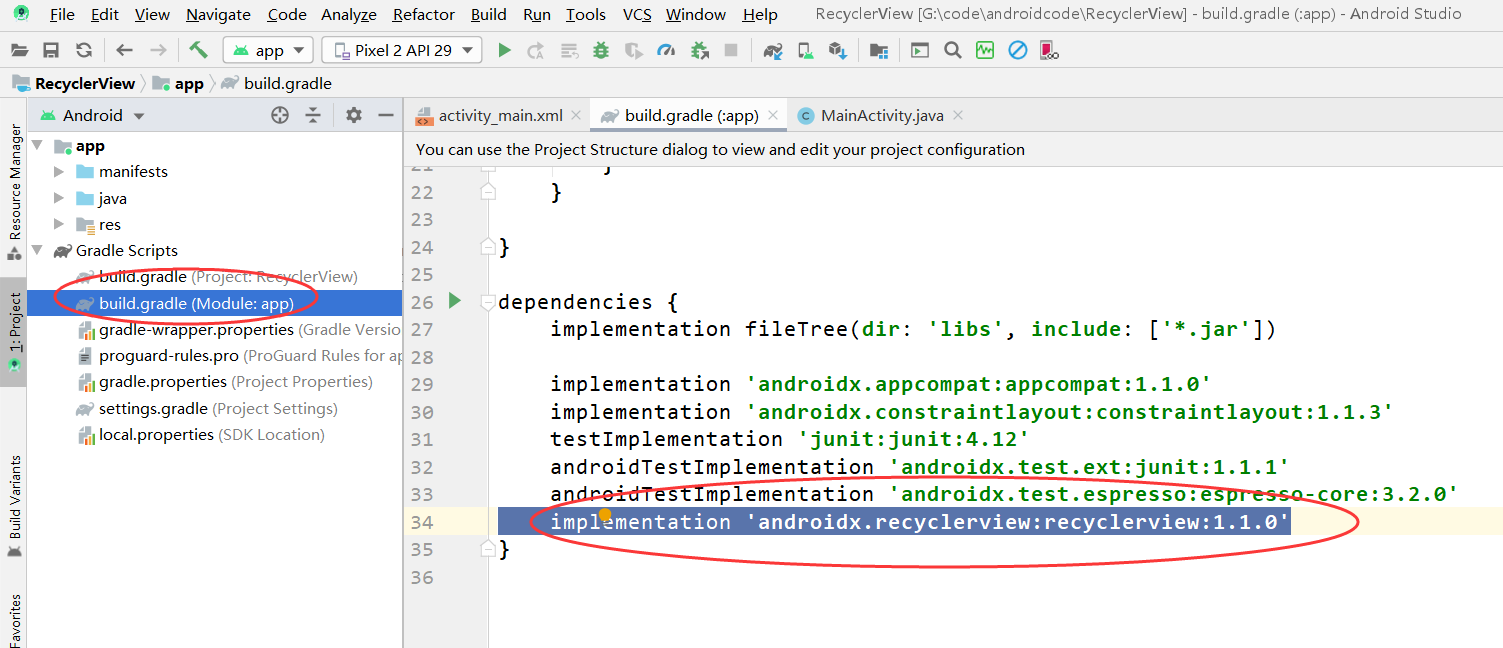
**方法2:**在build.gradle文件中添加依赖
implementation 'androidx.recyclerview:recyclerview:1.1.0'
第二步:添加布局文件
在布局文件activity_main.xml中先添加RecyclerView控件
<?xml version="1.0" encoding="utf-8"?>
<androidx.constraintlayout.widget.ConstraintLayout xmlns:android="http://schemas.android.com/apk/res/android"
    xmlns:app="http://schemas.android.com/apk/res-auto"
    xmlns:tools="http://schemas.android.com/tools"
    android:layout_width="match_parent"
    android:layout_height="match_parent"
    tools:context=".MainActivity">

    <androidx.recyclerview.widget.RecyclerView
        android:id="@+id/recyclerview"
        android:layout_width="match_parent"
        android:layout_height="match_parent"
        app:layout_constraintBottom_toBottomOf="parent"
        app:layout_constraintLeft_toLeftOf="parent"
        app:layout_constraintRight_toRightOf="parent"
        app:layout_constraintTop_toTopOf="parent" />

</androidx.constraintlayout.widget.ConstraintLayout>
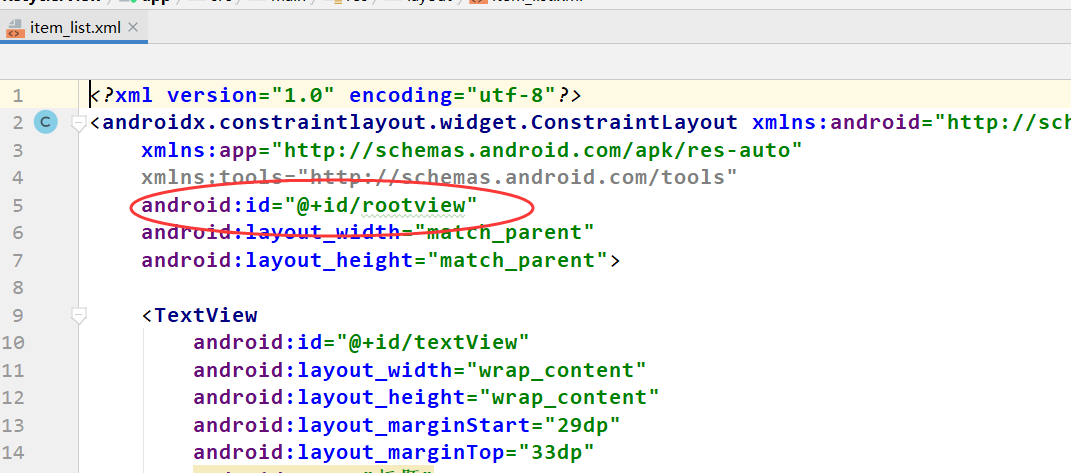
再添加一个item_list.xml的布局文件
<?xml version="1.0" encoding="utf-8"?>
<androidx.constraintlayout.widget.ConstraintLayout xmlns:android="http://schemas.android.com/apk/res/android"
    xmlns:app="http://schemas.android.com/apk/res-auto"
    xmlns:tools="http://schemas.android.com/tools"
    android:layout_width="match_parent"
    android:layout_height="match_parent">

    <TextView
        android:id="@+id/textView"
        android:layout_width="wrap_content"
        android:layout_height="wrap_content"
        android:layout_marginStart="29dp"
        android:layout_marginTop="33dp"
        android:text="标题"
        app:layout_constraintStart_toStartOf="parent"
        app:layout_constraintTop_toTopOf="parent" />

    <TextView
        android:id="@+id/textView2"
        android:layout_width="wrap_content"
        android:layout_height="wrap_content"
        android:layout_marginStart="4dp"
        android:layout_marginTop="18dp"
        android:text="内容"
        app:layout_constraintStart_toStartOf="@+id/textView"
        app:layout_constraintTop_toBottomOf="@+id/textView" />
</androidx.constraintlayout.widget.ConstraintLayout>
第三步:添加逻辑代码
首先定一个实体类如下:
public class News {

    public String title; // 标题
    public String content; //内容
}
然后在MainActivity中定义内部类 ViewHolder类、 MyAdapter类以及设置RecyclerView相关逻辑
package com.lucashu.recyclerview;

import androidx.annotation.NonNull;
import androidx.appcompat.app.AppCompatActivity;
import androidx.recyclerview.widget.LinearLayoutManager;
import androidx.recyclerview.widget.RecyclerView;

import android.os.Bundle;
import android.view.View;
import android.view.ViewGroup;
import android.widget.TextView;

import java.util.ArrayList;
import java.util.List;

public class MainActivity extends AppCompatActivity {

    RecyclerView mRecyclerView;
    MyAdapter mMyAdapter ;
    List<News> mNewsList = new ArrayList<>();

    @Override
    protected void onCreate(Bundle savedInstanceState) {

        super.onCreate(savedInstanceState);
        setContentView(R.layout.activity_main);
        mRecyclerView = findViewById(R.id.recyclerview);
        // 构造一些数据
        for (int i = 0; i < 50; i++) {

            News news = new News();
            news.title = "标题" + i;
            news.content = "内容" + i;
            mNewsList.add(news);
        }
        mMyAdapter = new MyAdapter();
        mRecyclerView.setAdapter(mMyAdapter);
        LinearLayoutManager layoutManager = new LinearLayoutManager(MainActivity.this);
        mRecyclerView.setLayoutManager(layoutManager);
    }

    class MyAdapter extends RecyclerView.Adapter<MyViewHoder> {


        @NonNull
        @Override
        public MyViewHoder onCreateViewHolder(@NonNull ViewGroup parent, int viewType) {

            View view = View.inflate(MainActivity.this, R.layout.item_list, null);
            MyViewHoder myViewHoder = new MyViewHoder(view);
            return myViewHoder;
        }

        @Override
        public void onBindViewHolder(@NonNull MyViewHoder holder, int position) {

            News news = mNewsList.get(position);
            holder.mTitleTv.setText(news.title);
            holder.mTitleContent.setText(news.content);
        }

        @Override
        public int getItemCount() {

            return mNewsList.size();
        }
    }

    class MyViewHoder extends RecyclerView.ViewHolder {

        TextView mTitleTv;
        TextView mTitleContent;

        public MyViewHoder(@NonNull View itemView) {

            super(itemView);
            mTitleTv = itemView.findViewById(R.id.textView);
            mTitleContent = itemView.findViewById(R.id.textView2);
        }
    }
}
运行效果

RecyclerView使用-进阶篇
布局管理器
RecyclerView提供了三种布局管理器即:
- LinearLayoutManager 线性布局管理器
- StaggeredGridLayoutManager 瀑布流布局管理器
- GridLayoutManager 网格布局管理器
线性布局管理器
这三种布局管理器都是通过setLayoutManager方法来设置
LinearLayoutManager 还可以设置横向滚动,只需将前面MainActivity中的layoutManager加一句代码即可:
 LinearLayoutManager layoutManager = new LinearLayoutManager(MainActivity.this);
 layoutManager.setOrientation(RecyclerView.HORIZONTAL);
 mRecyclerView.setLayoutManager(layoutManager);

网格布局管理器
如果让一行显示多个,可以设置 GridLayoutManager网格布局管理器来实现
  GridLayoutManager layoutManager = new GridLayoutManager(MainActivity.this,3);
// layoutManager.setOrientation(RecyclerView.HORIZONTAL); 也能设置横向滚动
  mRecyclerView.setLayoutManager(layoutManager);

ItemDecoration
通过给 设置ItemDecoration 来装饰Item的效果,比如我们要设置间隔线
DividerItemDecoration mDivider = new
                        DividerItemDecoration(this,DividerItemDecoration.VERTICAL);
mRecyclerView.addItemDecoration(mDivider);

Item 动画
RecyclerView提供了默认的ItemAnimator实现类:DefaultItemAnimator。该类可以帮我们实现一些炫酷的动画效果
DefaultItemAnimator itemAnimator = new DefaultItemAnimator();
defaultItemAnimator.setAddDuration(1000);
defaultItemAnimator.setRemoveDuration(1000);
 mRecyclerView.setItemAnimator(itemAnimator);
在MainActivity中添加了两个按钮, 一个添加item,一个删除item
Button button = findViewById(R.id.button);
        button.setOnClickListener(new View.OnClickListener() {

            @Override
            public void onClick(View v) {

                News news = new News();
                news.title = "标题 新内容" ;
                news.content = "内容 新内容" ;
                mNewsList.add(1,news);
                mMyAdapter.notifyItemInserted(1);
            }
        });
        Button button1 = findViewById(R.id.button1);
        button1.setOnClickListener(new View.OnClickListener() {

            @Override
            public void onClick(View v) {

                mNewsList.remove(0);
                mMyAdapter.notifyItemMoved(0,1);
            }
        });
效果如下:

Item 点击
可以通过对整个Item文件的根布局添加一个点击事件来实现Item的点击

效果如下:

RecyclerView使用-高级篇(上拉刷新下拉加载更多)
通常RecyclerView使用的时候需要配合上拉刷新下拉加载更多的功能
我们通过开源控件SmartRefreshLayout来实现
SmartRefreshLayout官网:https://github.com/scwang90/SmartRefreshLayout
使用方法如下:
第一步:添加依赖
在gradle文件中添加
implementation 'com.scwang.smartrefresh:SmartRefreshLayout:1.1.2'
implementation 'com.scwang.smartrefresh:SmartRefreshHeader:1.1.2'
第二步:布局文件
在activity_main.xml中SmartRefreshLayout控件将RecyclerView包裹起来
<?xml version="1.0" encoding="utf-8"?>
<androidx.constraintlayout.widget.ConstraintLayout xmlns:android="http://schemas.android.com/apk/res/android"
    xmlns:app="http://schemas.android.com/apk/res-auto"
    xmlns:tools="http://schemas.android.com/tools"
    android:layout_width="match_parent"
    android:layout_height="match_parent"
    tools:context=".MainActivity">

    <com.scwang.smartrefresh.layout.SmartRefreshLayout
        android:id="@+id/refreshLayout"
        android:layout_width="match_parent"
        android:layout_height="match_parent"
        app:layout_constraintBottom_toBottomOf="parent"
        app:layout_constraintTop_toTopOf="parent">

        <androidx.recyclerview.widget.RecyclerView
            android:id="@+id/recyclerview"
            android:layout_width="match_parent"
            android:layout_height="0dp"
            app:layout_constraintBottom_toBottomOf="parent"
            app:layout_constraintLeft_toLeftOf="parent"
            app:layout_constraintRight_toRightOf="parent"
            app:layout_constraintTop_toTopOf="parent" />
    </com.scwang.smartrefresh.layout.SmartRefreshLayout>
</androidx.constraintlayout.widget.ConstraintLayout>
第三步:逻辑代码
在MainActivity的onCreate方法中添加下拉刷新和上拉加载更多的功能
下拉刷新:
RefreshLayout refreshLayout = findViewById(R.id.refreshLayout);
        refreshLayout.setOnRefreshListener(new OnRefreshListener() {

            @Override
            public void onRefresh(RefreshLayout refreshlayout) {

                refreshlayout.finishRefresh(2000/*,false*/);//传入false表示刷新失败
                mNewsList.clear();
                for (int i = 0; i < 10; i++) {

                    News news = new News();
                    news.title = "标题 新内容" + i;
                    news.content = "内容" + i;
                    mNewsList.add(news);
                }
                mMyAdapter.notifyDataSetChanged();
            }
        });
上拉加载更多
 refreshLayout.setOnLoadMoreListener(new OnLoadMoreListener() {

            @Override
            public void onLoadMore(RefreshLayout refreshlayout) {

                refreshlayout.finishLoadMore(2000/*,false*/);//传入false表示加载失败
                for (int i = 0; i < 10; i++) {

                    News news = new News();
                    news.title = "标题 新内容" + i;
                    news.content = "内容" + i;
                    mNewsList.add(news);
                }
                mMyAdapter.notifyDataSetChanged();
            }
        });
效果如下:

完整代码
MainActivity.java文件
package com.lucashu.recyclerview;

import androidx.annotation.NonNull;
import androidx.appcompat.app.AppCompatActivity;
import androidx.constraintlayout.widget.ConstraintLayout;
import androidx.recyclerview.widget.LinearLayoutManager;
import androidx.recyclerview.widget.RecyclerView;

import android.os.Bundle;
import android.view.View;
import android.view.ViewGroup;
import android.widget.TextView;
import android.widget.Toast;

import com.scwang.smartrefresh.layout.api.RefreshLayout;
import com.scwang.smartrefresh.layout.listener.OnLoadMoreListener;
import com.scwang.smartrefresh.layout.listener.OnRefreshListener;

import java.util.ArrayList;
import java.util.List;

public class MainActivity extends AppCompatActivity {

    RecyclerView mRecyclerView;
    MyAdapter mMyAdapter ;
    List<News> mNewsList = new ArrayList<>();

    @Override
    protected void onCreate(Bundle savedInstanceState) {

        super.onCreate(savedInstanceState);
        setContentView(R.layout.activity_main);
        mRecyclerView = findViewById(R.id.recyclerview);
        // 构造一些数据
        for (int i = 0; i < 10; i++) {

            News news = new News();
            news.title = "标题" + i;
            news.content = "内容" + i;
            mNewsList.add(news);
        }

        mMyAdapter = new MyAdapter();
        mRecyclerView.setAdapter(mMyAdapter);
        LinearLayoutManager layoutManager = new LinearLayoutManager(MainActivity.this);
        mRecyclerView.setLayoutManager(layoutManager);


        RefreshLayout refreshLayout = findViewById(R.id.refreshLayout);
        refreshLayout.setOnRefreshListener(new OnRefreshListener() {

            @Override
            public void onRefresh(RefreshLayout refreshlayout) {

                refreshlayout.finishRefresh(2000/*,false*/);//传入false表示刷新失败
                mNewsList.clear();
                for (int i = 0; i < 10; i++) {

                    News news = new News();
                    news.title = "标题 新内容" + i;
                    news.content = "内容" + i;
                    mNewsList.add(news);
                }
                mMyAdapter.notifyDataSetChanged();
            }
        });

        refreshLayout.setOnLoadMoreListener(new OnLoadMoreListener() {

            @Override
            public void onLoadMore(RefreshLayout refreshlayout) {

                refreshlayout.finishLoadMore(2000/*,false*/);//传入false表示加载失败
                for (int i = 0; i < 10; i++) {

                    News news = new News();
                    news.title = "标题 新内容" + i;
                    news.content = "内容" + i;
                    mNewsList.add(news);
                }
                mMyAdapter.notifyDataSetChanged();
            }
        });

    }

    class MyAdapter extends RecyclerView.Adapter<MyViewHoder> {


        @NonNull
        @Override
        public MyViewHoder onCreateViewHolder(@NonNull ViewGroup parent, int viewType) {

            View view = View.inflate(MainActivity.this, R.layout.item_list, null);
            MyViewHoder myViewHoder = new MyViewHoder(view);
            return myViewHoder;
        }

        @Override
        public void onBindViewHolder(@NonNull MyViewHoder holder, final int position) {

            News news = mNewsList.get(position);
            holder.mTitleTv.setText(news.title);
            holder.mTitleContent.setText(news.content);
            holder.mRootView.setOnClickListener(new View.OnClickListener() {

                @Override
                public void onClick(View v) {

                    Toast.makeText(MainActivity.this,"点击了:"+ position,Toast.LENGTH_LONG).show();
                }
            });
        }

        @Override
        public int getItemCount() {

            return mNewsList.size();
        }
    }

    class MyViewHoder extends RecyclerView.ViewHolder {

        TextView mTitleTv;
        TextView mTitleContent;
        ConstraintLayout mRootView;

        public MyViewHoder(@NonNull View itemView) {

            super(itemView);
            mTitleTv = itemView.findViewById(R.id.textView);
            mTitleContent = itemView.findViewById(R.id.textView2);
            mRootView = itemView.findViewById(R.id.rootview);
        }
    }
}
activity_main.xml文件
<?xml version="1.0" encoding="utf-8"?>
<androidx.constraintlayout.widget.ConstraintLayout xmlns:android="http://schemas.android.com/apk/res/android"
    xmlns:app="http://schemas.android.com/apk/res-auto"
    xmlns:tools="http://schemas.android.com/tools"
    android:layout_width="match_parent"
    android:layout_height="match_parent"
    tools:context=".MainActivity">

    <com.scwang.smartrefresh.layout.SmartRefreshLayout
        android:id="@+id/refreshLayout"
        android:layout_width="match_parent"
        android:layout_height="match_parent"
        app:layout_constraintBottom_toBottomOf="parent"
        app:layout_constraintTop_toTopOf="parent">

        <androidx.recyclerview.widget.RecyclerView
            android:id="@+id/recyclerview"
            android:layout_width="match_parent"
            android:layout_height="match_parent" />
    </com.scwang.smartrefresh.layout.SmartRefreshLayout>
</androidx.constraintlayout.widget.ConstraintLayout>
发布者:全栈程序员-用户IM,转载请注明出处:https://javaforall.cn/203976.html原文链接:https://javaforall.cn
【正版授权,激活自己账号】: Jetbrains全家桶Ide使用,1年售后保障,每天仅需1毛
【官方授权 正版激活】: 官方授权 正版激活 支持Jetbrains家族下所有IDE 使用个人JB账号...
