大家好,又见面了,我是你们的朋友全栈君。如果您正在找激活码,请点击查看最新教程,关注关注公众号 “全栈程序员社区” 获取激活教程,可能之前旧版本教程已经失效.最新Idea2022.1教程亲测有效,一键激活。
Jetbrains全系列IDE使用 1年只要46元 售后保障 童叟无欺
作者: furenjun
本文内容:
用惯了别人做的图形控件,常常感慨别人做得好,心中徒生羡慕。
何时自已也能做出变幻莫测的图形效果呢?
想想.Net 对图形支持功能非常丰富,何不自已动手打造呢?!
好了,闲话少说,开始我们打造自已的图形之旅吧.
本文的结尾提供完整源码下载.
一.认识 System.Drawing类
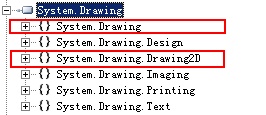

1.System.Drawing
包含与基本绘图功能有关的大多数类、结构、枚举和委托;
2.System.Drawing.Drawing2D
为大多数高级2D和矢量绘图操作提供了支持,包括消除锯齿、几何转换和图形路径;
3. System.Drawing.Imaging
帮助处理图像(位图、GIF文件等)的各种类;
4.System.Drawing.Printing
把打印机或打印预览窗口作为输出设备时使用的类;
5.System.Drawing.Design
一些预定义的对话框、属性表和其他用户界面元素,与在设计期间扩展用户界面相关;
6. System.Drawing.Text
对字体和字体系列执行更高级操作的类;
本文暂时只应用到 System.Drawing,System.Drawing.Drawing2D 两个命名空间的相关方法;
二. 了解GDI
GDI是Graphics Device Interface的缩写,含义是图形设备接口,它的主要任务是负责系统与绘图程序之间的信息交换,处理所有Windows程序的图形输出。
在Windows操作系统下,绝大多数具备图形界面的应用程序都离不开GDI,我们利用GDI所提供的众多函数就可以方便的在屏幕、打印机及其它输出设备上输出图形,文本等操作。GDI的出现使程序员无需要关心硬件设备及设备驱动,就可以将应用程序的输出转化为硬件设备上的输出,实现了程序开发者与硬件设备的隔离,大大方便了开发工作。
三. 掌握常用的绘图方法
俗话说,”万丈高楼从地起”,基础是必不可少的。只有从基础开始,学会理解了绘图类的相关工具的用法,才能做到在绘图时,将它们信手掂来,随手绘制的境界;
应用程序程序绘图就如同我们实际生活中绘图,需要相关绘图工具:如画布,画笔,画刷,剪刀等。当然还得好的构思与方法!
3.1 首先我们来绘制一些简单的图形
写字,画直线/长方体/圆
//拿来一块画布,大小为400*400
Image img = new Bitmap(400, 400);
pictureBox1.Image = img;
//创建一个Graphics实例,让它通过windows系统去与外部设备打交道;
Graphics g = Graphics.FromImage(pictureBox1.Image);
g.Clear(Color.White); //将画面擦干净
//设计一下画的透明度
int transValue = 255;
//拿来一把红色的画刷;
SolidBrush myBrush = new SolidBrush(Color.FromArgb(transValue, Color.Red));
//拿来一把红色的画笔
Pen myPen = new Pen(Color.FromArgb(transValue, Color.Red), 1);
g.DrawLine(myPen, -200, 0, 200, 0); //水平方向画一条线
g.DrawLine(myPen, 0, -200, 0, 200); //垂直方向画一条线
Font myFont = new Font(“黑体”, 15); //设计一下我要写的字的字体及大小
//将我要写的所有字的尺寸测量一下
SizeF strSize = g.MeasureString(“FURENJUN 绘图”, new Font(“黑体”, 15), new PointF(), StringFormat.GenericDefault );
int width = (int)(strSize.Width + 10.0f);
//好了,写几个字看看吧
g.DrawString(myDrawingStr, myFont, myBrush, new PointF(10, 5));
//再画一个长方形
Rectangle rect = new Rectangle(width, 0, 30, (int)strSize.Height);
g.DrawRectangle(new Pen(Color.FromArgb(transValue, Color.Blue), 1), rect);
g.FillRectangle(new SolidBrush(Color.FromArgb(transValue, Color.Blue)), rect);
g.TranslateTransform(10, 0);//水平移动10pz
g.TranslateTransform(0, 10);//垂直移动 10px
g.RotateTransform(30); //旋转30度
//再画一个圆
g.DrawPie(Pens.Red, rect, 0, 360);
g.FillPie(Brushes.Red, rect, 0, 360);
//还要画啥,你往下添吧.
//…
3.2 绘制一个多色的矩形


Code
private void DrawSimpleBar()
{
Graphics g = this.pictureBox3.CreateGraphics();
Rectangle PicRect = this.pictureBox3.ClientRectangle;
Rectangle myRect = new Rectangle(0, 0, PicRect.Width / 3, PicRect.Height);
g.DrawRectangle(Pens.Red, myRect);
g.FillRectangle(Brushes.Red, myRect);
myRect = new Rectangle(PicRect.Width / 3, 0, PicRect.Width / 3, PicRect.Height);
g.DrawRectangle(Pens.Green, myRect);
g.FillRectangle(Brushes.Green, myRect);
myRect
= new Rectangle(PicRect.Width / 3 * 2, 0, PicRect.Width / 3, PicRect.Height);g.DrawRectangle(Pens.Blue, myRect);
g.FillRectangle(Brushes.Blue, myRect);
}
3.3 绘制一个渐变的矩形

Code
private void DrawLinearGradient()
{
Graphics g = this.pictureBox4.CreateGraphics();
g.Clear(Color.White);
Rectangle rect = this.pictureBox4.ClientRectangle;
System.Drawing.Color myGradient = System.Drawing.Color.Transparent;
i += 90;
i = i % 360;
Brush br = new LinearGradientBrush(rect, Color.Green, myGradient, i, false);
g.FillRectangle(br, rect);
}
3.4 绘制一个多色渐变的矩形
Code
private void DrowMultiColors()
{
rect = this.pictureBox6.ClientRectangle;
Graphics g = this.pictureBox6.CreateGraphics();
//填充 pictureBox6 背景
g.FillRectangle(new SolidBrush(SystemColors.Window), rect);
LinearGradientMode myMode = LinearGradientMode.Horizontal;
LinearGradientBrush brBrush =
new LinearGradientBrush(
rect, Color.Blue, Color.Red,
myMode);
// 创建颜色渐变,所要用到的多个颜色,以及对应颜色的位置信息;
Color[] clrArray =
{
Color.Red,
Color.Transparent,
Color.Red
};
float[] posArray =
{
0.0f,
0.5f,
1.0f
};
// 定义用于在多色渐变中以内插值取代颜色混合的颜色和位置的数组,并且设置它的颜色和位置属性。
ColorBlend colorBlend = new ColorBlend();
colorBlend.Colors = clrArray;
colorBlend.Positions = posArray;
// 为刷子设置 interpolationColors 属性
brBrush.InterpolationColors = colorBlend;
g.FillRectangle(brBrush, rect);
brBrush.Dispose();
}
四. 应用本文学到的方法打造属于自已的第一批图形
4.1 电子屏效果

解决思路: 不就是让文字与图形在上面滚动吗,也就是平移一下当前文字的坐标而以;
也就是通过:
g.TranslateTransform(dx, 0);//水平平移坐标
就可搞定;
完整代码:
Code
private void DrawFlowingString()
{
Graphics g = this.pictureBox2.CreateGraphics();
//消除锯齿
g.SmoothingMode = SmoothingMode.AntiAlias;
//高质量,低速度绘制
g.CompositingQuality = CompositingQuality.HighQuality;
StringFormat mySF
= new StringFormat();mySF.Alignment = StringAlignment.Near;
mySF.LineAlignment = StringAlignment.Center;
mySF.FormatFlags = StringFormatFlags.NoWrap;
SizeF strSize
= g.MeasureString(myDrawingStr, myFont, new PointF(), mySF);int width = (int)(strSize.Width + 30.0f);
g.Clear(Color.Black);
dx
-= steep;if (dx <= (width * –1))
{
dx = this.pictureBox2.Width – steep;
}
g.TranslateTransform(dx, 0);//水平平移坐标
//dy += steep;
//if (dy >= this.pictureBox5.Height)
//{
// dy = (strSize.Height * -1);
//}
//g.TranslateTransform(0, dy);//垂直平移坐标
Rectangle myRect = new Rectangle(myBitmap.Width + 10, 0, width, (int)this.pictureBox2.Height);
g.DrawString(myDrawingStr, myFont, Brushes.Red, myRect, mySF);
int y = (this.pictureBox2.Height – this.myBitmap.Height) / 2;
g.DrawImage(myBitmap,
new Point(0, y));//g.DrawPie(Pens.Red, myRect, 0, 360);
//g.FillPie(Brushes.Red, myRect, 0, 360);
//g.DrawRectangle(Pens.Red, myRect);
//g.FillRectangle(Brushes.Red, myRect);
}
4.2 霓虹灯效果

解决思路: 不就是让我只显示文字,然后文字颜色动态变一变,不就得了;
我先将这些字在画布上显示,然后根据文字,创建一个文字区域(相当于剪纸),再用不同颜色画刷在这上面刷啊刷,就得了;
关键代码:
Code
GraphicsPath gp = new GraphicsPath();
gp.AddString(…);
Region excludeRegion = new Region(gp);
Rectangle blotoutRect = new Rectangle(0, 0, this.pictureBox1.Width, this.pictureBox1.Height);
Region recRegion = new Region(blotoutRect);
excludeRegion.Intersect(blotoutRect);
g.FillRegion(Brushes.Yellow, excludeRegion);
this.pictureBox1.Region = excludeRegion;
g.FillRectangle(myBrush, 0, 0, myWidth, 300);
完整代码:
Code
private void DrawMyImage()
{
//扯出一张画布
Graphics g = this.pictureBox1.CreateGraphics();
//消除锯齿
g.SmoothingMode = SmoothingMode.AntiAlias;
//高质量,低速度绘制
g.CompositingQuality = CompositingQuality.HighQuality;
//想想,我要画个啥东西,搞个啥样子?
GraphicsPath gp = new GraphicsPath();
//嗨,练练写字吧,弯弯曲曲,有份量.
gp.AddString(stringText,
family,
fontStyle,
emSize,
origin,
format);
//想想,得有点艺术。 对了,我只要显示字,其它与字无关的我都不要显示;
//好,我先把字的轮廓画出来。
Region excludeRegion = new Region(gp);
//把画布大小也测量一下.
Rectangle blotoutRect = new Rectangle(0, 0, this.pictureBox1.Width, this.pictureBox1.Height);
//你就把字在这般大小的地方写吧.
Region recRegion = new Region(blotoutRect);
//除了字之外,我其它都不要。
excludeRegion.Intersect(blotoutRect);
//我用黄颜色的画笔写写字试试。当然,你也可以用其它颜色的。
g.FillRegion(Brushes.Yellow, excludeRegion);
//干脆我把这个字的样子做个剪纸,在上面刷刷颜料得了.呵呵。
this.pictureBox1.Region = excludeRegion;
//呵呵,我慢慢刷,一次刷10px.
myWidth += 10;
//我多刷几次玩玩,用红,绿交替刷。
if (myWidth > this.pictureBox1.Width)
{
IsOdd = !IsOdd;
myWidth = 10;
if (IsOdd)
{
myBrush = new SolidBrush(Color.Red);
}
else
{
myBrush = new SolidBrush(Color.Blue);
}
}
 ,好在颜料不要钱买.啥啥,看看效果吧;
g.FillRectangle(myBrush, 0, 0, myWidth, 300);
}
4.3 进度条显示效果

解决思路: 不就让我只动态绘制 百分比和矩形吗.
通过设置一个绘图路径,然后我动态的绘制,填充颜色就得了;
关键代码:
Code
GraphicsPath myPath = new GraphicsPath();
myPath.AddString(…);
Rectangle blotoutRect = new Rectangle(0, 0, CurrentX, this.pictureBox7.Height);
myPath.AddRectangle(blotoutRect);
g.FillPath(Brushes.Green, myPath);
完整代码:
Code
private void drawGraphicsPath()
{
Graphics g = this.pictureBox7.CreateGraphics();
g.Clear(this.pictureBox7.BackColor );
//消除锯齿
g.SmoothingMode = SmoothingMode.AntiAlias;
//高质量,低速度绘制
g.CompositingQuality = CompositingQuality.HighQuality;
StringFormat mySF
= new StringFormat();mySF.Alignment = StringAlignment.Near;
mySF.LineAlignment = StringAlignment.Center;
mySF.FormatFlags = StringFormatFlags.NoWrap;
SizeF strSize
= g.MeasureString(PercentStr, PercFont, new PointF(), mySF);int strWidth = (int)(strSize.Width + 10);
GraphicsPath myPath = new GraphicsPath();
int fontStyle = (int)FontStyle.Bold;
int x = (int)((this.pictureBox7.Width – strWidth) / 2);
int y = (int)((this.pictureBox7.Height – strSize.Height) / 2);
Point origin = new Point(x, y + 5);
StringFormat format = StringFormat.GenericDefault;
// Add the string to the path.
myPath.AddString(PercentStr,
family2,
fontStyle,
emSize2,
origin,
format);
GraphicsPath stringPath = myPath;
CurrentX += this.pictureBox7.Width / 10;
Rectangle blotoutRect = new Rectangle(0, 0, CurrentX, this.pictureBox7.Height);
myPath.AddRectangle(blotoutRect);
//Draw the path to the screen.
g.FillPath(Brushes.Green, myPath);
}
本文源程序下载:
发布者:全栈程序员-用户IM,转载请注明出处:https://javaforall.cn/196561.html原文链接:https://javaforall.cn
【正版授权,激活自己账号】: Jetbrains全家桶Ide使用,1年售后保障,每天仅需1毛
【官方授权 正版激活】: 官方授权 正版激活 支持Jetbrains家族下所有IDE 使用个人JB账号...
