大家好,又见面了,我是你们的朋友全栈君。
情景:使用静默授权或感知授权的方式将请求绑定到微信公众号的菜单栏上。链接如下:
https://open.weixin.qq.com/connect/oauth2/authorize?appid=APPID&redirect_uri=REDIRECT_URI&response_type=code&scope=SCOPE&state=STATE#wechat_redirect 当点击菜单按钮时微信服务器会将code通过redirect_uri指定的Url传给后台,通过code换取网页授权access_token,但当使用code换取授权码是不同的报invalid cod错误,而且时灵时不灵。让人崩溃。还有报api.weixin.qq.com:443 failed to respond
微信服务器不稳定,当我们开发完成应用准备上公众号测试时,老是刷新出空白界面,但有时又有进去,感觉碰运气似的,体验不好,然后去测试公众号一步一步调整,过程一脸蒙蔽,不停的提示如下错误:

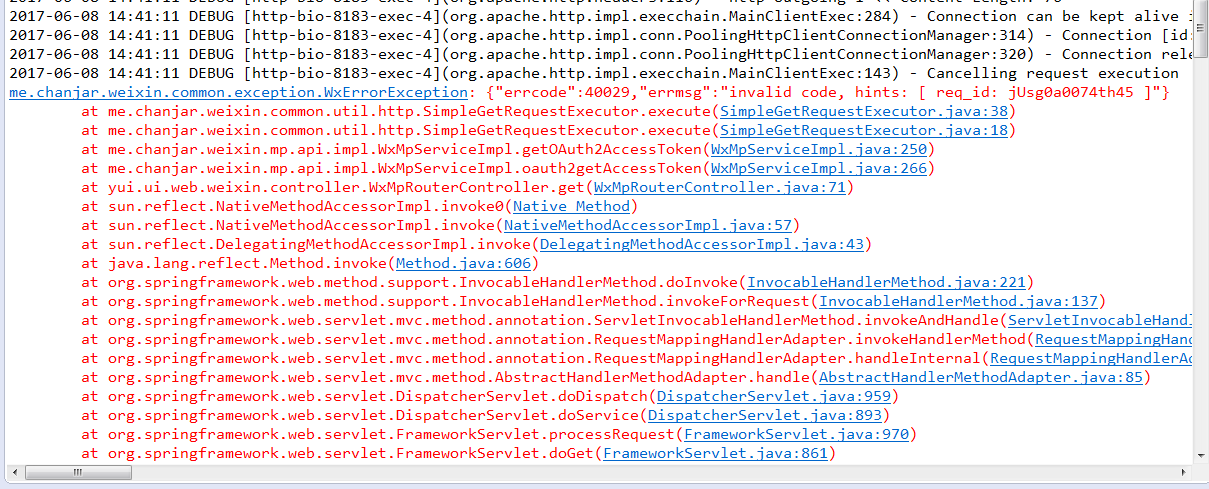
{“errcode”:40029,”errmsg”:”invalidcode, hints: [ req_id: Cq41ba0095th45 ]”}
网上有很多出现同样问题的小伙伴。官网上说40029对应错误是”不合法的oauth_code“,但哪里不合法呢,我用weinxin-mp-2.50.java包,我保证参数都正确。但还是在获得access_token时报错。
有人说code失效,是因为你重复请求了,请求两次导致code失效(code只能使用一次),但我确定code没失效,而且是第一次使用。后来感觉是weinxin-mp-2.5.0.jar发的请求有问题,废话不多说,总之我现在有解决办法了。
创建一个SSLSocket,然后自己发给它,接受返回的JSON即可。
用jar包里有问题的方法是:WxMpOAuth2AccessToken accessToken= wxMpService.oauth2getAccessToken(code);
解决代码如下:
import java.io.BufferedReader;
import java.io.IOException;
import java.io.InputStreamReader;
import java.net.URI;
import java.security.SecureRandom;
import java.security.cert.CertificateException;
import java.util.HashMap;
import java.util.Map;

import javax.net.ssl.SSLContext;
import javax.net.ssl.TrustManager;
import javax.net.ssl.X509TrustManager;
import javax.security.cert.X509Certificate;
import javax.servlet.http.HttpServletRequest;
import javax.servlet.http.HttpServletResponse;

import org.apache.http.HttpResponse;
import org.apache.http.client.HttpClient;
import org.apache.http.client.methods.HttpGet;
import org.apache.http.conn.ClientConnectionManager;
import org.apache.http.conn.scheme.Scheme;
import org.apache.http.conn.scheme.SchemeRegistry;
import org.apache.http.conn.ssl.SSLSocketFactory;
import org.apache.http.impl.client.DefaultHttpClient;
import org.apache.http.impl.conn.tsccm.ThreadSafeClientConnManager;
import org.apache.ibatis.annotations.Param;
import org.apache.log4j.Logger;
import org.apache.shiro.SecurityUtils;
import org.apache.shiro.authc.AuthenticationToken;
import org.apache.shiro.authc.UsernamePasswordToken;
import org.apache.shiro.subject.Subject;
import org.springframework.beans.factory.annotation.Autowired;
import org.springframework.stereotype.Controller;
import org.springframework.web.bind.annotation.PathVariable;
import org.springframework.web.bind.annotation.RequestMapping;
import org.springframework.web.bind.annotation.RequestMethod;
import org.springframework.web.bind.annotation.RequestParam;
import org.springframework.web.bind.annotation.ResponseBody;
import org.springframework.web.servlet.ModelAndView;

import com.google.gson.Gson;
import com.google.gson.GsonBuilder;
import com.google.gson.JsonObject;
import com.google.gson.JsonParser;

import me.chanjar.weixin.common.bean.WxJsapiSignature;
import me.chanjar.weixin.mp.api.WxMpService;
import me.chanjar.weixin.mp.bean.result.WxMpOAuth2AccessToken;
import yui.bss.mgr.base.sec.IAcctMgr;
import yui.bss.model.dto.ext.sec.AcctDtox;
import yui.bss.security.util.YUISecurityUtils;
import yui.comn.code.BaseSvcMsgCode;
import yui.comn.model.UserInfo;
import yui.comn.util.ExpUtil;
import yui.ui.web.weixin.service.model.ReturnModel;
// 获取
	public String testQ(String code) {
		StringBuilder url = new StringBuilder();
	    url.append("https://api.weixin.qq.com/sns/oauth2/access_token?");
	    url.append("appid=").append(this.wxMpService.getWxMpConfigStorage().getAppId());
	    url.append("&secret=").append(this.wxMpService.getWxMpConfigStorage().getSecret());
	    url.append("&code=").append(code);
	    url.append("&grant_type=authorization_code");
		HttpClient httpclient = new DefaultHttpClient();
        httpclient = this.wrapClient(httpclient);

		BufferedReader in = null;
		String content = null;
		try {
			HttpClient client = getSecuredHttpClient(new DefaultHttpClient());
			// 实例化HTTP方法
			HttpGet request = new HttpGet();
			request.setURI(new URI(url.toString()));
			HttpResponse response = client.execute(request);

			in = new BufferedReader(new InputStreamReader(response.getEntity().getContent()));
			StringBuffer sb = new StringBuffer("");
			String line = "";
			String NL = System.getProperty("line.separator");
			while ((line = in.readLine()) != null) {
				sb.append(line + NL);
			}
			in.close();
			content = sb.toString();
			System.out.println(content);
			Gson gson = new GsonBuilder().create();
			JsonParser jsonParser = new JsonParser();
			JsonObject  jsonObject = jsonParser.parse(content).getAsJsonObject();
			String openid = (String)jsonObject.get("openid").getAsString();
			return openid;
		} catch (Exception e) {
		} finally {
			if (in != null) {
				try {
					in.close();// 最后要关闭BufferedReader
				} catch (Exception e) {
					e.printStackTrace();
				}
			}
		}
		return "";
	}

	/**
	 * 重新包装httpclient对象,忽略证书验证
	 *
	 * @param httpClient
	 * @return
	 * @author:Administrator
	 * @date:2014-9-2
	 */
	private static DefaultHttpClient getSecuredHttpClient(HttpClient httpClient) {
		final X509Certificate[] _AcceptedIssuers = new X509Certificate[] {};
		try {
			SSLContext ctx = SSLContext.getInstance("TLS");
			X509TrustManager tm = new X509TrustManager() {
				@Override
				public void checkClientTrusted(java.security.cert.X509Certificate[] arg0, String arg1)
						throws CertificateException {
					// TODO Auto-generated method stub

				}

				@Override
				public void checkServerTrusted(java.security.cert.X509Certificate[] chain, String authType)
						throws CertificateException {
					// TODO Auto-generated method stub

				}

				@Override
				public java.security.cert.X509Certificate[] getAcceptedIssuers() {
					// TODO Auto-generated method stub
					return null;
				}
			};
			ctx.init(null, new javax.net.ssl.TrustManager[] { tm }, new SecureRandom());
			SSLSocketFactory ssf = new SSLSocketFactory(ctx, SSLSocketFactory.ALLOW_ALL_HOSTNAME_VERIFIER);
			ClientConnectionManager ccm = httpClient.getConnectionManager();
			SchemeRegistry sr = ccm.getSchemeRegistry();
			sr.register(new Scheme("https", 443, ssf));
			return new DefaultHttpClient(ccm, httpClient.getParams());
		} catch (Exception e) {
			System.out.println("=====:=====");
			e.printStackTrace();
		}
		return null;
	}
在code的回调方法里:
/**
	 * 由微信回调的方法
	 *
	 * @param module
	 * @param path
	 * @param code
	 * @param response
	 * @return
	 */
	@RequestMapping(value = "/wechat/{module}/{path}", method = RequestMethod.GET)
	public ModelAndView get(@PathVariable("module") String module, @PathVariable("path") String path,
			@RequestParam(value = "code", required = true) String code, HttpServletResponse response) {
		// System.out.println("所属模块 :" + module + "所属页面 :" + path);
		WxMpOAuth2AccessToken accessToken;
		try {
			ModelAndView mv = new ModelAndView(module + "/" + path);
			String openId = this.testQ(code);
	return mv;
		} catch (Exception e) {
			e.printStackTrace();
			ExpUtil.capture(BaseSvcMsgCode.failure, "", e, logger);
		}
		return null;
成功获得到openId:
{
	"access_token": "j8-XkADjlgxTWY2l0UlztZ2ejcSaz-FD0obHf9NYqIq1aNX5n0w9-P03qb6yAtVbdyq7hTKu6Dc-TIiJc9_He3kGtTbjcoYAiow-W6yssEY",
	"expires_in": 7200,
	"refresh_token": "M2sGfzQt0EcB8cojNKa4xC8jSVVYDj21dZ36HYomU2Frbl4ZbIKrGVNL3fxPLkA-Tu1h9z0LRTKWlzbw8bvxgXuTaTu4PNrsiLMbw3DDhIg",
	"openid": "oUOwvw_c1v8Ym4WejCJeu4uFSYjg",
	"scope": "snsapi_base"
}
然后使用GSOn解决json数据.
顺带提醒一下微信支付成功后的回调链接。
1. 注意一下回调方法不会只回调一次,需要一个字段表示已经收到微信服务器发送的该订单支付回调链接。
2. 如果收不到请求,请注意一下是否javaweb后端设置了过滤,返回给微信服务器的响应是登陆界面。比如某个界面需要用户权限验证。
发布者:全栈程序员-用户IM,转载请注明出处:https://javaforall.cn/132259.html原文链接:https://javaforall.cn
【正版授权,激活自己账号】: Jetbrains全家桶Ide使用,1年售后保障,每天仅需1毛
【官方授权 正版激活】: 官方授权 正版激活 支持Jetbrains家族下所有IDE 使用个人JB账号...
