大家好,又见面了,我是你们的朋友全栈君。
这个仓库克自 https://github.com/amix/vimrc
放在 oschina 上来加速部署, 也方便再添加些功能.
如何使用:
git clone https://git.oschina.net/shrekuu/vimrc.git ~/.vim_runtime
sh ~/.vim_runtime/install_awesome_vimrc.sh
更多:
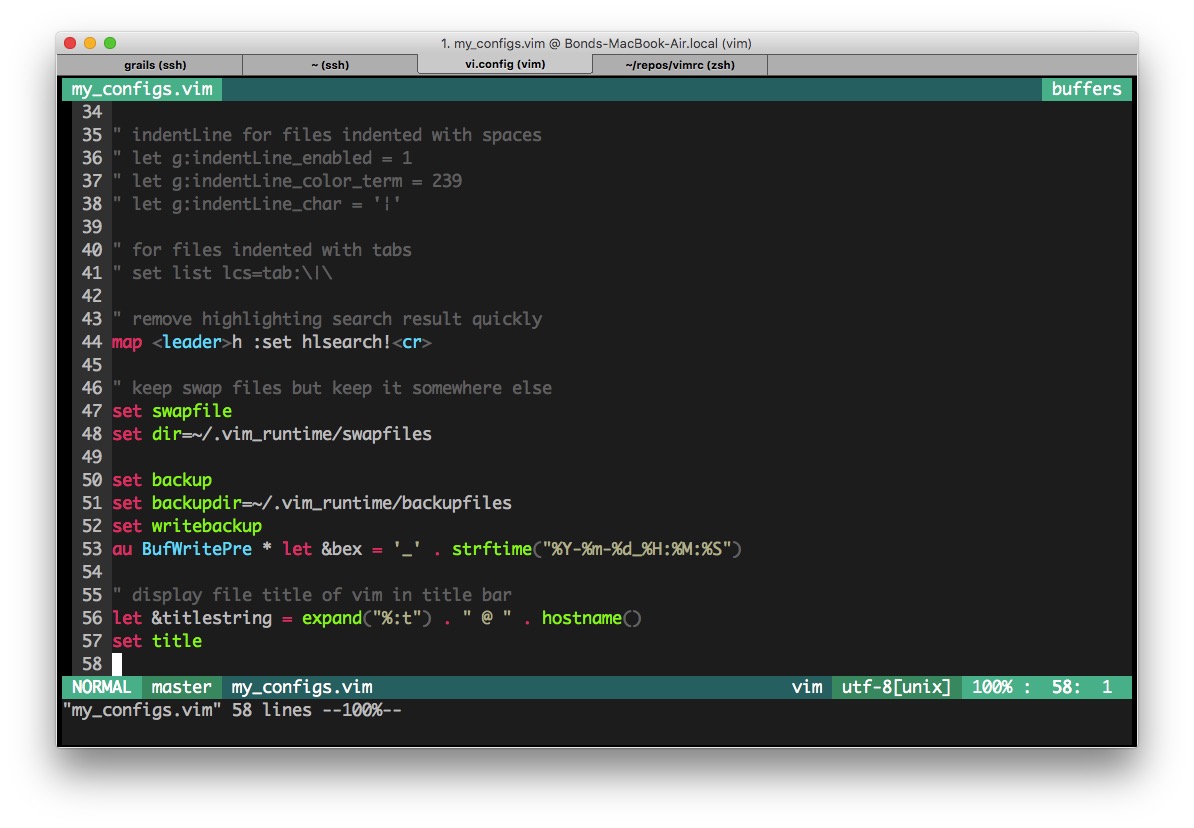
这个版本直接加入了 ~/.vim_runtime/my_config.vim 文件, 并写入了一些配置, 具体参考这个文件.
加入了 molokai 主题配色, 也就是 sublime text 上那个默认配色 monokai.
vim 编辑时的缓存文件与备份存放在 ~/.vim_runtime/swapfiles/, ~/.vim_runtime/backupfiles/ 两个目录.
其它参考最最最下面列出的每个插件的功能. 强大到不行不行的. :)
来看一下:

下面是原仓库 readme.md 内容
The Ultimate vimrc
Over the last 8 years I have used and tweaked Vim. This is my Ultimate vimrc.
There are two versions:
Basic: If you want something small just copy basic.vim into your ~/.vimrc and you will have a great basic setup
Awesome: This includes a ton of useful plugins, color schemes and configurations
I would of course recommend using the awesome version.
How to install the Awesome version?
The awesome version includes a lot of great plugins, configurations and color schemes that make Vim a lot better. To install it simply do following:
git clone https://github.com/amix/vimrc.git ~/.vim_runtime
sh ~/.vim_runtime/install_awesome_vimrc.sh
The taglist.vim plugin will require ctags (http://ctags.sourceforge.net) (Debian: apt-get install ctags)
I also recommend using Source Code Pro font from Adobe (it’s free and awesome font for writing and programming). The Awesome vimrc is already setup to try to use it
How to install the Basic version?
The basic version is basically just one file and no plugins. You can check out basic.vim.
This is useful to install on remote servers where you don’t need many plugins and you don’t do many edits.
git clone git://github.com/amix/vimrc.git ~/.vim_runtime
sh ~/.vim_runtime/install_basic_vimrc.sh
How to install on Windows?
Use msysgit to checkout the repository and run the installation instructions above. No special instructions needed ;-)
How to update to latest version?
Simply just do a git rebase!
cd ~/.vim_runtime
git pull –rebase
Some screenshots
Colors when editing a Python file:

Opening recently opened files mru.vim:

NERD Tree plugin in a terminal window:

This vimrc even works on Windows!

Distraction free mode using goyo.vim and vim-zenroom2:

Included Plugins
I recommend reading the docs of these plugins to understand them better. Each of them provide a much better Vim experience!
pathogen.vim: Manages the runtime path of the plugins
YankRing: Maintains a history of previous yanks, changes and deletes
snipMate.vim: snipMate.vim aims to be a concise vim script that implements some of TextMate’s snippets features in Vim
bufexplorer.zip: Buffer Explorer / Browser. This plugin can be opened with
NERD Tree: A tree explorer plugin for vim
ack.vim: Vim plugin for the Perl module / CLI script ‘ack’
ag.vim: A much faster Ack
ctrlp.vim: Fuzzy file, buffer, mru and tag finder. In my config it’s mapped to , because is used by YankRing
mru.vim: Plugin to manage Most Recently Used (MRU) files. Includes my own fork which adds syntax highlighting to MRU. This plugin can be opened with
open_file_under_cursor.vim: Open file under cursor when pressing gf
zencoding: Expanding abbreviation like zen-coding, very useful for editing XML, HTML.
vim-indent-object: Defines a new text object representing lines of code at the same indent level. Useful for python/vim scripts
taglist.vim: Source code browser (supports C/C++, java, perl, python, tcl, sql, php, etc)
vim-multiple-cursors: Sublime Text style multiple selections for Vim, CTRL+N is remapped to CTRL+S (due to YankRing)
vim-expand-region: Allows you to visually select increasingly larger regions of text using the same key combination.
vim-airline: Lean & mean status/tabline for vim that’s light as air (replacing powerline)
vim-fugitive: A Git wrapper so awesome, it should be illegal
goyo.vim and vim-zenroom2:
Remove all clutter and focus only on the essential. Similar to iA Writer or Write Room Read more here
vim-commentary: Comment stuff out. Use gcc to comment out a line (takes a count), gc to comment out the target of a motion. gcu uncomments a set of adjacent commented lines.
syntastic: Syntax checking hacks for vim
Included color schemes
Included modes
How to include your own stuff?
After you have installed the setup you can create ~/.vim_runtime/my_configs.vim to fill in any configurations that are important for you. For instance, my my_configs.vim looks like this:
~/.vim_runtime (master)> cat my_configs.vim
map ct :cd ~/Desktop/Todoist/todoist
map cw :cd ~/Desktop/Wedoist/wedoist
You can also install your own plugins, for instance, via pathogen we can install vim-rails:
cd ~/.vim_runtime
git clone git://github.com/tpope/vim-rails.git sources_non_forked/vim-rails
Now you have vim-rails installed ;-)
Key Mappings
Plugin related mappings
Open bufexplorer and see and manage the current buffers:
map o :BufExplorer
Open MRU.vim and see the recently open files:
map f :MRU
Open ctrlp.vim plugin:
let g:ctrlp_map = ”
Open PeepOpen plugin:
map j :PeepOpen
Managing the NERD Tree plugin:
map nn :NERDTreeToggle
map nb :NERDTreeFromBookmark
map nf :NERDTreeFind
goyo.vim and vim-zenroom2 lets you only focus on one thing at a time. It removes all the distractions and centers the content. It has a special look when editing Markdown, reStructuredText and textfiles. It only has one mapping.
map z :Goyo
Normal mode mappings
Fast saving of a buffer:
nmap w :w!
Treat long lines as break lines (useful when moving around in them):
map j gj
map k gk
Map to / (search) and + to ? (backwards search):
map /
map ?
map :noh
Disable highlight when is pressed:
map :noh
Smart way to move between windows:
map j
map k
map h
map l
Closing of current buffer(s):
” Close current buffer
map bd :Bclose
” Close all buffers
map ba :1,1000 bd!
Useful mappings for managing tabs:
map tn :tabnew
map to :tabonly
map tc :tabclose
map tm :tabmove
” Opens a new tab with the current buffer’s path
” Super useful when editing files in the same directory
map te :tabedit =expand(“%:p:h”)/
Switch CWD to the directory of the open buffer:
map cd :cd %:p:h:pwd
Open vimgrep and put the cursor in the right position:
map g :vimgrep // **/*.
Vimgreps in the current file:
map :vimgrep // %
Remove the Windows ^M – when the encodings gets messed up:
noremap m mmHmt:%s///ge’tzt’m
Quickly open a buffer for scripbble:
map q :e ~/buffer
Toggle paste mode on and off:
map pp :setlocal paste!
Insert mode mappings
Quickly insert parenthesis/brackets/etc.:
inoremap $1 ()i
inoremap $2 []i
inoremap $3 {}i
inoremap $4 {o}O
inoremap $q ”i
inoremap $e “”i
inoremap $t <>i
Insert the current date and time (useful for timestamps):
iab xdate =strftime(“%d/%m/%y %H:%M:%S”)
Visual mode mappings
Visual mode pressing * or # searches for the current selection:
vnoremap * :call VisualSelection(‘f’)
vnoremap # :call VisualSelection(‘b’)
When you press gv you vimgrep after the selected text:
vnoremap gv :call VisualSelection(‘gv’)
When you press r you can search and replace the selected text:
vnoremap r :call VisualSelection(‘replace’)
Surround the visual selection in parenthesis/brackets/etc.:
vnoremap $1 `>a)`
vnoremap $2 `>a]`
vnoremap $3 `>a}`
vnoremap $$ `>a”`
vnoremap $q `>a’`
vnoremap $e `>a”`
Command line mappings
$q is super useful when browsing on the command line. It deletes everything until the last slash:
cno $q eDeleteTillSlash()
Bash like keys for the command line:
cnoremap
cnoremap
cnoremap
cnoremap
cnoremap
Write the file as sudo (only on Unix). Super useful when you open a file and you don’t have permissions to save your changes. Vim tip:
:W
Spell checking
Pressing ss will toggle and untoggle spell checking
map ss :setlocal spell!
Shortcuts using instead of special chars
map sn ]s
map sp [s
map sa zg
map s? z=
Cope
Do :help cope if you are unsure what cope is. It’s super useful!
When you search with vimgrep, display your results in cope by doing:
cc
To go to the next search result do:
n
To go to the previous search results do:
p
Vimscript mappings:
map cc :botright cope
map co ggVGy:tabnew:set syntax=qfpgg
map n :cn
map p :cp
Useful blog tips regarding my Vim setup
How to uninstall
Do following:
Remove ~/.vim_runtime
Remove any lines that refernce .vim_runtime in your ~/.vimrc
发布者:全栈程序员-用户IM,转载请注明出处:https://javaforall.cn/132034.html原文链接:https://javaforall.cn
【正版授权,激活自己账号】: Jetbrains全家桶Ide使用,1年售后保障,每天仅需1毛
【官方授权 正版激活】: 官方授权 正版激活 支持Jetbrains家族下所有IDE 使用个人JB账号...
