大家好,又见面了,我是全栈君。
工作繁忙,总想有机会停下来喘口气,整理一下思路,做一些积累,但是这样的机会很少。要做android的界面,基础的要求是熟悉那些内置的组件(prebuilt componments),而有时候这些组件是不够用的,这时候我们就需要自己写一个新的,或者修改内置的。这就要求我们了解更多知识,比如各个View是怎么画出来的,UI上各种事件是如何分发和处理的等等。这些我都计划写出来和大家分享,网络上中文资料,说得清楚的太少了,就那么几篇被广泛的转载。今天说一说如何做一个vertical seekbar,竖起来的seekbar。实现它的过程中就会涉及一些View是如何被画出来的知识。通过本文你可以实现一个verticalseekbar,你也可以学到一些使用seekbar的知识。
我的一个同事很牛,需要自定义的组件时,从framework中抠出来相关(功能相似、在继承关系的hierarchy中地位相当)的代码(类),在自己的应用程序中做修改,实现自己想要的功能。需要的style、drawable等资源,有些是在应用程序里用不了的,就也自己做一份。我们公司做整个系统,从硬件到android到android上的应用系统, framework我们也修改,主要是功能上的增减。在framework里增加一个verticalseekbar我们也能做到,但是这样兼容性就被破坏了,所以这位仁兄把需要的拿出来在自己的程序中实现。
我做vertical seekbar也采取这个策略,不和大家啰嗦实现过程中太多因果逻辑,我想很多读者读这篇文章就是为了做出来一个vertical seekbar。为了方便手头没有代码和开发环境的读者,我会贴上framework中的相关代码。
vertical seekbar当然要实现seekbar一样的功能,所以首先seekbar有的vertical seekbar都要有,直接在你的工程中新建一个类vertical seekbar,从framework中把seekbar的代码复制过来,做一些必要的修改。我们来看看seekbar做了些什么.
seekbar代码:
/*
 * Copyright (C) 2006 The Android Open Source Project
 *
 * Licensed under the Apache License, Version 2.0 (the "License");
 * you may not use this file except in compliance with the License.
 * You may obtain a copy of the License at
 *
 *      http://www.apache.org/licenses/LICENSE-2.0
 *
 * Unless required by applicable law or agreed to in writing, software
 * distributed under the License is distributed on an "AS IS" BASIS,
 * WITHOUT WARRANTIES OR CONDITIONS OF ANY KIND, either express or implied.
 * See the License for the specific language governing permissions and
 * limitations under the License.
 */
package android.widget;
import android.content.Context;
import android.util.AttributeSet;
/**
 * A SeekBar is an extension of ProgressBar that adds a draggable thumb. The user can touch
 * the thumb and drag left or right to set the current progress level or use the arrow keys.
 * Placing focusable widgets to the left or right of a SeekBar is discouraged.
 * <p>
 * Clients of the SeekBar can attach a {@link SeekBar.OnSeekBarChangeListener} to
 * be notified of the user's actions.
 *
 * @attr ref android.R.styleable#SeekBar_thumb
 */
public class SeekBar extends AbsSeekBar {
    /**
     * A callback that notifies clients when the progress level has been
     * changed. This includes changes that were initiated by the user through a
     * touch gesture or arrow key/trackball as well as changes that were initiated
     * programmatically.
     */
    public interface OnSeekBarChangeListener {

        /**
         * Notification that the progress level has changed. Clients can use the fromUser parameter
         * to distinguish user-initiated changes from those that occurred programmatically.
         *
         * @param seekBar The SeekBar whose progress has changed
         * @param progress The current progress level. This will be in the range 0..max where max
         *        was set by {@link ProgressBar#setMax(int)}. (The default value for max is 100.)
         * @param fromUser True if the progress change was initiated by the user.
         */
        void onProgressChanged(SeekBar seekBar, int progress, boolean fromUser);

        /**
         * Notification that the user has started a touch gesture. Clients may want to use this
         * to disable advancing the seekbar.
         * @param seekBar The SeekBar in which the touch gesture began
         */
        void onStartTrackingTouch(SeekBar seekBar);

        /**
         * Notification that the user has finished a touch gesture. Clients may want to use this
         * to re-enable advancing the seekbar.
         * @param seekBar The SeekBar in which the touch gesture began
         */
        void onStopTrackingTouch(SeekBar seekBar);
    }
    private OnSeekBarChangeListener mOnSeekBarChangeListener;

    public SeekBar(Context context) {
        this(context, null);
    }

    public SeekBar(Context context, AttributeSet attrs) {
        this(context, attrs, com.android.internal.R.attr.seekBarStyle);
    }
    public SeekBar(Context context, AttributeSet attrs, int defStyle) {
        super(context, attrs, defStyle);
    }
    @Override
    void onProgressRefresh(float scale, boolean fromUser) {
        super.onProgressRefresh(scale, fromUser);
        if (mOnSeekBarChangeListener != null) {
            mOnSeekBarChangeListener.onProgressChanged(this, getProgress(), fromUser);
        }
    }
    /**
     * Sets a listener to receive notifications of changes to the SeekBar's progress level. Also
     * provides notifications of when the user starts and stops a touch gesture within the SeekBar.
     *
     * @param l The seek bar notification listener
     *
     * @see SeekBar.OnSeekBarChangeListener
     */
    public void setOnSeekBarChangeListener(OnSeekBarChangeListener l) {
        mOnSeekBarChangeListener = l;
    }

    @Override
    void onStartTrackingTouch() {
        if (mOnSeekBarChangeListener != null) {
            mOnSeekBarChangeListener.onStartTrackingTouch(this);
        }
    }

    @Override
    void onStopTrackingTouch() {
        if (mOnSeekBarChangeListener != null) {
            mOnSeekBarChangeListener.onStopTrackingTouch(this);
        }
    }

}
它定义了一个接口OnSeekBarChangeListener,接口中定义了三个方法:
void onProgressChanged(SeekBar seekBar, int progress, boolean fromUser);
void onStartTrackingTouch(SeekBar seekBar);
void onStopTrackingTouch(SeekBar seekBar);
看名字也知道它们是做什么的,代码也给了注释。那么它们是怎么做到的呢?seekbar中声明了一个该接口的对象mOnSeekBarChangeListener,方法setOnSeekBarChangeListener()将给它赋值。在你的程序中定义一个对象,实现OnSeekBarChangeListener,并调用setOnSeekBarChangeListener()把这个对象传给mOnSeekBarChangeListener。在seekbar中还有几个override的方法:
void onProgressRefresh(float scale, boolean fromUser)
void onStartTrackingTouch()
void onStopTrackingTouch()
这些方法会在发生了相应事件的时候被调用,而它们又相应地去调用mOnSeekBarChangeListener中的方法,于是你的程序的定义的响应各种事件的方法就被执行了。
但是这些还不够,我们要让seekbar竖起来,要让thumb上下滑动,实现这些特性的代码在什么地方呢?我们顺着seekbar的继承关系向上找。来看看absseekbar。
absseekbar的代码:
/*
 * Copyright (C) 2007 The Android Open Source Project
 *
 * Licensed under the Apache License, Version 2.0 (the "License");
 * you may not use this file except in compliance with the License.
 * You may obtain a copy of the License at
 *
 *      http://www.apache.org/licenses/LICENSE-2.0
 *
 * Unless required by applicable law or agreed to in writing, software
 * distributed under the License is distributed on an "AS IS" BASIS,
 * WITHOUT WARRANTIES OR CONDITIONS OF ANY KIND, either express or implied.
 * See the License for the specific language governing permissions and
 * limitations under the License.
 */
package android.widget;
import android.content.Context;
import android.content.res.TypedArray;
import android.graphics.Canvas;
import android.graphics.Rect;
import android.graphics.drawable.Drawable;
import android.util.AttributeSet;
import android.view.KeyEvent;
import android.view.MotionEvent;
public abstract class AbsSeekBar extends ProgressBar {
    private Drawable mThumb;
    private int mThumbOffset;

    /**
     * On touch, this offset plus the scaled value from the position of the
     * touch will form the progress value. Usually 0.
     */
    float mTouchProgressOffset;
    /**
     * Whether this is user seekable.
     */
    boolean mIsUserSeekable = true;
    /**
     * On key presses (right or left), the amount to increment/decrement the
     * progress.
     */
    private int mKeyProgressIncrement = 1;

    private static final int NO_ALPHA = 0xFF;
    private float mDisabledAlpha;

    public AbsSeekBar(Context context) {
        super(context);
    }
    public AbsSeekBar(Context context, AttributeSet attrs) {
        super(context, attrs);
    }
    public AbsSeekBar(Context context, AttributeSet attrs, int defStyle) {
        super(context, attrs, defStyle);
        TypedArray a = context.obtainStyledAttributes(attrs,
                com.android.internal.R.styleable.SeekBar, defStyle, 0);
        Drawable thumb = a.getDrawable(com.android.internal.R.styleable.SeekBar_thumb);
        setThumb(thumb);
        int thumbOffset =
                a.getDimensionPixelOffset(com.android.internal.R.styleable.SeekBar_thumbOffset, 0);
        setThumbOffset(thumbOffset);
        a.recycle();
        a = context.obtainStyledAttributes(attrs,
                com.android.internal.R.styleable.Theme, 0, 0);
        mDisabledAlpha = a.getFloat(com.android.internal.R.styleable.Theme_disabledAlpha, 0.5f);
        a.recycle();
    }
    /**
     * Sets the thumb that will be drawn at the end of the progress meter within the SeekBar
     *
     * @param thumb Drawable representing the thumb
     */
    public void setThumb(Drawable thumb) {
        if (thumb != null) {
            thumb.setCallback(this);
        }
        mThumb = thumb;
        invalidate();
    }
    /**
     * @see #setThumbOffset(int)
     */
    public int getThumbOffset() {
        return mThumbOffset;
    }
    /**
     * Sets the thumb offset that allows the thumb to extend out of the range of
     * the track.
     *
     * @param thumbOffset The offset amount in pixels.
     */
    public void setThumbOffset(int thumbOffset) {
        mThumbOffset = thumbOffset;
        invalidate();
    }
    /**
     * Sets the amount of progress changed via the arrow keys.
     *
     * @param increment The amount to increment or decrement when the user
     *            presses the arrow keys.
     */
    public void setKeyProgressIncrement(int increment) {
        mKeyProgressIncrement = increment < 0 ? -increment : increment;
    }
    /**
     * Returns the amount of progress changed via the arrow keys.
     * <p>
     * By default, this will be a value that is derived from the max progress.
     *
     * @return The amount to increment or decrement when the user presses the
     *         arrow keys. This will be positive.
     */
    public int getKeyProgressIncrement() {
        return mKeyProgressIncrement;
    }

    @Override
    public synchronized void setMax(int max) {
        super.setMax(max);
        if ((mKeyProgressIncrement == 0) || (getMax() / mKeyProgressIncrement > 20)) {
            // It will take the user too long to change this via keys, change it
            // to something more reasonable
            setKeyProgressIncrement(Math.max(1, Math.round((float) getMax() / 20)));
        }
    }
    @Override
    protected boolean verifyDrawable(Drawable who) {
        return who == mThumb || super.verifyDrawable(who);
    }
    @Override
    protected void drawableStateChanged() {
        super.drawableStateChanged();

        Drawable progressDrawable = getProgressDrawable();
        if (progressDrawable != null) {
            progressDrawable.setAlpha(isEnabled() ? NO_ALPHA : (int) (NO_ALPHA * mDisabledAlpha));
        }

        if (mThumb != null && mThumb.isStateful()) {
            int[] state = getDrawableState();
            mThumb.setState(state);
        }
    }

    @Override
    void onProgressRefresh(float scale, boolean fromUser) {
        Drawable thumb = mThumb;
        if (thumb != null) {
            setThumbPos(getWidth(), thumb, scale, Integer.MIN_VALUE);
            /*
             * Since we draw translated, the drawable's bounds that it signals
             * for invalidation won't be the actual bounds we want invalidated,
             * so just invalidate this whole view.
             */
            invalidate();
        }
    }


    @Override
    protected void onSizeChanged(int w, int h, int oldw, int oldh) {
        Drawable d = getCurrentDrawable();
        Drawable thumb = mThumb;
        int thumbHeight = thumb == null ? 0 : thumb.getIntrinsicHeight();
        // The max height does not incorporate padding, whereas the height
        // parameter does
        int trackHeight = Math.min(mMaxHeight, h - mPaddingTop - mPaddingBottom);

        int max = getMax();
        float scale = max > 0 ? (float) getProgress() / (float) max : 0;

        if (thumbHeight > trackHeight) {
            if (thumb != null) {
                setThumbPos(w, thumb, scale, 0);
            }
            int gapForCenteringTrack = (thumbHeight - trackHeight) / 2;
            if (d != null) {
                // Canvas will be translated by the padding, so 0,0 is where we start drawing
                d.setBounds(0, gapForCenteringTrack,
                        w - mPaddingRight - mPaddingLeft, h - mPaddingBottom - gapForCenteringTrack
                        - mPaddingTop);
            }
        } else {
            if (d != null) {
                // Canvas will be translated by the padding, so 0,0 is where we start drawing
                d.setBounds(0, 0, w - mPaddingRight - mPaddingLeft, h - mPaddingBottom
                        - mPaddingTop);
            }
            int gap = (trackHeight - thumbHeight) / 2;
            if (thumb != null) {
                setThumbPos(w, thumb, scale, gap);
            }
        }
    }
    /**
     * @param gap If set to {@link Integer#MIN_VALUE}, this will be ignored and
     */
    private void setThumbPos(int w, Drawable thumb, float scale, int gap) {
        int available = w - mPaddingLeft - mPaddingRight;
        int thumbWidth = thumb.getIntrinsicWidth();
        int thumbHeight = thumb.getIntrinsicHeight();
        available -= thumbWidth;
        // The extra space for the thumb to move on the track
        available += mThumbOffset * 2;
        int thumbPos = (int) (scale * available);
        int topBound, bottomBound;
        if (gap == Integer.MIN_VALUE) {
            Rect oldBounds = thumb.getBounds();
            topBound = oldBounds.top;
            bottomBound = oldBounds.bottom;
        } else {
            topBound = gap;
            bottomBound = gap + thumbHeight;
        }

        // Canvas will be translated, so 0,0 is where we start drawing
        thumb.setBounds(thumbPos, topBound, thumbPos + thumbWidth, bottomBound);
    }

    @Override
    protected synchronized void onDraw(Canvas canvas) {
        super.onDraw(canvas);
        if (mThumb != null) {
            canvas.save();
            // Translate the padding. For the x, we need to allow the thumb to
            // draw in its extra space
            canvas.translate(mPaddingLeft - mThumbOffset, mPaddingTop);
            mThumb.draw(canvas);
            canvas.restore();
        }
    }
    @Override
    protected synchronized void onMeasure(int widthMeasureSpec, int heightMeasureSpec) {
        Drawable d = getCurrentDrawable();
        int thumbHeight = mThumb == null ? 0 : mThumb.getIntrinsicHeight();
        int dw = 0;
        int dh = 0;
        if (d != null) {
            dw = Math.max(mMinWidth, Math.min(mMaxWidth, d.getIntrinsicWidth()));
            dh = Math.max(mMinHeight, Math.min(mMaxHeight, d.getIntrinsicHeight()));
            dh = Math.max(thumbHeight, dh);
        }
        dw += mPaddingLeft + mPaddingRight;
        dh += mPaddingTop + mPaddingBottom;

        setMeasuredDimension(resolveSize(dw, widthMeasureSpec),
                resolveSize(dh, heightMeasureSpec));
    }

    @Override
    public boolean onTouchEvent(MotionEvent event) {
        if (!mIsUserSeekable || !isEnabled()) {
            return false;
        }

        switch (event.getAction()) {
            case MotionEvent.ACTION_DOWN:
                setPressed(true);
                onStartTrackingTouch();
                trackTouchEvent(event);
                break;

            case MotionEvent.ACTION_MOVE:
                trackTouchEvent(event);
                attemptClaimDrag();
                break;

            case MotionEvent.ACTION_UP:
                trackTouchEvent(event);
                onStopTrackingTouch();
                setPressed(false);
                break;

            case MotionEvent.ACTION_CANCEL:
                onStopTrackingTouch();
                setPressed(false);
                break;
        }
        return true;
    }
    private void trackTouchEvent(MotionEvent event) {
        final int width = getWidth();
        final int available = width - mPaddingLeft - mPaddingRight;
        int x = (int)event.getX();
        float scale;
        float progress = 0;
        if (x < mPaddingLeft) {
            scale = 0.0f;
        } else if (x > width - mPaddingRight) {
            scale = 1.0f;
        } else {
            scale = (float)(x - mPaddingLeft) / (float)available;
            progress = mTouchProgressOffset;
        }

        final int max = getMax();
        progress += scale * max;

        setProgress((int) progress, true);
    }
    /**
     * Tries to claim the user's drag motion, and requests disallowing any
     * ancestors from stealing events in the drag.
     */
    private void attemptClaimDrag() {
        if (mParent != null) {
            mParent.requestDisallowInterceptTouchEvent(true);
        }
    }

    /**
     * This is called when the user has started touching this widget.
     */
    void onStartTrackingTouch() {
    }
    /**
     * This is called when the user either releases his touch or the touch is
     * canceled.
     */
    void onStopTrackingTouch() {
    }
    /**
     * Called when the user changes the seekbar's progress by using a key event.
     */
    void onKeyChange() {
    }
    @Override
    public boolean onKeyDown(int keyCode, KeyEvent event) {
        int progress = getProgress();

        switch (keyCode) {
            case KeyEvent.KEYCODE_DPAD_LEFT:
                if (progress <= 0) break;
                setProgress(progress - mKeyProgressIncrement, true);
                onKeyChange();
                return true;

            case KeyEvent.KEYCODE_DPAD_RIGHT:
                if (progress >= getMax()) break;
                setProgress(progress + mKeyProgressIncrement, true);
                onKeyChange();
                return true;
        }
        return super.onKeyDown(keyCode, event);
    }
}
连上注释372行,不多。我们看到有onTouchEvent(),trackTouchEvent(),onProgressRefresh(),setThumbPos()等一些方法,这些都是和seekbar功能相关的方法,去看看它们的注释。
onTouchEvent()是在View中就有定义的方法,(touch)事件处理我日后有空我会再发文章讨论,现在我们只要知道,在用户触摸seekbar(absseekbar)时,这个方法会响应touch事件就够了。onTouchEvent()会判断用户的动作,然后调用前述的一些方法(注意去看代码),注意它调用的顺序,判断是ACTION_DOWN时先调用onStartTrackingTouch()再调用trackTouchEvent(event),于是在你的程序中定义的 onStartTrackingTouch()先执行了;判断是ACTION_UP时先调用trackTouchEvent(event)再调用onStopTrackingTouch(),至于为什么我就不啰嗦了,有时候这个顺序是很重要的。
trackTouchEvent()根据touch的位置来设置进度,它计算出progress后调用setProgress(),setProgress()是progressbar中实现的方法。
当seekbar的progress改变时onProgressRefresh()会被调用,它会调用setThumbPos()来设置thumb的位置。
大致过程就是这样,要更深入细致的了解还是得认真得看看代码。
现在我们知道,seekbar拥有的progressbar之外的功能,都是在absseekbar中实现的。系统默认seekbar是横着的,在absseekbar中计算progress、计算thumb的位置,用到了seekbar的宽和高,我们只要改变一下计算方法就能计算出竖着的seekbar所需要的各个数值。例如:
private void trackTouchEvent(MotionEvent event) {
final int Height = getHeight();
Log.d(“demon”, “Y:”+event.getY()+” height:”+Height);
final int available = Height – getPaddingBottom() – getPaddingTop();
int Y = (int)event.getY();
float scale;
float progress = 0;
if (Y > Height – getPaddingBottom()) {
scale = 0.0f;
} else if (Y < getPaddingTop()) {
scale = 1.0f;
} else {
scale = (float)(Height – getPaddingBottom()-Y) / (float)available;
}
final int max = getMax();
progress = scale * max;
setProgress((int) progress);
}
其他的地方你可以仿造这个写。
功能上分析告一段落,我们如何画出来一个竖着的seekbar呢?
我想了两个办法,一是自己画,也就是自己写个draw,太难,而且很难和系统风格统一。另外一个办法是让系统给我们画。verticalseekbar只是seekbar转了90度或-90度,我们可以把画布转一个角度,然后交给系统去画,具体的做法就是在ondraw()时调整画布,然后调用super.onDraw()。
这个调整也就是旋转和平移。至于旋转和平移的具体实现,我跟到native部分就没有看下去了,也没有看到具体的介绍。我的理解,你要保证画布的左上角在旋转平移以后坐标不变,否者会出现很多问题。 就我们的seekbar而言,如果你要获得一个向上增长的seekbar,那么代码应该是:
protected void onDraw(Canvas c)
{
c.rotate(-90);
c.translate(-height,0);//height是你的verticalseekbar的高
super.onDraw(c);
}
如果是向下的seekbar则应该是:
protected void onDraw(Canvas c)
{
c.rotate(90);
c.translate(0,-width);//width是你的verticalseekbar的宽
super.onDraw(c);
}
你也可以自己计算一下来验证。
一个View在屏幕上画出来,首先measure()会被调用,这是个final方法,measure()会调用onMeasure()。你可以重写onMeasure(),但是重写的onMeasure()中必须调用setMeasuredDimension(int,int), setMeasuredDimension()会保存该View的长和宽。我们可以重写onMeasure()方法给我们的seekbar分配一块竖直的,长宽由我们设定的区域。在画seekbar之前,我们把这个区域旋转了90度交给系统,系统给我们画一个标准的seekbar,在整个layout中,这个seekbar就成竖直的了。
实际操作时,我们在工程中新建了类verticalSeekbar,把framework中seekbar的代码拷贝过来,做一些必须的修改(类名、构造方法什么的)。注意如果我们的verticalseekbar是在XML中定义的,在代码中使用findViewById()方法来获得,系统将使用第二个构造方法(我简单地试了一下,没有看到官方资料或权威的解释),也就是
public SeekBar(Context context, AttributeSet attrs) {
this(context, attrs, com.android.internal.R.attr.seekBarStyle);
}
com.android.internal.R.attr.seekBarStyle在我我们的应用程序中是无法使用的,你可以换成android.R.attr.seekBarStyle,你也可以自己定义一个,但是必须包含系统本身的。
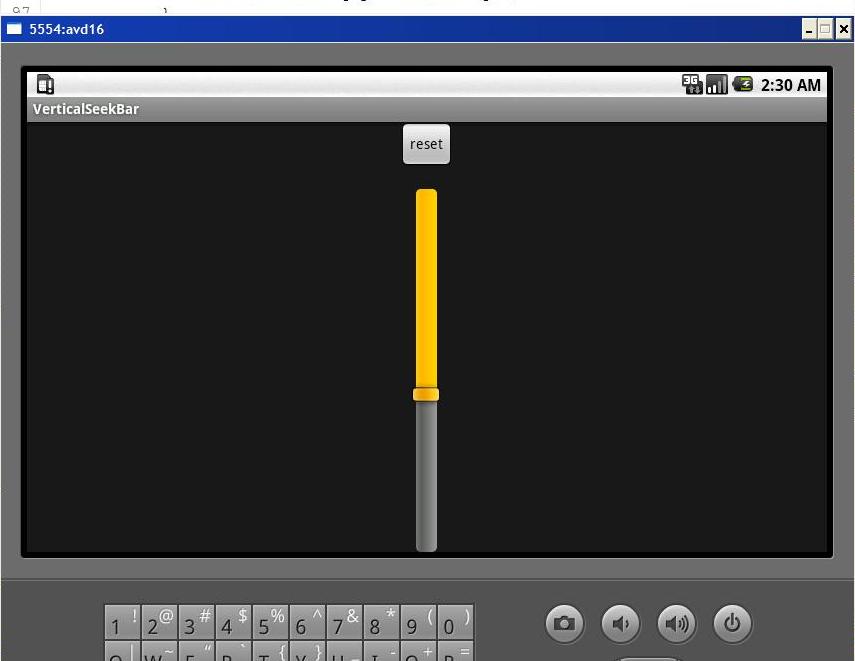
然后我们要加一些方法,也就是重写absseekbar中的一些方法,大致如下:
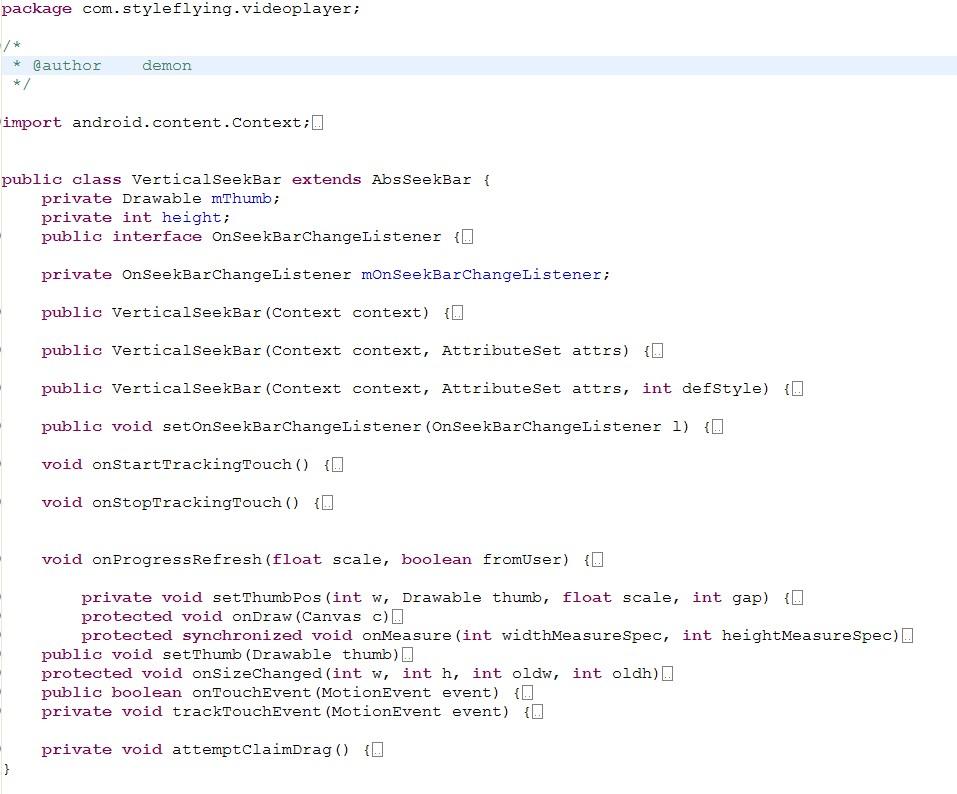

由于是给公司写的代码,不便共享,望大家见谅。贴俩实现了的图,鼓舞一下对verticalseekbar有需求的读者——做一个verticalseekbar不难。
欢迎收藏,不要盲目转载,你验证了我说的,在传播给别人。
发布者:全栈程序员-用户IM,转载请注明出处:https://javaforall.cn/121379.html原文链接:https://javaforall.cn
【正版授权,激活自己账号】: Jetbrains全家桶Ide使用,1年售后保障,每天仅需1毛
【官方授权 正版激活】: 官方授权 正版激活 支持Jetbrains家族下所有IDE 使用个人JB账号...
