串口数据读取和动态显示Tkinter+matplotlib+pyqtgraph(详细教程)
注意 :本函数已将pyqtgraph动态绘图隐藏,在main函数中去除隐藏便可以显示,但是没有嵌入到tkinter
运行环境:
win10,python3.5.2
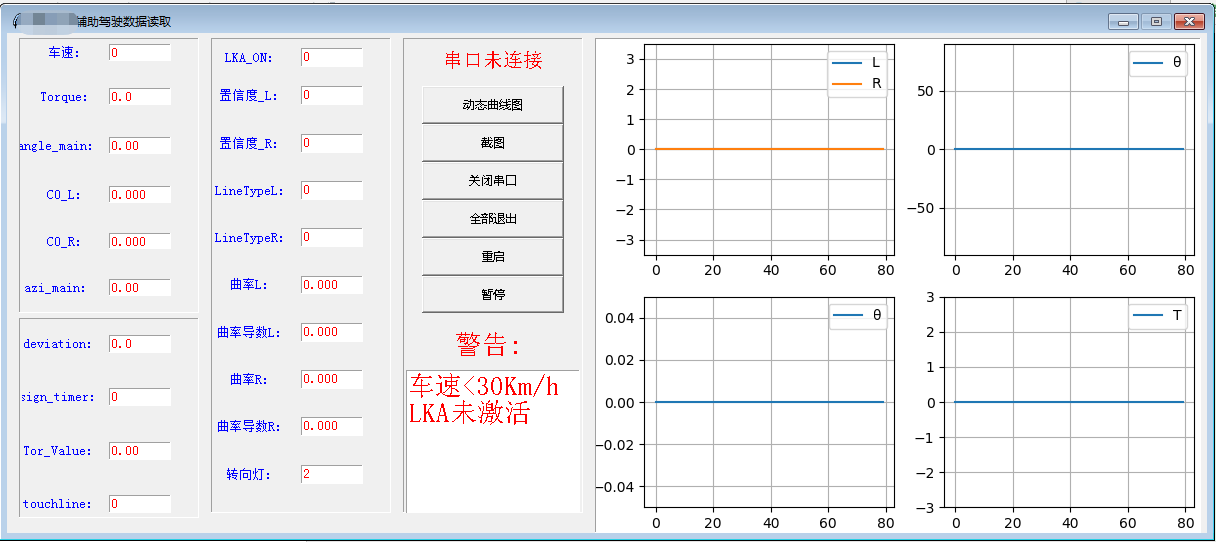
效果图:

代码:
# import os
# import sys
# import serial
# from tkinter import *
from tkinter.simpledialog import *
import tkinter.messagebox
import serial.tools.list_ports
import matplotlib.pyplot as plt
import matplotlib.animation as animation
import numpy as np
import datetime
#import time
import threading
# import sys
# import array
# import pyqtgraph as pg
import os
# 创建画布需要的库
from matplotlib.backends.backend_tkagg import FigureCanvasTkAgg
# 创建工具栏需要的库
# from matplotlib.backends.backend_tkagg import NavigationToolbar2Tk
import shutil

jishu1 = 0  # type: int
#接收不到数据,循环10次之后退出
exit_sum = 0


#使用matplotlib模块绘图,可以嵌入到tkinter,但是性能不好
dis = np.zeros(80)  #左车道线距离
dis2 = dis
dis3 = np.zeros(80)  #右车道线距离
dis4 = dis3
dis5 = np.zeros(80) #方向盘转角
dis6 = dis5
dis7 = np.zeros(80)  #方位角
dis8 = dis7
dis9 = np.zeros(80)  #发送扭矩大小
dis10 = dis9

#截图命名
name_sum = 0


#pyqtgraph模块绘图,不能嵌入到tkinter,但是性能较好
i = 0
gg = 0
zxd = 0
data = []
shuju = []
shuju2 = []
shuju3 = []
shuju4 = []
shuju5 = []
historyLength = 0
historyLength2 = 0


def recv():  # 从串口获取数据
    # start1 = time.time()
    global exit_sum
    try:
        data3 = serial1.readline()
        data_str = str(data3)
        if data_str.count(',') != 19:
            data3 = b'0,0,0,0.0,0.00,0.000,0.000,0.00,0.0,0,0.00,0,0,0.000,0.000,0.000,0.000,0,0,1\n'
            jishu1 = 1
            exit_sum = exit_sum + 1
        elif data_str.count(',') == 19:
            jishu1 = 0
            exit_sum = 0
        # end1 = time.time()
        # print(end1 - start1)
    except:
        data3 = b'0,0,0,0.0,0.00,0.000,0.000,0.00,0.0,0,0.00,0,0,0.000,0.000,0.000,0.000,0,0,2\n'
    return data3


#主要数据处理
def lka_all():
    # while 1:
        global jishu1
        global lka_cs_in, lka_sign_timer_in, lka_on_in, torque_in, angle_main_in, c0_l_in, c0_r_in, azi_main_in, deviation_reminder, \
            touchline_sign, Tor_Value, c0_l_lctype, c0_r_rtype, c2_l, c3_l, c2_r, c3_r, degree_confidence_l, degree_confidence_r, zxd

        global exit_sum

        try:
            data1 = recv()  # 将数据进行解析
        except:
            data1 = b'0,0,0,0.0,0.00,0.000,0.000,0.00,0.0,0,0.00,0,0,0.000,0.000,0.000,0.000,0,0,3\n'

        if exit_sum > 1000:  #接收不到数据,循环10次之后退出
            exit_all()

        if data1 != b'':
            lka_cs_in = data1.split(str.encode(','))[0]  # 车速信息
            text_cs.delete('1.0', 'end')
            text_cs.insert(END, lka_cs_in)

            lka_sign_timer_in = data1.split(str.encode(','))[1]  # 程序执行到那一步的标志位.
            text_sign_timer.delete('1.0', 'end')
            text_sign_timer.insert(END, lka_sign_timer_in)

            lka_on_in = data1.split(str.encode(','))[2]  # LKA的总开关是否开启
            text_lka_on_in.delete('1.0', 'end')
            text_lka_on_in.insert(END, lka_on_in)

            torque_in = data1.split(str.encode(','))[3]  # 方向盘的扭矩,驾驶员驾驶的扭矩
            text_torque_in.delete('1.0', 'end')
            text_torque_in.insert(END, torque_in)

            angle_main_in = data1.split(str.encode(','))[4]  # 方向盘的转角
            text_angle_main_in.delete('1.0', 'end')
            text_angle_main_in.insert(END, angle_main_in)

            c0_l_in = data1.split(str.encode(','))[5]  # 距离左边线的距离
            text_c0_l_in.delete('1.0', 'end')
            text_c0_l_in.insert(END, c0_l_in)

            c0_r_in = data1.split(str.encode(','))[6]  # 距离右边线的距离
            text_c0_r_in.delete('1.0', 'end')
            text_c0_r_in.insert(END, c0_r_in)

            azi_main_in = data1.split(str.encode(','))[7]  # 车身的方位角
            text_azi_main_in.delete('1.0', 'end')
            text_azi_main_in.insert(END, azi_main_in)

            deviation_reminder = data1.split(str.encode(','))[8]  # 是否满足偏离条件,左偏为1,右偏为-1
            text_deviation_reminder.delete('1.0', 'end')
            text_deviation_reminder.insert(END, deviation_reminder)
            # print(deviation_reminder)
            # print(type(deviation_reminder))

            touchline_sign = data1.split(str.encode(','))[9]  # 是否压线
            text_touchline_sign.delete('1.0', 'end')
            text_touchline_sign.insert(END, touchline_sign)
            # print(touchline_sign)

            Tor_Value = data1.split(str.encode(','))[10]  # 发送的扭矩值
            text_Tor_Value.delete('1.0', 'end')
            text_Tor_Value.insert(END, Tor_Value)

            c0_l_lctype = data1.split(str.encode(','))[11]  # 左车道线类型
            text_c0_lctype.delete('1.0', 'end')
            text_c0_lctype.insert(END, c0_l_lctype)

            c0_r_rtype = data1.split(str.encode(','))[12]  # 右车道线类型
            text_c0_rtype.delete('1.0', 'end')
            text_c0_rtype.insert(END, c0_r_rtype)

            c2_l = data1.split(str.encode(','))[13]  # zuo曲率
            text_c2_l.delete('1.0', 'end')
            text_c2_l.insert(END, c2_l)

            c3_l = data1.split(str.encode(','))[14]  # 左曲率导数
            text_c3_l.delete('1.0', 'end')
            text_c3_l.insert(END, c3_l)

            c2_r = data1.split(str.encode(','))[15]  # 右曲率
            text_c2_r.delete('1.0', 'end')
            text_c2_r.insert(END, c2_r)

            c3_r = data1.split(str.encode(','))[16]  # 右曲率倒数
            text_c3_r.delete('1.0', 'end')
            text_c3_r.insert(END, c3_r)

            degree_confidence_l = data1.split(str.encode(','))[17]  # 左置信度
            text_degree_confidence_l.delete('1.0', 'end')
            text_degree_confidence_l.insert(END, degree_confidence_l)

            degree_confidence_r = data1.split(str.encode(','))[18]  # 右置信度
            text_degree_confidence_r.delete('1.0', 'end')
            text_degree_confidence_r.insert(END, degree_confidence_r)

            zxd = data1.split(str.encode(','))[19]  # 右置信度
            text_zxd.delete('1.0', 'end')
            text_zxd.insert(END, zxd)

            if int(lka_cs_in) >= 30:
                if int(degree_confidence_r) < 2 or int(degree_confidence_l) < 2:
                    text_alert.delete('1.0', 'end')
                    text_alert.insert(END, '置信度较低\n不能识别车道线')
                elif deviation_reminder == b'1.0' and jishu1 == 0:
                    text_alert.delete('1.0', 'end')
                    text_alert.insert(END, '左偏离')
                    if touchline_sign == b'1':
                        text_alert.delete('1.0', 'end')
                        text_alert.insert(END, '左偏离+压线\n正在退出纠正...')
                elif deviation_reminder == b'-1.0' and jishu1 == 0:
                    text_alert.delete('1.0', 'end')
                    text_alert.insert(END, '右偏离')
                    if touchline_sign == b'1':
                        text_alert.delete('1.0', 'end')
                        text_alert.insert(END, '右偏离+压线\n正在退出纠正...')
                elif touchline_sign == b'1':
                    text_alert.delete('1.0', 'end')
                    text_alert.insert(END, '压线\n正在退出纠正...')
                elif jishu1 == 1:
                    text_alert.delete('1.0', 'end')
                    text_alert.insert(END, '数据错误')
                elif int(zxd == 1):
                    text_alert.delete('1.0', 'end')
                    text_alert.insert(END, '已开启转向灯\nLKA未激活')
                else:
                    text_alert.delete('1.0', 'end')
            elif int(lka_cs_in) < 30:
                text_alert.delete('1.0', 'end')
                text_alert.insert(END, '车速<30Km/h\nLKA未激活')


            # try:
            #     serial1.close()
            # except:
            #     print("close_error")


def update(goo):
    # start1 = time.clock()
    global lka_cs_in, lka_sign_timer_in, lka_on_in, torque_in, angle_main_in, c0_l_in, c0_r_in, azi_main_in, deviation_reminder, \
        touchline_sign, Tor_Value, c0_l_lctype, c0_r_rtype, c2_l, c3_l, c2_r, c3_r, degree_confidence_l, degree_confidence_r, zxd
    global dis, dis2, dis3, dis4, dis5, dis6, dis7, dis8, dis9, dis10, line, line1, line2, line3, line4
    global aa, bb, cc, dd, ee
    # 读入模拟
    try:
        aa = c0_l_in
        bb = c0_r_in
        cc = angle_main_in
        dd = azi_main_in
    except:
        aa = 0
        bb = 0
        cc = 0
        dd = 0

    try:
        ee = Tor_Value
    except:
        ee = 0

    # 左车道线距离
    dis[0:-1] = dis2[1:]
    dis[-1] = aa
    dis2 = dis
    # 右车道线距离
    dis3[0:-1] = dis4[1:]
    dis3[-1] = bb
    dis4 = dis3
    # 方向盘转角
    dis5[0:-1] = dis6[1:]
    dis5[-1] = cc
    dis6 = dis5
    # 方位角
    dis7[0:-1] = dis8[1:]
    dis7[-1] = dd
    dis8 = dis7
    # 发送扭矩
    dis9[0:-1] = dis10[1:]
    dis9[-1] = ee
    dis10 = dis9

    line.set_ydata(dis)
    line1.set_ydata(dis3)
    line2.set_ydata(dis5)
    line3.set_ydata(dis7)
    line4.set_ydata(dis9)

    # end1 = time.clock()
    # print(end1 - start1)


def display():
    # start1 = time.clock()
    global dis, dis2, dis3, dis4, dis5, dis6, dis7, dis8, dis9, dis10, line, line1, line2, line3, line4
    fig = plt.figure(figsize=(10,8))
    plt.subplots_adjust(left=0.08, right=0.99, top=0.99, bottom=0.05)
    ax = fig.add_subplot(2, 2, 1, ylim=(-3.5, 3.5))
    plt.grid()
    # ax.set_ylabel("distance")
    line, = ax.plot(dis)
    line1, = ax.plot(dis3)
    plt.legend('LRdistance')
    # 设置坐标轴刻度
    # my_y_ticks1 = np.arange(-4, 4, 1)
    # plt.yticks(my_y_ticks1)

    ax2 = fig.add_subplot(2, 2, 2, ylim=(-90, 90))
    plt.grid()
    # ax2.set_ylabel("angle")
    line2, = ax2.plot(dis5)
    plt.legend('θangle')
    # 设置坐标轴刻度
    # my_y_ticks2 = np.arange(-100, 100, 15)
    # plt.yticks(my_y_ticks2)

    ax3 = fig.add_subplot(2, 2, 3, ylim=(-0.05, 0.05))
    plt.grid()
    # ax3.set_ylabel("azi")
    line3, = ax3.plot(dis7)
    plt.legend('θazi')
    # # 设置坐标轴刻度
    # my_y_ticks3 = np.arange(-0.2, 0.2, 0.05)
    # plt.yticks(my_y_ticks3)

    ax4 = fig.add_subplot(2, 2, 4, ylim=(-3, 3))
    plt.grid()
    # ax4.set_ylabel("T_send")
    line4, = ax4.plot(dis9)
    plt.legend('T_send')
    # # 设置坐标轴刻度
    # my_y_ticks4 = np.arange(-3, 3, 0.5)
    # plt.yticks(my_y_ticks4)

    # 创建画布控件
    canvas = FigureCanvasTkAgg(fig, master=frame5)
    canvas.draw()
    # 显示画布控件
    canvas.get_tk_widget().pack()
    ani = animation.FuncAnimation(fig, update, frames=None, interval=40)  # default=200
    # end1 = time.clock()
    # print(end1 - start1)
    plt.show()


def pause_ani():
    tkinter.messagebox.showinfo('提示', '暂时没有该功能')


def screen_shot():
    # #查询是否重复
    # global name_sum
    # ss = askstring('Input','Input filename')
    # shotname = ss + str(name_sum) + '.png'
    # if os.path.exists(shotname):
    #     tkinter.messagebox.showinfo('提示', '命名重复,再来一次吧')
    # else:
    #     plt.savefig(shotname)
    # name_sum = name_sum + 1

    name_dir = str(datetime.datetime.now()).split(' ')[0]

    shotname_tmp = str(str(datetime.datetime.now()) + '.png')
    shotname = shotname_tmp.replace(':','-')

    plt.savefig(shotname)

    if os.path.exists('数据曲线截图'):
        pass
    else:
        os.mkdir('数据曲线截图')
    try:
        if os.path.exists(shotname):
            shutil.move(shotname, '数据曲线截图')
        else:
            tkinter.messagebox.showinfo('提示', '图片不存在')
    except:
        tkinter.messagebox.showinfo('提示', '未知错误')


# 重启程序
def restart_program():
    global data1, serial1, com_0, com_kou
    try:
        serial1.close()
    except:
        pass
    # tkinter.messagebox.showinfo('提示', '暂时没有该功能')
    port_list22 = list(serial.tools.list_ports.comports())
    if len(port_list22) == 0:
        pass
    else:
        com_0 = str(port_list22[1])
        com_kou = com_0.split(' ')[1]

    try:
        serial1 = serial.Serial(com_kou, 115200, timeout=0.15)  # com_kou
        data1 = recv()  # 将数据进行解析
        lb1 = Label(frame4, text='串口已连接', fg='blue', font=('宋体', 15))
        lb1.place(relx=0.1, rely=0.02, relwidth=0.8, relheight=0.05)
    except:
        data1 = b'000,000,000,000,000,000,000,000,000,000,000,000,000,000,000,000,000,000,000,000\n'
        if serial1.isOpen():
            lb1 = Label(frame4, text='串口已连接', fg='blue', font=('宋体', 15))
            lb1.place(relx=0.1, rely=0.02, relwidth=0.8, relheight=0.05)
        else:
            lb1 = Label(frame4, text='串口未连接', fg='blue', font=('宋体', 15))
            lb1.place(relx=0.1, rely=0.02, relwidth=0.8, relheight=0.05)


# 退出命令
def exit_all():
    # root.quit()
    # root.destroy()
    # os._exit(0)
    # sys.exit(app.exec_())
    # # sys.exit(1)
    os._exit(0)


def close_com():
    global serial1
    serial1.close()
    print('串口关闭了')


def plotData():
    global gg
    global lka_cs_in, c0_l_in, c0_r_in, angle_main_in, azi_main_in, Tor_Value, deviation_reminder
    global idx  # 内部作用域想改变外部域变量
    global historyLength
    global historyLength2
    gg = gg + 0.01

    try:
        tmp = float(c0_l_in)
        tmp2 = float(c0_r_in)
        tmp3 = float(angle_main_in)
        tmp4 = float(azi_main_in)
    except:
        tmp = 0
        tmp2 = 0
        tmp3 = 0
        tmp4 = 0

    try:
        tmp5 = float(Tor_Value)

    except:
        tmp5 = 0

    try:
        tmp6 = float(deviation_reminder)
    except:
        tmp6 = 0

    if len(data) <= historyLength:
        data.append(tmp)
        shuju.append(tmp2)
        shuju2.append(tmp3)
        shuju3.append(tmp4)
        shuju4.append(tmp5)
        shuju5.append(tmp6)
    else:
        data[:-1] = data[1:]  # 前移
        data[-1] = tmp
        shuju[:-1] = shuju[1:]  # 前移
        shuju[-1] = tmp2
        shuju2[:-1] = shuju2[1:]  # 前移
        shuju2[-1] = tmp3
        shuju3[:-1] = shuju3[1:]  # 前移
        shuju3[-1] = tmp4
        shuju4[:-1] = shuju4[1:]  # 前移
        shuju4[-1] = tmp5
        shuju5[:-1] = shuju5[1:]  # 前移
        shuju5[-1] = tmp6

    curve1.setData(data)
    curve2.setData(shuju)
    curve3.setData(shuju2)
    curve4.setData(shuju3)
    curve5.setData(shuju4)
    curve6.setData(shuju5)
    idx += 1


if __name__ == '__main__':
    root = Tk()
    root.geometry('1200x500')
    root.resizable(False, False)
    root.title('毕业设计 LKA辅助驾驶数据读取')

    frame1 = Frame(root, relief=SUNKEN, bd=1)
    frame1.place(relx=0.01, rely=0.01, relwidth=0.15, relheight=0.55)
    frame2 = Frame(root, relief=SUNKEN, bd=1)
    frame2.place(relx=0.01, rely=0.57, relwidth=0.15, relheight=0.4)
    frame3 = Frame(root, relief=SUNKEN, bd=1)
    frame3.place(relx=0.17, rely=0.01, relwidth=0.15, relheight=0.95)
    frame4 = Frame(root, relief=SUNKEN, bd=1)
    frame4.place(relx=0.33, rely=0.01, relwidth=0.15, relheight=0.95)
    frame5 = Frame(root, relief=SUNKEN, bd=1)
    frame5.place(relx=0.49, rely=0.01, relwidth=0.505, relheight=0.99)

    # Tk控件的名称
    text_cs = Text(frame1, fg='red', font=("宋体", 10))
    lb_cs = Label(frame1, text='车速:', fg='blue', font=("宋体", 10))
    text_torque_in = Text(frame1, fg='red', font=("宋体", 10))
    lb_torque = Label(frame1, text='Torque:', fg='blue', font=("宋体", 10))
    text_angle_main_in = Text(frame1, fg='red', font=("宋体", 10))
    lb_angle_main = Label(frame1, text='angle_main:', fg='blue', font=("宋体", 10))
    text_c0_l_in = Text(frame1, fg='red', font=("宋体", 10))
    lb_c0_l = Label(frame1, text='C0_L:', fg='blue', font=("宋体", 10))
    text_c0_r_in = Text(frame1, fg='red', font=("宋体", 10))
    lb_c0_r = Label(frame1, text='C0_R:', fg='blue', font=("宋体", 10))
    text_azi_main_in = Text(frame1, fg='red', font=("宋体", 10))
    lb_azi_main = Label(frame1, text='azi_main:', fg='blue', font=("宋体", 10))

    text_deviation_reminder = Text(frame2, fg='red', font=("宋体", 10))
    lb_deviation_reminder = Label(frame2, text='deviation:', fg='blue', font=("宋体", 10))
    text_sign_timer = Text(frame2, fg='red', font=("宋体", 10))
    lb_sign = Label(frame2, text='sign_timer:', fg='blue', font=("宋体", 10))
    text_touchline_sign = Text(frame2, fg='red', font=("宋体", 10))
    lb_touchline_sign = Label(frame2, text='touchline:', fg='blue', font=("宋体", 10))
    text_Tor_Value = Text(frame2, fg='red', font=("宋体", 10))
    lb_text_Tor_Value = Label(frame2, text='Tor_Value:', fg='blue', font=("宋体", 10))

    text_lka_on_in = Text(frame3, fg='red', font=("宋体", 10))
    lb_lka_on = Label(frame3, text='LKA_ON:', fg='blue', font=("宋体", 10))
    text_degree_confidence_l = Text(frame3, fg='red', font=("宋体", 10))
    lb_text_degree_confidence_l = Label(frame3, text='置信度_L:', fg='blue', font=("宋体", 10))
    text_degree_confidence_r = Text(frame3, fg='red', font=("宋体", 10))
    lb_text_degree_confidence_r = Label(frame3, text='置信度_R:', fg='blue', font=("宋体", 10))
    text_c0_lctype = Text(frame3, fg='red', font=("宋体", 10))
    lb_text_c0_lctype = Label(frame3, text='LineTypeL:', fg='blue', font=("宋体", 10))
    text_c0_rtype = Text(frame3, fg='red', font=("宋体", 10))
    lb_text_c0_rtype = Label(frame3, text='LineTypeR:', fg='blue', font=("宋体", 10))
    text_c2_l = Text(frame3, fg='red', font=("宋体", 10))
    lb_text_c2_l = Label(frame3, text='曲率L:', fg='blue', font=("宋体", 10))
    text_c3_l = Text(frame3, fg='red', font=("宋体", 10))
    lb_text_c3_l = Label(frame3, text='曲率导数L:', fg='blue', font=("宋体", 10))
    text_c2_r = Text(frame3, fg='red', font=("宋体", 10))
    lb_text_c2_r = Label(frame3, text='曲率R:', fg='blue', font=("宋体", 10))
    text_c3_r = Text(frame3, fg='red', font=("宋体", 10))
    lb_text_c3_r = Label(frame3, text='曲率导数R:', fg='blue', font=("宋体", 10))
    text_zxd = Text(frame3, fg='red', font=("宋体", 10))
    lb_text_zxd = Label(frame3, text='转向灯:', fg='blue', font=("宋体", 10))

    text_alert = Text(frame4, fg='red', font=("宋体", 20))
    lb_text_alert = Label(frame4, text='警告:', fg='red', font=("宋体", 20))

    # 界面显示相对于frame1的位置
    text_cs.place(relx=0.5, rely=0.02, relwidth=0.35, relheight=0.06)
    lb_cs.place(relx=0.1, rely=0.02, relwidth=0.3, relheight=0.06)
    text_torque_in.place(relx=0.5, rely=0.18, relwidth=0.35, relheight=0.06)
    lb_torque.place(relx=0.1, rely=0.18, relwidth=0.3, relheight=0.06)
    text_angle_main_in.place(relx=0.5, rely=0.36, relwidth=0.35, relheight=0.06)
    lb_angle_main.place(relx=0.0, rely=0.36, relwidth=0.4, relheight=0.06)
    text_c0_l_in.place(relx=0.5, rely=0.54, relwidth=0.35, relheight=0.06)
    lb_c0_l.place(relx=0.1, rely=0.54, relwidth=0.3, relheight=0.06)
    text_c0_r_in.place(relx=0.5, rely=0.71, relwidth=0.35, relheight=0.06)
    lb_c0_r.place(relx=0.1, rely=0.71, relwidth=0.3, relheight=0.06)
    text_azi_main_in.place(relx=0.5, rely=0.88, relwidth=0.35, relheight=0.06)
    lb_azi_main.place(relx=0.0, rely=0.88, relwidth=0.4, relheight=0.06)

    # 界面显示相对于frame2的位置
    text_deviation_reminder.place(relx=0.5, rely=0.08, relwidth=0.35, relheight=0.09)
    lb_deviation_reminder.place(relx=0.01, rely=0.08, relwidth=0.4, relheight=0.09)
    text_sign_timer.place(relx=0.5, rely=0.35, relwidth=0.35, relheight=0.09)
    lb_sign.place(relx=0.01, rely=0.35, relwidth=0.4, relheight=0.09)
    text_Tor_Value.place(relx=0.5, rely=0.62, relwidth=0.35, relheight=0.09)
    lb_text_Tor_Value.place(relx=0.01, rely=0.62, relwidth=0.4, relheight=0.09)
    text_touchline_sign.place(relx=0.5, rely=0.89, relwidth=0.35, relheight=0.09)
    lb_touchline_sign.place(relx=0.01, rely=0.89, relwidth=0.4, relheight=0.09)

    # 界面显示相对于frame3的位置
    text_lka_on_in.place(relx=0.5, rely=0.02, relwidth=0.35, relheight=0.04)
    lb_lka_on.place(relx=0.01, rely=0.02, relwidth=0.4, relheight=0.04)
    text_degree_confidence_l.place(relx=0.5, rely=0.1, relwidth=0.35, relheight=0.04)
    lb_text_degree_confidence_l.place(relx=0.01, rely=0.1, relwidth=0.4, relheight=0.04)
    text_degree_confidence_r.place(relx=0.5, rely=0.2, relwidth=0.35, relheight=0.04)
    lb_text_degree_confidence_r.place(relx=0.01, rely=0.2, relwidth=0.4, relheight=0.04)
    text_c0_lctype.place(relx=0.5, rely=0.3, relwidth=0.35, relheight=0.04)
    lb_text_c0_lctype.place(relx=0.01, rely=0.3, relwidth=0.4, relheight=0.04)
    text_c0_rtype.place(relx=0.5, rely=0.4, relwidth=0.35, relheight=0.04)
    lb_text_c0_rtype.place(relx=0.01, rely=0.4, relwidth=0.4, relheight=0.04)
    text_c2_l.place(relx=0.5, rely=0.5, relwidth=0.35, relheight=0.04)
    lb_text_c2_l.place(relx=0.01, rely=0.5, relwidth=0.4, relheight=0.04)
    text_c3_l.place(relx=0.5, rely=0.6, relwidth=0.35, relheight=0.04)
    lb_text_c3_l.place(relx=0.01, rely=0.6, relwidth=0.4, relheight=0.04)
    text_c2_r.place(relx=0.5, rely=0.7, relwidth=0.35, relheight=0.04)
    lb_text_c2_r.place(relx=0.01, rely=0.7, relwidth=0.4, relheight=0.04)
    text_c3_r.place(relx=0.5, rely=0.8, relwidth=0.35, relheight=0.04)
    lb_text_c3_r.place(relx=0.01, rely=0.8, relwidth=0.4, relheight=0.04)
    text_zxd.place(relx=0.5, rely=0.9, relwidth=0.35, relheight=0.04)
    lb_text_zxd.place(relx=0.01, rely=0.9, relwidth=0.4, relheight=0.04)

    # 界面显示相对于root的位置
    text_alert.place(relx=0.01, rely=0.7, relwidth=0.98, relheight=0.35)
    lb_text_alert.place(relx=0.13, rely=0.62, relwidth=0.7, relheight=0.05)

    port_list = list(serial.tools.list_ports.comports())
    if len(port_list) == 0:
        print('找不到串口')
    else:
        com_0 = str(port_list[0])
        com_kou = com_0.split(' ')[0]
    try:
        serial1 = serial.Serial(com_kou, 115200, timeout=0.15)  # com_kou
        data1 = recv()  # 将数据进行解析
        lb1 = Label(frame4, text='串口已连接', fg='blue', font=('宋体', 15))
        lb1.place(relx=0.1, rely=0.02, relwidth=0.8, relheight=0.05)
    except:
        data1 = b'555,555,555,555,555,555,555,555,555,555,555,555,555,555,555,555,555,555,555,555\n'
        lb1 = Label(frame4, text='串口未连接', fg='red', font=('宋体', 15))
        lb1.place(relx=0.1, rely=0.02, relwidth=0.8, relheight=0.05)

    btn2 = Button(frame4, text='动态曲线图', command=display)
    btn2.place(relx=0.1, rely=0.1, relwidth=0.8, relheight=0.08)
    btn3 = Button(frame4, text='截图', command=screen_shot)
    btn3.place(relx=0.1, rely=0.18, relwidth=0.8, relheight=0.08)
    btn4 = Button(frame4, text="关闭串口", command=close_com)
    btn4.place(relx=0.1, rely=0.26, relwidth=0.8, relheight=0.08)
    btn5 = Button(frame4, text="全部退出", command=exit_all)
    btn5.place(relx=0.1, rely=0.34, relwidth=0.8, relheight=0.08)
    btn6 = Button(frame4, text="重启", command=restart_program)
    btn6.place(relx=0.1, rely=0.42, relwidth=0.8, relheight=0.08)
    btn7 = Button(frame4, text="暂停", command=pause_ani)
    btn7.place(relx=0.1, rely=0.50, relwidth=0.8, relheight=0.08)


    #使用pyqt显示曲线图
    # app = pg.mkQApp()  # 建立app
    # win = pg.GraphicsWindow()  # 建立窗口
    # win.setWindowTitle(u'实时监测卡车参数')
    # win.resize(800, 400)  # 小窗口大小
    #
    # data = array.array('d')  # 可动态改变数组的大小,double型数组
    # shuju = array.array('d')  # 可动态改变数组的大小,double型数组
    # historyLength = 100  # 横坐标长度
    # p = win.addPlot()  # 把图p加入到窗口中
    # p.showGrid(x=True, y=True)  # 把X和Y的表格打开
    # # p.setRange(xRange=[0, historyLength], yRange=[-4.0, 4.0], padding=0)
    # p.setLabel(axis='left', text='左右车道线距离')  # 靠左
    # p.setLabel(axis='bottom', text='time')
    # p.setTitle('车道线距离')  # 表格的名字
    # curve1 = p.plot(pen='w')  # 绘制一个图形
    # curve2 = p.plot(pen='g')  # 绘制一个图形
    # angle_steer = win.addPlot(left='方向盘转角', bottom='time',title='方向盘转角')
    # # angle_steer.setRange(xRange=[0, historyLength], yRange=[-600, 600], padding=0)
    # curve3 = angle_steer.plot(pen='w')
    # win.nextRow()
    # azi = win.addPlot(left='方位角', bottom='time', title='方位角')
    # azi.setRange(xRange=[0, historyLength], yRange=[-0.2, 0.2], padding=0)
    # curve4 = azi.plot(pen='w')
    # T_send = win.addPlot(left='发送扭矩', bottom='time', title='发送扭矩')
    # T_send.setRange(xRange=[0, historyLength], yRange=[-2, 2], padding=0)
    # curve5 = T_send.plot(pen='r')
    # curve6 = T_send.plot(pen='g')
    #
    # idx = 0
    # timer = pg.QtCore.QTimer()
    # timer.timeout.connect(plotData)  # 定时调用plotData函数
    # timer.start(20)  # 多少ms调用一次

    thread_1 = threading.Thread(target=lka_all)
    thread_1.start()  # 开启T1
    #使用pyqt显示曲线图
    # thread_2 = threading.Thread(target=plotData)
    # thread_2.start()  # 开启T2
    thread_3 = threading.Thread(target=recv)
    thread_3.start()  # 开启T1


    root.mainloop()
    # app.exec_()
版权声明:本文内容由互联网用户自发贡献,该文观点仅代表作者本人。本站仅提供信息存储空间服务,不拥有所有权,不承担相关法律责任。如发现本站有涉嫌侵权/违法违规的内容, 请发送邮件至 举报,一经查实,本站将立刻删除。
发布者:全栈程序员-用户IM,转载请注明出处:https://javaforall.cn/2174.html原文链接:https://javaforall.cn
【正版授权,激活自己账号】: Jetbrains全家桶Ide使用,1年售后保障,每天仅需1毛
【官方授权 正版激活】: 官方授权 正版激活 支持Jetbrains家族下所有IDE 使用个人JB账号...
