大家好,又见面了,我是你们的朋友全栈君。如果您正在找激活码,请点击查看最新教程,关注关注公众号 “全栈程序员社区” 获取激活教程,可能之前旧版本教程已经失效.最新Idea2022.1教程亲测有效,一键激活。
Jetbrains全家桶1年46,售后保障稳定
SpringBoot自定义starters
1、简介
SpringBoot最强大的功能就是把我们常用的场景抽象成一个个starter(场景启动器),我们通过引入springBoot为我们提供这些场景启动器,我们再进行少量的配置就能使用相应的功能。但是,SpringBoot不能包含所有的场景,经常需要我们自定义starter,来简化我们对springBoot的使用。
2、如何自定义starter
2.1、编写自定义模块
根据SpringBoot官方的介绍,一般情况下我们需要创建两个模块,一个是autoconfigure,一个是starter,autoconfigure里面装着自定义配置类,而starter只是负责向外提供调用的接口,所以下面我们先创建了几个模块
2.1.1、一个父模块和两个子模块

2、创建完成之后,我们需要在starter的pom文件中引入autoconfigure,又因为我们这个是以web首页为例子,所以还要在autoconfigure里面引入web的starter启动器。
<!-- 还需要检查父项目的pom文件是否有 -->
<packaging>pom</packaging>
starter的pom文件:
<?xml version="1.0" encoding="UTF-8"?>
<project xmlns="http://maven.apache.org/POM/4.0.0" xmlns:xsi="http://www.w3.org/2001/XMLSchema-instance" xsi:schemaLocation="http://maven.apache.org/POM/4.0.0 http://maven.apache.org/xsd/maven-4.0.0.xsd">
    <parent>
        <artifactId>springboot_custom_starter</artifactId>
        <groupId>cool.ale</groupId>
        <version>0.0.1-SNAPSHOT</version>
    </parent>
    <modelVersion>4.0.0</modelVersion>

    <description>
        自定义启动器starter
    </description>

    <artifactId>dujlc-spring-boot-starter</artifactId>

    <dependencies>
        <!-- 引入autoconfigure -->
        <dependency>
            <groupId>cool.ale</groupId>
            <version>0.0.1-SNAPSHOT</version>
            <artifactId>dujlc-spring-boot-autoconfigure</artifactId>
        </dependency>

        <!-- 如果需要引用其它的类库,可以在这里引用 -->
    </dependencies>


</project>
autoconfigure的pom文件:
<?xml version="1.0" encoding="UTF-8"?>
<project xmlns="http://maven.apache.org/POM/4.0.0" xmlns:xsi="http://www.w3.org/2001/XMLSchema-instance" xsi:schemaLocation="http://maven.apache.org/POM/4.0.0 http://maven.apache.org/xsd/maven-4.0.0.xsd">
    <parent>
        <artifactId>springboot_custom_starter</artifactId>
        <groupId>cool.ale</groupId>
        <version>0.0.1-SNAPSHOT</version>
    </parent>
    <modelVersion>4.0.0</modelVersion>

    <artifactId>dujlc-spring-boot-autoconfigure</artifactId>
    <dependencies>
        <dependency>
            <groupId>org.springframework.boot</groupId>
            <artifactId>spring-boot-starter-web</artifactId>
        </dependency>

        <!-- 导入配置文件处理器,配置文件进行绑定就会又提示 -->
        <dependency>
            <groupId>org.springframework.boot</groupId>
            <artifactId>spring-boot-configuration-processor</artifactId>
            <optional>true</optional>
        </dependency>
    </dependencies>


</project>
2.1.2、写上相应的配置类等等
一共涉及到三个Java类
| 类名称 | 含义 |
|---|---|
| HelloAutoConfiguration | 自动配置类,可调用我们自动配置实现的具体功能 |
| HelloProperties | 自动配置属性文件,配置着我们的这个自动配置可设置哪些属性 |
| IndexController | HelloAutoConfiguration 调用的具体实现 |
代码举例如下:
HelloAutoConfiguration
package com.starter.ale;

import org.springframework.beans.factory.annotation.Autowired;
import org.springframework.boot.autoconfigure.condition.ConditionalOnProperty;
import org.springframework.boot.context.properties.EnableConfigurationProperties;
import org.springframework.context.annotation.Bean;
import org.springframework.context.annotation.Configuration;

@Configuration
// 必须要配置这个属性才会生效
@ConditionalOnProperty("cool.ale.starter.name")
@EnableConfigurationProperties(HelloProperties.class)
public class HelloAutoConfiguration {


    @Autowired
    private HelloProperties helloProperties;

    /** * 为web应用添加一个首页 */
    @Bean
    public IndexController indexController(){

        return new IndexController(helloProperties);
    }
}
HelloProperties
package com.starter.ale;

import org.springframework.boot.context.properties.ConfigurationProperties;

@ConfigurationProperties("cool.ale.starter")
public class HelloProperties {


    private String name;

    public String getName() {

        return name;
    }

    public void setName(String name) {

        this.name = name;
    }
}
IndexController
package com.starter.ale;


import org.springframework.web.bind.annotation.RequestMapping;
import org.springframework.web.bind.annotation.RestController;

@RestController
public class IndexController {


    HelloProperties helloProperties;

    public IndexController() {
   }

    public IndexController(HelloProperties helloProperties) {

        this.helloProperties = helloProperties;
    }

    /** * 首页 * @return */
    @RequestMapping("/")
    public String index(){

        return helloProperties.getName() + "欢迎你";
    }
}
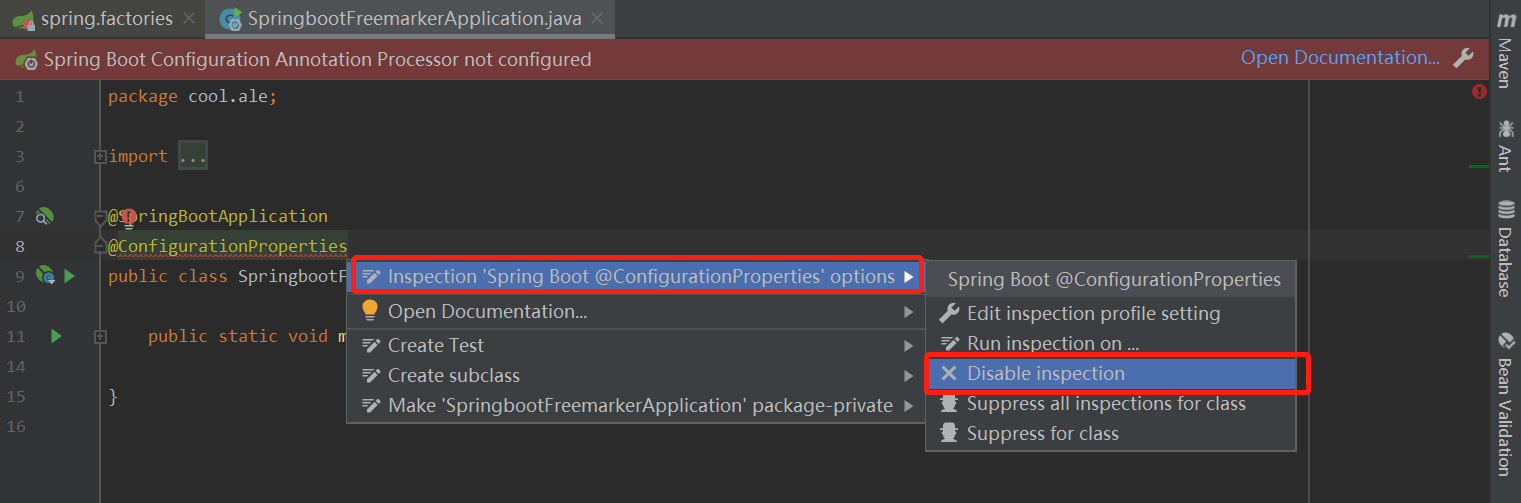
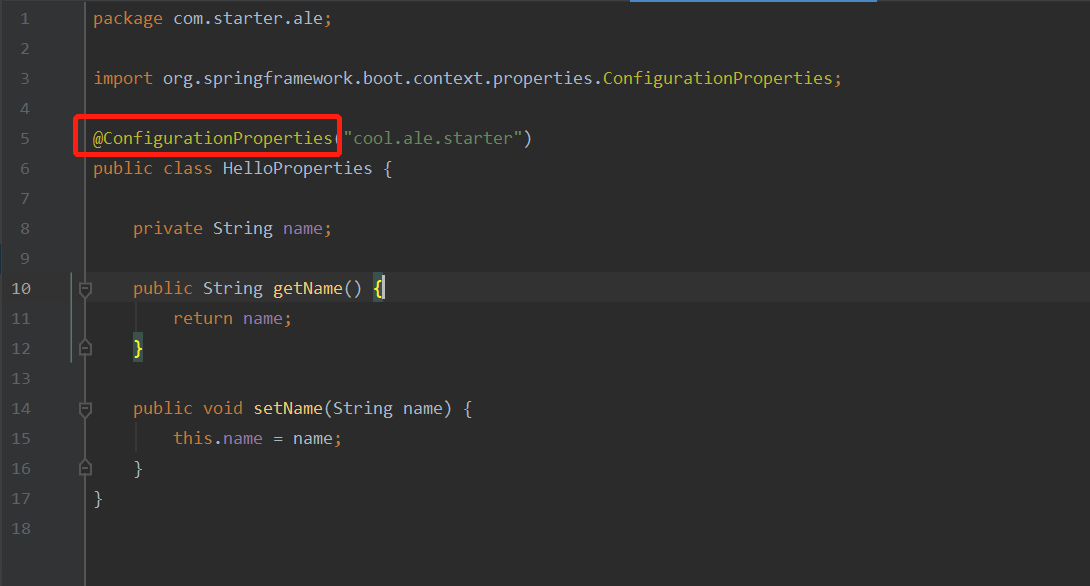
在这里我们发现一个问题,就是HelloProperties类里面的注解报错,我们需要做如下操作:
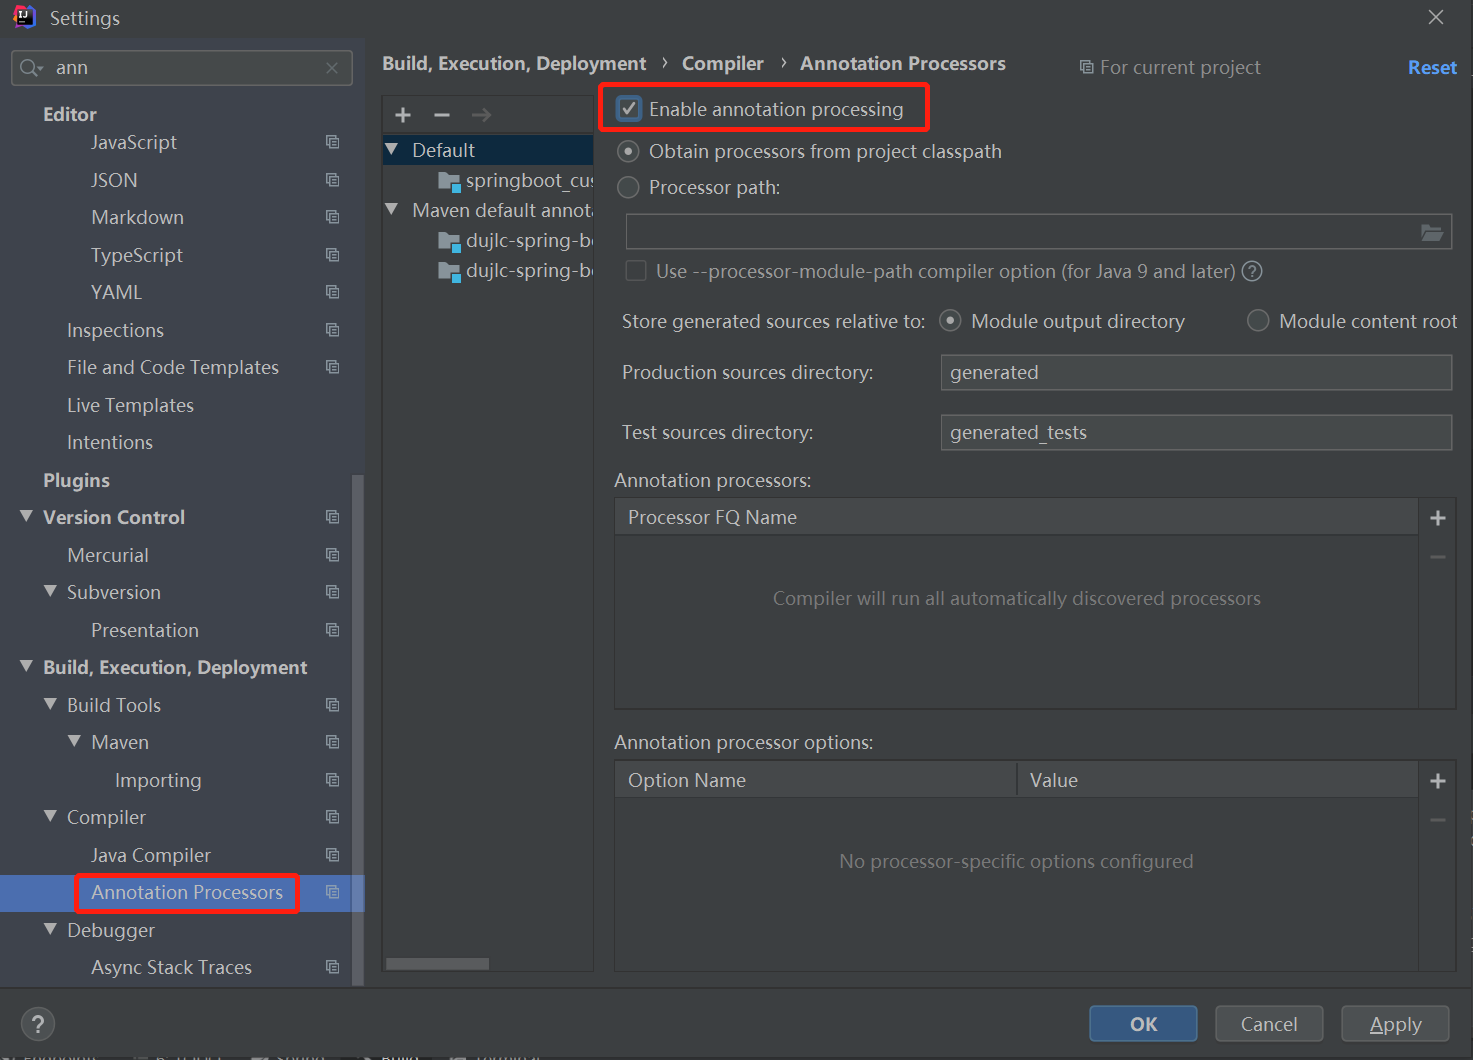
我们发现勾选之后还报错,这个其实已经和编码没有关系了,只是一个提示,我们可以通过下面的方法让报错不提示:
在报错行上alt+enter键,弹出如下图所示框,依次选中即可(先忽略图中代码,这是我从另一个项目截的图),原来的代码是第二张图的@ConfigurationProperties报错:
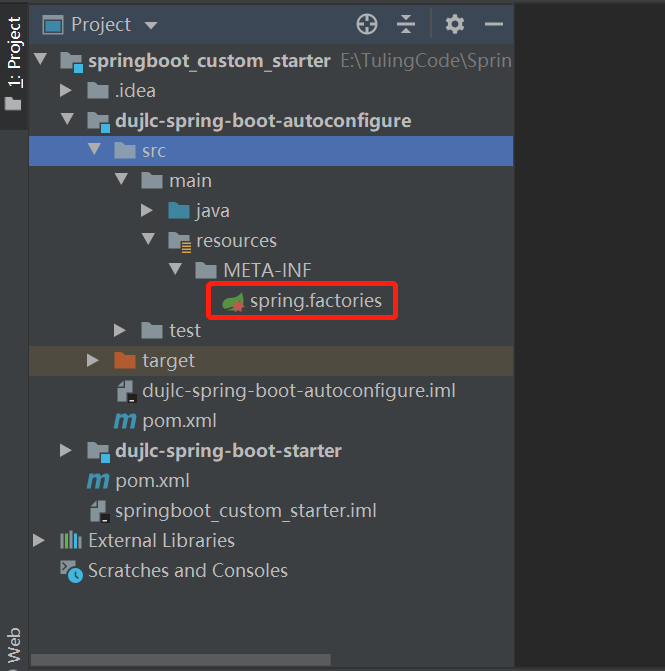
2.1.3、定义spring.factories
定义这个文件的目的就是让SpringBoot找到我们的自定义的自动配置类,如下所示:
# Auto Configure
org.springframework.boot.autoconfigure.EnableAutoConfiguration=\
  com.starter.ale.HelloAutoConfiguration
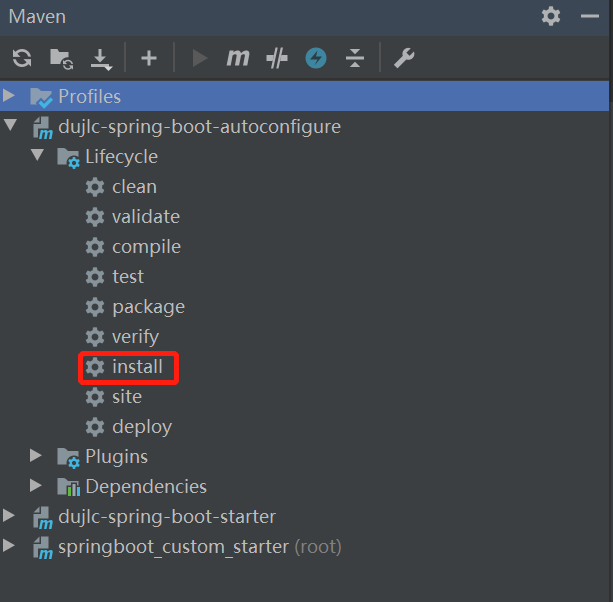
2.1.4、依次打包
代码书写完之后,我们将这三个打包,一定要注意打包顺序,starter在最后打包,依次点击三个包的install,如下图所示:
2.1.5、使用其它模块进行调用
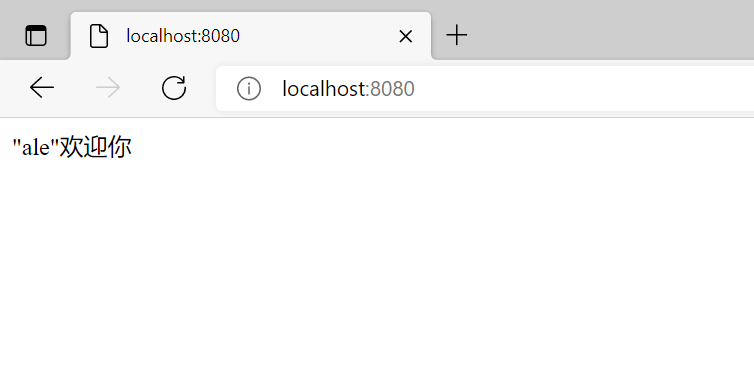
1、在其它模块中的全局配置文件中配置下面属性:
cool.ale.starter.name="ale"
2、启动首页访问,如下图所示:
发布者:全栈程序员-用户IM,转载请注明出处:https://javaforall.cn/203465.html原文链接:https://javaforall.cn
【正版授权,激活自己账号】: Jetbrains全家桶Ide使用,1年售后保障,每天仅需1毛
【官方授权 正版激活】: 官方授权 正版激活 支持Jetbrains家族下所有IDE 使用个人JB账号...
