大家好,又见面了,我是你们的朋友全栈君。如果您正在找激活码,请点击查看最新教程,关注关注公众号 “全栈程序员社区” 获取激活教程,可能之前旧版本教程已经失效.最新Idea2022.1教程亲测有效,一键激活。
Jetbrains全系列IDE使用 1年只要46元 售后保障 童叟无欺
Kong是一个使用了lua-nginx-module运行在Nginx之上的Lua应用。Kong是一个成熟的API网关解决方案。API 网关,即API Gateway,是大型分布式系统中,为了保护内部服务而设计的一道屏障,可以提供高性能、高可用的 API托管服务,从而帮助服务的开发者便捷地对外提供服务,而不用考虑安全控制、流量控制、审计日志等问题,统一在网关层将安全认证,流量控制,审计日志,黑白名单等实现。网关的下一层,是内部服务,内部服务只需开发和关注具体业务相关的实现。网关可以提供API发布、管理、维护等主要功能。开发者只需要简单的配置操作即可把自己开发的服务发布出去,同时置于网关的保护之下。
环境:
环境:Centos7
配置:2c4g
权限:root
一、安装PostgreSQL
注意:请勿使用”yum install kong-community-edition”安装Kong,必须指定版本号!”yum install kong-community-edition-0.14.1.*.noarch.rpm –nogpgcheck”
1、配置yum源
# 配置完yum库之后卸载之前安装的Postgresql
yum erase postgresql*
# 删除遗留的数据
rm -rf /var/lib/pgsql
2、安装
下载RPM(PostgreSQL YUM源),找到对应的版本 CentOS 7 – x86_64
# 安装yum源
yum install https://download.postgresql.org/pub/repos/yum/9.6/redhat/rhel-7-x86_64/pgdg-centos96-9.6-3.noarch.rpm
# 安装PostgreSQL
yum install postgresql96-server postgresql96-contrib
3、初始化数据库
# 初始化数据库
/usr/pgsql-9.6/bin/postgresql96-setup initdb
4、PostgreSQL服务控制
# PostgreSQL 使用systemctl作为服务托管
service postgresql-9.6 start/stop/restart/reload
# 或是
systemctl start/stop/restart/status postgresql-9.6
# 设置开机自启
systemctl enable postgresql-9.6
5、卸载(顺便提供卸载PostgreSQL的命令)
# 卸载PostgreSQL
yum erase postgresql96
6、修改密码
PostgreSQL数据库默认会创建一个Linux系统用户postgres,通过passwd命令可以设置密码。
# 创建postgres数据库账号
su postgres
psql
ALTER USER postgres WITH PASSWORD ‘123456’;
\q
su root
7、设置远程控制
7.1 修改vi /var/lib/pgsql/9.6/data/postgresql.conf文件,配置可以远程访问(正式环境按照白名单正确配置)
将listen_addresses前的#去掉,并将 listen_addresses = ‘localhost’ 改成 listen_addresses = ‘*’;
#——————————————————————————
# CONNECTIONS AND AUTHENTICATION
#——————————————————————————
# – Connection Settings –
# 放开IP的限制
listen_addresses = ‘*’ # what IP address(es) to listen on;
7.2 修改客户端认证配置文件 vi /var/lib/pgsql/9.6/data/pg_hba.conf
将IPv4区下的127.0.0.1/32修改为0.0.0.0/0; 将ident修改为md5
# TYPE DATABASE USER ADDRESS METHOD
# “local” is for Unix domain socket connections only
local all all peer
local all all md5
# IPv4 local connections:
### 假如Kong用户设置了密码,需要配置MD5认证
host all all 127.0.0.1/32 md5
### 容许远程向Navicat客户端访问
host all all 0.0.0.0/0 md5
# IPv6 local connections:
host all all ::1/128 ident
7.3 重启使配置生效
7.4 注意:对应虚拟机或是在非本机的用户,需要注意防火墙端口开放。
8、添加Kong账号
#为postgres用户增加work分组
sudo usermod -a -G work postgres
# 添加kong数据库账户及数据库
createuser -s -e kong
createdb -E UTF8 -O kong kong
# 添加kong系统用户名
sudo adduser kong
# 可选 为kong系统用户设置密码
sudo passwd kong
9、新建Kong数据库
# 创建postgres数据库账号
su postgres
psql
ALTER USER kong WITH PASSWORD ‘123456’;
\q
exit
二、安装Kong
1、根据系统版本配置yum源
# 新建Kong的yum reposit
vi /etc/yum.repos.d/kong-community-edition.repo
# 输入内容
[kong-community-edition]
name=kong-community-edition
baseurl=https://kong.bintray.com/kong-community-edition-rpm/centos/7
gpgcheck=0
repo_gpgcheck=0
enabled=1
2、安装
# 安装epel
yum install epel-release
# 安装Kong
yum localinstall https://bintray.com/kong/kong-community-edition-rpm/download_file?file_path=centos/7/kong-community-edition-0.14.1.el7.noarch.rpm
3、配置Kong DataSource
# 创建配置 cp kong.conf.default kong.conf
vim /etc/kong/kong.conf
# 修改数据库配置
database = postgres # Determines which of PostgreSQL or Cassandra
pg_host = 127.0.0.1 # The PostgreSQL host to connect to.
pg_port = 5432 # The port to connect to.
pg_user = kong # The username to authenticate if required.
pg_password = 123456 # The password to authenticate if required.
pg_database = kong # The database name to connect to.
4、迁移Kong (在数据库Kong中创建需要的表)
kong migrations up [-c /path/to/kong.conf]
5、启动Kong
kong start [-c /path/to/kong.conf]
# 非root权限用户启动方式
chmod -R 777 /usr/local/kong
chmod -R 777 /usr/local/share/lua/5.1
6、验证
curl -i http://localhost:8001/
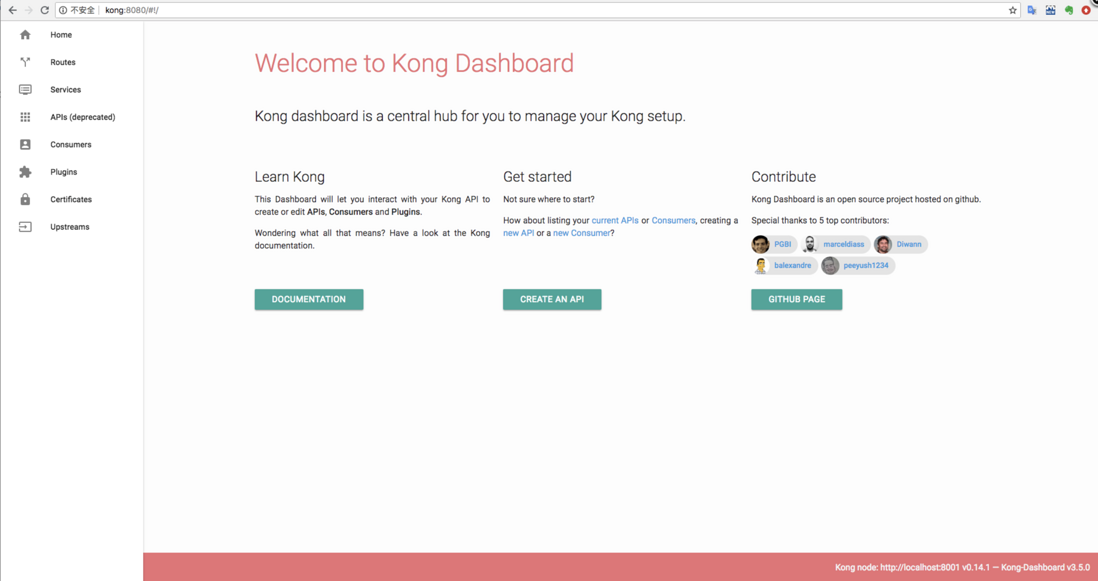
三、安装Kong Dashboard
1、安装npm
# kong Dashboard是nodejs写的
sudo yum install nodejs
2、安装
# Install Kong Dashboard
npm install -g kong-dashboard
# Start Kong Dashboard
kong-dashboard start –kong-url http://kong:8001
# Start Kong Dashboard on a custom port
kong-dashboard start \
–kong-url http://kong:8001 \
–port [port]
# Start Kong Dashboard with basic auth
kong-dashboard start \
–kong-url http://kong:8001 \
–basic-auth user1=password1 user2=password2
# See full list of start options
kong-dashboard start –help
四、大功告成

发布者:全栈程序员-用户IM,转载请注明出处:https://javaforall.cn/195061.html原文链接:https://javaforall.cn
【正版授权,激活自己账号】: Jetbrains全家桶Ide使用,1年售后保障,每天仅需1毛
【官方授权 正版激活】: 官方授权 正版激活 支持Jetbrains家族下所有IDE 使用个人JB账号...
