大家好,又见面了,我是你们的朋友全栈君。如果您正在找激活码,请点击查看最新教程,关注关注公众号 “全栈程序员社区” 获取激活教程,可能之前旧版本教程已经失效.最新Idea2022.1教程亲测有效,一键激活。
Jetbrains全系列IDE使用 1年只要46元 售后保障 童叟无欺
导师的课题需要用到图片分类;入门萌新啥也不会,只需要实现这个功能,给出初步效果,不需要花太多时间了解内部逻辑。经过一周的摸索,建好环境、pytorch,终于找到整套的代码和数据集,实现了一个小小的分类。记录一下使用方法,避免后续使用时遗忘。感谢各位大佬的开源代码和注释!
找到一个大佬的视频讲解和代码开源:
github:
https://github.com/WZMIAOMIAO/deep-learning-for-image-processing/tree/master/data_set
bilbil:
6.2 使用pytorch搭建ResNet并基于迁移学习训练_哔哩哔哩_bilibili
参考的拆分讲解:
pytorch图像分类篇:6. ResNet网络结构详解与迁移学习简介_fun1024-CSDN博客_resnet网络结构
一、数据处理
项目文件夹为Project2,使用的是五种花朵的数据集,首先有spilt_data的代码将已经分好文件夹的数据集分类成测试集和训练集。Project2下建data_set文件夹,data_set下文件目录为:
1.——spilt_data.py #用于分类训练集和测试集的代码
2——-flower_data #已经分好文件夹的数据
2.1————–flower_photos
2.1.1——————-daisy
2.1.2——————-dandelion
2.1.3——————-roses
2.1.4——————-sunflowers
2.1.5——————-tulips
2.1.6——————-LICENSE.txt
Spilt_data的代码如下:
import os
from shutil import copy, rmtree
import random
#flower_data文件夹必须和spilt_data程序在同一级中

def mk_file(file_path: str):
    if os.path.exists(file_path):
        # 如果文件夹存在,则先删除原文件夹在重新创建
        rmtree(file_path)
    os.makedirs(file_path)


def main():
    # 保证随机可复现
    random.seed(0)

    # 将数据集中10%的数据划分到验证集中
    split_rate = 0.1

    # 指向你解压后的flower_photos文件夹
    cwd = os.getcwd()
    data_root = os.path.join(cwd, "position_data")
    origin_flower_path = os.path.join(data_root, "position_photos")
    assert os.path.exists(origin_flower_path), "path '{}' does not exist.".format(origin_flower_path)

    flower_class = [cla for cla in os.listdir(origin_flower_path)
                    if os.path.isdir(os.path.join(origin_flower_path, cla))]

    # 建立保存训练集的文件夹
    train_root = os.path.join(data_root, "train")
    mk_file(train_root)
    for cla in flower_class:
        # 建立每个类别对应的文件夹
        mk_file(os.path.join(train_root, cla))

    # 建立保存验证集的文件夹
    val_root = os.path.join(data_root, "val")
    mk_file(val_root)
    for cla in flower_class:
        # 建立每个类别对应的文件夹
        mk_file(os.path.join(val_root, cla))

    for cla in flower_class:
        cla_path = os.path.join(origin_flower_path, cla)
        images = os.listdir(cla_path)
        num = len(images)
        # 随机采样验证集的索引
        eval_index = random.sample(images, k=int(num*split_rate))
        for index, image in enumerate(images):
            if image in eval_index:
                # 将分配至验证集中的文件复制到相应目录
                image_path = os.path.join(cla_path, image)
                new_path = os.path.join(val_root, cla)
                copy(image_path, new_path)
            else:
                # 将分配至训练集中的文件复制到相应目录
                image_path = os.path.join(cla_path, image)
                new_path = os.path.join(train_root, cla)
                copy(image_path, new_path)
            print("\r[{}] processing [{}/{}]".format(cla, index+1, num), end="")  # processing bar
        print()

    print("processing done!")


if __name__ == '__main__':
    main()
运行完成后文件夹目录为:
Project2
—data_set #已经分好文件夹的数据集
1.——spilt_data.py #用于分类训练集和测试集的代码
2.——-flower_data
2.1————–flower_photos
2.1.1——————-daisy
2.1.2——————-dandelion
2.1.3——————-roses
2.1.4——————-sunflowers
2.1.5——————-tulips
2.1.6——————-LICENSE.txt
2.2————–train
2.2.1——————-daisy
2.2.2——————-dandelion
2.2.3——————-roses
2.2.4——————-sunflowers
2.2.5——————-tulips
2.3————–val
2.3.1——————-daisy
2.3.2——————-dandelion
2.3.3——————-roses
2.3.4——————-sunflowers
2.3.5——————-tulips
至此,完成数据集分类。
二、Model
由于只是使用,没有对其中过多了解,总之感谢开源的各位大佬!
import torch.nn as nn
import torch


# ResNet18/34的残差结构,用的是2个3x3的卷积
class BasicBlock(nn.Module):
    expansion = 1  # 残差结构中,主分支的卷积核个数是否发生变化,不变则为1

    def __init__(self, in_channel, out_channel, stride=1, downsample=None):  # downsample对应虚线残差结构
        super(BasicBlock, self).__init__()
        self.conv1 = nn.Conv2d(in_channels=in_channel, out_channels=out_channel,
                               kernel_size=3, stride=stride, padding=1, bias=False)
        self.bn1 = nn.BatchNorm2d(out_channel)
        self.relu = nn.ReLU()
        self.conv2 = nn.Conv2d(in_channels=out_channel, out_channels=out_channel,
                               kernel_size=3, stride=1, padding=1, bias=False)
        self.bn2 = nn.BatchNorm2d(out_channel)
        self.downsample = downsample

    def forward(self, x):
        identity = x
        if self.downsample is not None:  # 虚线残差结构,需要下采样
            identity = self.downsample(x)  # 捷径分支 short cut

        out = self.conv1(x)
        out = self.bn1(out)
        out = self.relu(out)

        out = self.conv2(out)
        out = self.bn2(out)

        out += identity
        out = self.relu(out)

        return out

# ResNet50/101/152的残差结构,用的是1x1+3x3+1x1的卷积
class Bottleneck(nn.Module):
    expansion = 4  # 残差结构中第三层卷积核个数是第一/二层卷积核个数的4倍

    def __init__(self, in_channel, out_channel, stride=1, downsample=None):
        super(Bottleneck, self).__init__()
        self.conv1 = nn.Conv2d(in_channels=in_channel, out_channels=out_channel,
                               kernel_size=1, stride=1, bias=False)  # squeeze channels
        self.bn1 = nn.BatchNorm2d(out_channel)
        # -----------------------------------------
        self.conv2 = nn.Conv2d(in_channels=out_channel, out_channels=out_channel,
                               kernel_size=3, stride=stride, bias=False, padding=1)
        self.bn2 = nn.BatchNorm2d(out_channel)
        # -----------------------------------------
        self.conv3 = nn.Conv2d(in_channels=out_channel, out_channels=out_channel * self.expansion,
                               kernel_size=1, stride=1, bias=False)  # unsqueeze channels
        self.bn3 = nn.BatchNorm2d(out_channel * self.expansion)
        self.relu = nn.ReLU(inplace=True)
        self.downsample = downsample

    def forward(self, x):
        identity = x
        if self.downsample is not None:
            identity = self.downsample(x)  # 捷径分支 short cut

        out = self.conv1(x)
        out = self.bn1(out)
        out = self.relu(out)

        out = self.conv2(out)
        out = self.bn2(out)
        out = self.relu(out)

        out = self.conv3(out)
        out = self.bn3(out)

        out += identity
        out = self.relu(out)

        return out


class ResNet(nn.Module):
    # block = BasicBlock or Bottleneck
    # block_num为残差结构中conv2_x~conv5_x中残差块个数,是一个列表
    def __init__(self, block, blocks_num, num_classes=1000, include_top=True):
        super(ResNet, self).__init__()
        self.include_top = include_top
        self.in_channel = 64

        self.conv1 = nn.Conv2d(3, self.in_channel, kernel_size=7, stride=2,
                               padding=3, bias=False)
        self.bn1 = nn.BatchNorm2d(self.in_channel)
        self.relu = nn.ReLU(inplace=True)
        self.maxpool = nn.MaxPool2d(kernel_size=3, stride=2, padding=1)
        self.layer1 = self._make_layer(block, 64, blocks_num[0])             # conv2_x
        self.layer2 = self._make_layer(block, 128, blocks_num[1], stride=2)  # conv3_x
        self.layer3 = self._make_layer(block, 256, blocks_num[2], stride=2)  # conv4_x
        self.layer4 = self._make_layer(block, 512, blocks_num[3], stride=2)  # conv5_x
        if self.include_top:
            self.avgpool = nn.AdaptiveAvgPool2d((1, 1))  # output size = (1, 1)
            self.fc = nn.Linear(512 * block.expansion, num_classes)

        for m in self.modules():
            if isinstance(m, nn.Conv2d):
                nn.init.kaiming_normal_(m.weight, mode='fan_out', nonlinearity='relu')

    # channel为残差结构中第一层卷积核个数
    def _make_layer(self, block, channel, block_num, stride=1):
        downsample = None

        # ResNet50/101/152的残差结构,block.expansion=4
        if stride != 1 or self.in_channel != channel * block.expansion:
            downsample = nn.Sequential(
                nn.Conv2d(self.in_channel, channel * block.expansion, kernel_size=1, stride=stride, bias=False),
                nn.BatchNorm2d(channel * block.expansion))

        layers = []
        layers.append(block(self.in_channel, channel, downsample=downsample, stride=stride))
        self.in_channel = channel * block.expansion

        for _ in range(1, block_num):
            layers.append(block(self.in_channel, channel))

        return nn.Sequential(*layers)

    def forward(self, x):
        x = self.conv1(x)
        x = self.bn1(x)
        x = self.relu(x)
        x = self.maxpool(x)

        x = self.layer1(x)
        x = self.layer2(x)
        x = self.layer3(x)
        x = self.layer4(x)

        if self.include_top:
            x = self.avgpool(x)
            x = torch.flatten(x, 1)
            x = self.fc(x)

        return x


def resnet34(num_classes=1000, include_top=True):
    return ResNet(BasicBlock, [3, 4, 6, 3], num_classes=num_classes, include_top=include_top)


def resnet101(num_classes=1000, include_top=True):
    return ResNet(Bottleneck, [3, 4, 23, 3], num_classes=num_classes, include_top=include_top)
三、Train
import torch
import torch.nn as nn
from torchvision import transforms, datasets
import json
import matplotlib.pyplot as plt
import os
import torch.optim as optim
from model import resnet34, resnet101


device = torch.device("cuda:0" if torch.cuda.is_available() else "cpu")
print(device)

data_transform = {
    "train": transforms.Compose([transforms.RandomResizedCrop(224),
                                 transforms.RandomHorizontalFlip(),
                                 transforms.ToTensor(),
                                 transforms.Normalize([0.485, 0.456, 0.406], [0.229, 0.224, 0.225])]),
    "val": transforms.Compose([transforms.Resize(256),
                               transforms.CenterCrop(224),
                               transforms.ToTensor(),
                               transforms.Normalize([0.485, 0.456, 0.406], [0.229, 0.224, 0.225])])}


data_root = os.path.abspath(os.path.join(os.getcwd(), "../.."))  # get data root path
image_path = data_root + "/pycharmProject/Project2/data_set/flower_data/"  # data set path 这里需要改,在这个路径里找train

train_dataset = datasets.ImageFolder(root=image_path+"train",
                                     transform=data_transform["train"])
train_num = len(train_dataset)

# {'daisy':0, 'dandelion':1, 'roses':2, 'sunflower':3, 'tulips':4}
flower_list = train_dataset.class_to_idx
cla_dict = dict((val, key) for key, val in flower_list.items())
# write dict into json file
json_str = json.dumps(cla_dict, indent=4)
with open('class_indices.json', 'w') as json_file:
    json_file.write(json_str)

batch_size = 16
train_loader = torch.utils.data.DataLoader(train_dataset,
                                           batch_size=batch_size, shuffle=True,
                                           num_workers=0)

validate_dataset = datasets.ImageFolder(root=image_path + "val",
                                        transform=data_transform["val"])
val_num = len(validate_dataset)
validate_loader = torch.utils.data.DataLoader(validate_dataset,
                                              batch_size=batch_size, shuffle=False,
                                              num_workers=0)

net = resnet34()
# load pretrain weights
model_weight_path = "./resnet34-pre.pth"
missing_keys, unexpected_keys = net.load_state_dict(torch.load(model_weight_path), strict=False)
# for param in net.parameters():
#     param.requires_grad = False
# change fc layer structure
inchannel = net.fc.in_features
net.fc = nn.Linear(inchannel, 5)
net.to(device)

loss_function = nn.CrossEntropyLoss()
optimizer = optim.Adam(net.parameters(), lr=0.0001)

best_acc = 0.0
save_path = './resNet34.pth'
for epoch in range(3):
    # train
    net.train()
    running_loss = 0.0
    for step, data in enumerate(train_loader, start=0):
        images, labels = data
        optimizer.zero_grad()
        logits = net(images.to(device))
        loss = loss_function(logits, labels.to(device))
        loss.backward()
        optimizer.step()

        # print statistics
        running_loss += loss.item()
        # print train process
        rate = (step+1)/len(train_loader)
        a = "*" * int(rate * 50)
        b = "." * int((1 - rate) * 50)
        print("\rtrain loss: {:^3.0f}%[{}->{}]{:.4f}".format(int(rate*100), a, b, loss), end="")
    print()

    # validate
    net.eval()
    acc = 0.0  # accumulate accurate number / epoch
    with torch.no_grad():
        for val_data in validate_loader:
            val_images, val_labels = val_data
            outputs = net(val_images.to(device))  # eval model only have last output layer
            # loss = loss_function(outputs, test_labels)
            predict_y = torch.max(outputs, dim=1)[1]
            acc += (predict_y == val_labels.to(device)).sum().item()
        val_accurate = acc / val_num
        if val_accurate > best_acc:
            best_acc = val_accurate
            torch.save(net.state_dict(), save_path)
        print('[epoch %d] train_loss: %.3f  test_accuracy: %.3f' %
              (epoch + 1, running_loss / step, val_accurate))

print('Finished Training')
四、predict and batch_predict
单张图片Predict:
import torch
from model import resnet34
from PIL import Image
from torchvision import transforms
import matplotlib.pyplot as plt
import json

data_transform = transforms.Compose(
    [transforms.Resize(256),
     transforms.CenterCrop(224),
     transforms.ToTensor(),
     transforms.Normalize([0.485, 0.456, 0.406], [0.229, 0.224, 0.225])])

# load image
img = Image.open("G:\\pycharmProject/Project2/tulip.jpg")
plt.imshow(img)
# [N, C, H, W]
img = data_transform(img)
# expand batch dimension
img = torch.unsqueeze(img, dim=0)

# read class_indict
try:
    json_file = open('./class_indices.json', 'r')
    class_indict = json.load(json_file)
except Exception as e:
    print(e)
    exit(-1)

# create model
model = resnet34(num_classes=5)
# load model weights
model_weight_path = "./resNet34.pth"
model.load_state_dict(torch.load(model_weight_path))
model.eval()
with torch.no_grad():
    # predict class
    output = torch.squeeze(model(img))
    predict = torch.softmax(output, dim=0)
    predict_cla = torch.argmax(predict).numpy()
print(class_indict[str(predict_cla)], predict[predict_cla].numpy())
plt.show()
batch predict:
import os
import json

import torch
from PIL import Image
from torchvision import transforms

from model import resnet34


def main():
    device = torch.device("cuda:0" if torch.cuda.is_available() else "cpu")

    data_transform = transforms.Compose(
        [transforms.Resize(256),
         transforms.CenterCrop(224),
         transforms.ToTensor(),
         transforms.Normalize([0.485, 0.456, 0.406], [0.229, 0.224, 0.225])])

    # load image
    # 指向需要遍历预测的图像文件夹
    imgs_root = "G:\pycharmProject\Project2\predict_batch\imgs"
    assert os.path.exists(imgs_root), f"file: '{imgs_root}' dose not exist."
    # 读取指定文件夹下所有jpg图像路径
    img_path_list = [os.path.join(imgs_root, i) for i in os.listdir(imgs_root) if i.endswith(".jpg")]

    # read class_indict
    json_path = './class_indices.json'
    assert os.path.exists(json_path), f"file: '{json_path}' dose not exist."

    json_file = open(json_path, "r")
    class_indict = json.load(json_file)

    # create model
    model = resnet34(num_classes=5).to(device)

    # load model weights
    weights_path = "./resNet34.pth"
    assert os.path.exists(weights_path), f"file: '{weights_path}' dose not exist."
    model.load_state_dict(torch.load(weights_path, map_location=device))

    # prediction
    model.eval()
    batch_size = 8  # 每次预测时将多少张图片打包成一个batch
    with torch.no_grad():
        for ids in range(0, len(img_path_list) // batch_size):
            img_list = []
            for img_path in img_path_list[ids * batch_size: (ids + 1) * batch_size]:
                assert os.path.exists(img_path), f"file: '{img_path}' dose not exist."
                img = Image.open(img_path)
                img = data_transform(img)
                img_list.append(img)

            # batch img
            # 将img_list列表中的所有图像打包成一个batch
            batch_img = torch.stack(img_list, dim=0)
            # predict class
            output = model(batch_img.to(device)).cpu()
            predict = torch.softmax(output, dim=1)
            probs, classes = torch.max(predict, dim=1)

            for idx, (pro, cla) in enumerate(zip(probs, classes)):
                print("image: {}  class: {}  prob: {:.3}".format(img_path_list[ids * batch_size + idx],
                                                                 class_indict[str(cla.numpy())],
                                                                 pro.numpy()))


if __name__ == '__main__':
    main()
五、下载预训练的模型参数
下载地址如下所示,浏览器直接跳转下载就行。自己用的是resnet34就足够了。
model_urls = {
    'resnet18': 'https://download.pytorch.org/models/resnet18-5c106cde.pth',
    'resnet34': 'https://download.pytorch.org/models/resnet34-333f7ec4.pth',
    'resnet50': 'https://download.pytorch.org/models/resnet50-19c8e357.pth',
    'resnet101': 'https://download.pytorch.org/models/resnet101-5d3b4d8f.pth',
    'resnet152': 'https://download.pytorch.org/models/resnet152-b121ed2d.pth',
    'resnext50_32x4d': 'https://download.pytorch.org/models/resnext50_32x4d-7cdf4587.pth',
    'resnext101_32x8d': 'https://download.pytorch.org/models/resnext101_32x8d-8ba56ff5.pth',
    'wide_resnet50_2': 'https://download.pytorch.org/models/wide_resnet50_2-95faca4d.pth',
    'wide_resnet101_2': 'https://download.pytorch.org/models/wide_resnet101_2-32ee1156.pth',
}
下载好的文件更名为resnet34-pre.pth
六、检查所有需要的程序、数据集和模型参数
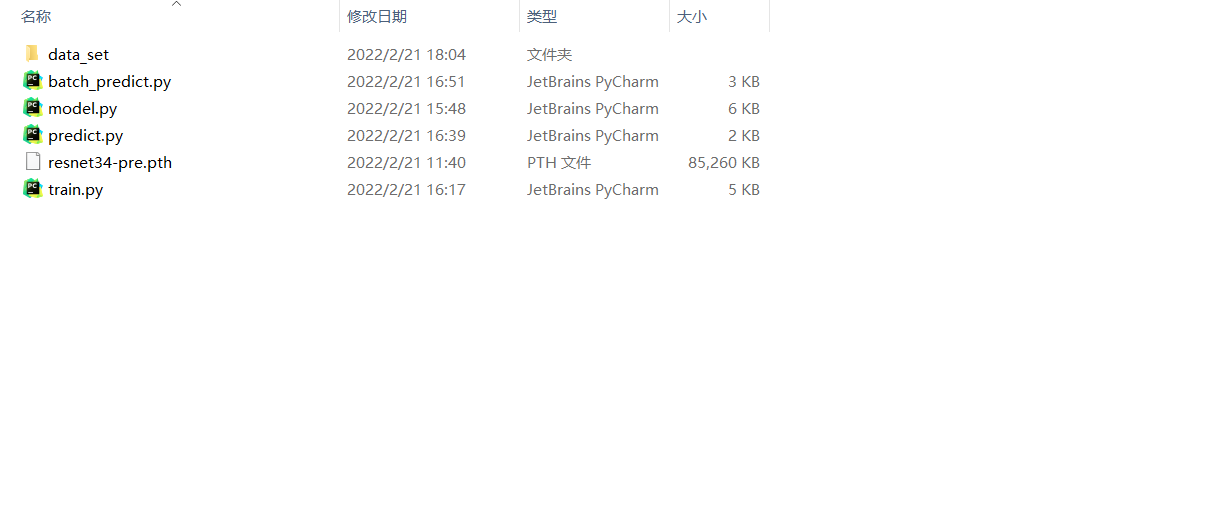

打开pycharm,打开各py文件,点击train,右键运行,训练完毕之后,切换到predict.py程序。预测之前选取测试集中的一张图片,命名为tulip.jpg;如果是批预测,选取测试集中的各类别的图片组成文件夹predict_batch/imgs/ ….. .jpg.
预测程序中写的路径为:
G:\\pycharmProject/Project2/tulip.jpg
批预测程序的路径为:
G:\\pycharmProject\Project2\predict_batch\imgs
注意这里需要修改。
七、运行和结果
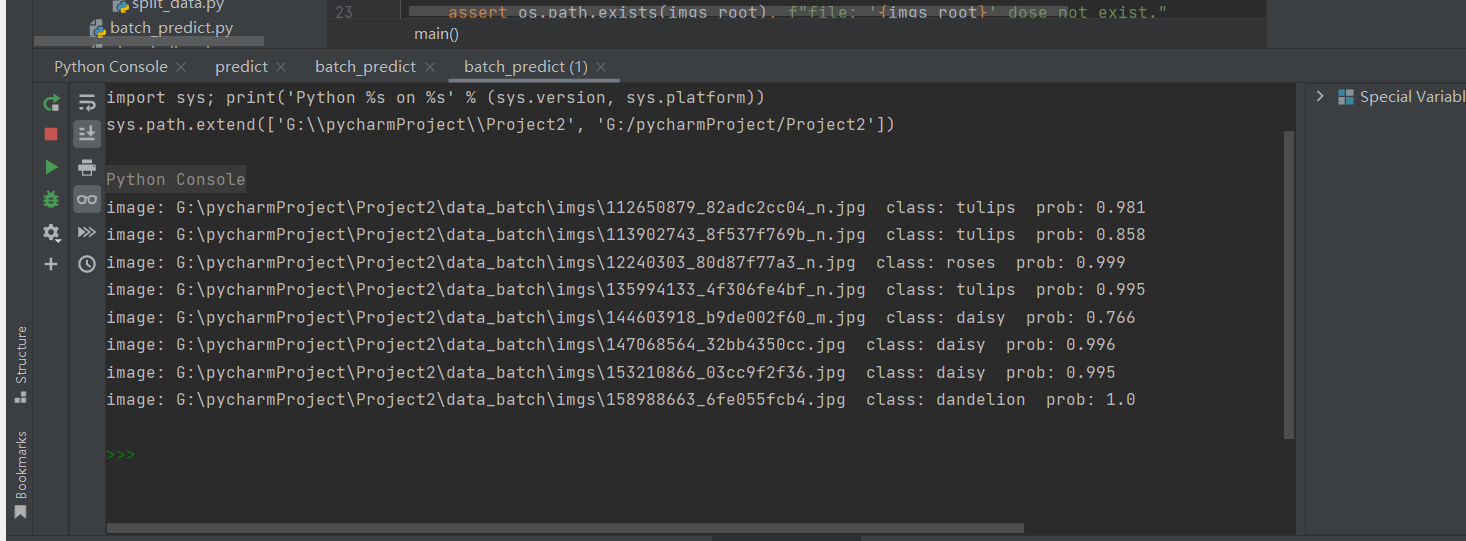
这样应该算是预测成功了。
发布者:全栈程序员-用户IM,转载请注明出处:https://javaforall.cn/188537.html原文链接:https://javaforall.cn
【正版授权,激活自己账号】: Jetbrains全家桶Ide使用,1年售后保障,每天仅需1毛
【官方授权 正版激活】: 官方授权 正版激活 支持Jetbrains家族下所有IDE 使用个人JB账号...
