大家好,又见面了,我是你们的朋友全栈君。如果您正在找激活码,请点击查看最新教程,关注关注公众号 “全栈程序员社区” 获取激活教程,可能之前旧版本教程已经失效.最新Idea2022.1教程亲测有效,一键激活。
Jetbrains全系列IDE稳定放心使用
一、简介
之所以叫温故而知新,是因为将这两个工具结合起来作为单元测试工具的想法在上一个项目中应用了,好像还没有人将这两种工具结合使用,或者没有写成博客供大家参考,现在重新温习下将想法写下来。
gtest单元测试工具接触过的人都很熟悉了,它是一款google提供的强大的测试框架,测试案例的编写也比较简单,gtest案例的编写可以参考系列博文:http://www.cnblogs.com/coderzh/archive/2009/03/31/1426758.html。
lcov代码覆盖率统计工具,是gcov的延伸版本,提供程序实际执行的信息(统计某行代码被执行的次数),其基于HTML的输出通过浏览器以清晰的图表形式呈现覆盖率统计结果。locv相关详细介绍可以参考博文:https://my.oschina.net/alphajay/blog/33725。
二、gtest环境的搭建步骤:
(1)下载源码包搭建:
参考博文:http://www.linuxidc.com/Linux/2015-05/116894.htm。
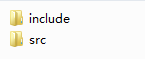
我是按照这篇博客的步骤下载源码将多余的目录删除最后在gtest_tool目录下只剩下两个核心代码目录:

(2)直接输入命令安装: sudo apt-get install libgtest-dev
三、lcov工具的安装:
(1)下载源码包:http://ltp.sourceforge.net/coverage/lcov.php
(2)解压:tar xvzf lcov-1.11.tar.gz
(3)cd lcov-1.11
(4)如果是交叉编译移植到实机上需要执行这步:
修改文件:lcov-1.11/bin/genifo
vim lcov-1.11/bin/genifo
然后将第65行的:our $gcov_tool = “gcov” 改为自己的交叉编译器的gcov
比如我的交叉编译工具是/usr/local/arm/4.3.2/bin/arm-linux-gcc
那么就改为:our $gcov_tool = “/usr/local/arm/4.3.2/bin/arm-linux-gcov”
可以使用:find / -name *gcov来查找下自己的交叉编译工具在什么目录下
(5)sudo make install
注:除了下载源码包还可以执行下面两条命令安装:
sudo apt-get install lcov
sudo apt-get install ggcov
四、将两者结合使用实例
环境搭建好后可以开心得玩耍了 哈哈
(1)首先了解下我需要测试的代码模型:
代码到我的github上下载:https://github.com/fanchenxinok/gtest-lcov
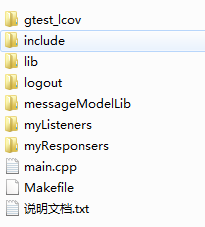
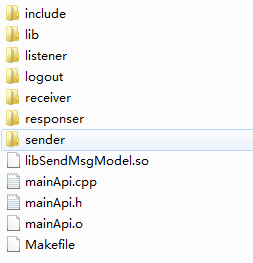
说明:这是我自己写的简单的消息传递及监听模型测试代码。messageModelLib目录是消息传递模型的核心代码,
编译出来一个.so库供该目录的其他模块使用。messageModelLib目录内容如下:
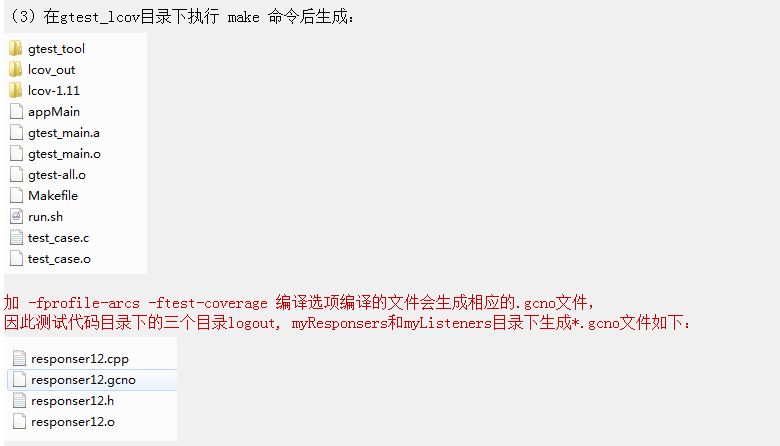
(2)重点是gtest_lcov目录,该目录是专门用来进行单元测试的,目录内容如下:
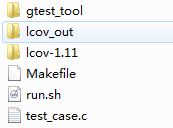
说明:gtest_tool 为gtest源码的删减版,lcov-1.11为lcov源码包编译后的目录,lcov_out为自己建的目录用来存放lcov工具统计出的结果的输出。test_case.c为编写的测试用例,内容如下:
// Copyright 2005, Google Inc.
// All rights reserved.
//
// Redistribution and use in source and binary forms, with or without
// modification, are permitted provided that the following conditions are
// met:
//
//     * Redistributions of source code must retain the above copyright
// notice, this list of conditions and the following disclaimer.
//     * Redistributions in binary form must reproduce the above
// copyright notice, this list of conditions and the following disclaimer
// in the documentation and/or other materials provided with the
// distribution.
//     * Neither the name of Google Inc. nor the names of its
// contributors may be used to endorse or promote products derived from
// this software without specific prior written permission.
//
// THIS SOFTWARE IS PROVIDED BY THE COPYRIGHT HOLDERS AND CONTRIBUTORS
// "AS IS" AND ANY EXPRESS OR IMPLIED WARRANTIES, INCLUDING, BUT NOT
// LIMITED TO, THE IMPLIED WARRANTIES OF MERCHANTABILITY AND FITNESS FOR
// A PARTICULAR PURPOSE ARE DISCLAIMED. IN NO EVENT SHALL THE COPYRIGHT
// OWNER OR CONTRIBUTORS BE LIABLE FOR ANY DIRECT, INDIRECT, INCIDENTAL,
// SPECIAL, EXEMPLARY, OR CONSEQUENTIAL DAMAGES (INCLUDING, BUT NOT
// LIMITED TO, PROCUREMENT OF SUBSTITUTE GOODS OR SERVICES; LOSS OF USE,
// DATA, OR PROFITS; OR BUSINESS INTERRUPTION) HOWEVER CAUSED AND ON ANY
// THEORY OF LIABILITY, WHETHER IN CONTRACT, STRICT LIABILITY, OR TORT
// (INCLUDING NEGLIGENCE OR OTHERWISE) ARISING IN ANY WAY OUT OF THE USE
// OF THIS SOFTWARE, EVEN IF ADVISED OF THE POSSIBILITY OF SUCH DAMAGE.

// A sample program demonstrating using Google C++ testing framework.
//
// Author: wan@google.com (Zhanyong Wan)


// This sample shows how to write a simple unit test for a function,
// using Google C++ testing framework.
//
// Writing a unit test using Google C++ testing framework is easy as 1-2-3:


// Step 1. Include necessary header files such that the stuff your
// test logic needs is declared.
//
// Don't forget gtest.h, which declares the testing framework.

#include <limits.h>
#include "gtest/gtest.h"

#include "myComDef.h"
#include "responser12.h"
#include "listener12.h"

extern "C" {
	#include "log_out.h"
}


// Step 2. Use the TEST macro to define your tests.
//
// TEST has two parameters: the test case name and the test name.
// After using the macro, you should define your test logic between a
// pair of braces.  You can use a bunch of macros to indicate the
// success or failure of a test.  EXPECT_TRUE and EXPECT_EQ are
// examples of such macros.  For a complete list, see gtest.h.
//
// <TechnicalDetails>
//
// In Google Test, tests are grouped into test cases.  This is how we
// keep test code organized.  You should put logically related tests
// into the same test case.
//
// The test case name and the test name should both be valid C++
// identifiers.  And you should not use underscore (_) in the names.
//
// Google Test guarantees that each test you define is run exactly
// once, but it makes no guarantee on the order the tests are
// executed.  Therefore, you should write your tests in such a way
// that their results don't depend on their order.
//
// </TechnicalDetails>


// Tests Factorial().

// Tests factorial of negative numbers.

static responser1 res1_instance;
static responser2 res2_instance;

static listener1 lis1_instance;
static listener2 lis2_instance;


TEST(apl_registResponserTest, isTrue)
{
	ASSERT_EQ(TRUE, apl_registResponser(RES1, RES_MID, &res1_instance));
       ASSERT_EQ(TRUE, apl_registResponser(RES2, RES_HIGH, &res2_instance));
}


TEST(apl_registListenerTest, isTrue)
{
    ASSERT_EQ(TRUE, apl_registListener(RES1, &res1_instance, &lis1_instance));
    ASSERT_EQ(TRUE, apl_registListener(RES2, &res2_instance, &lis2_instance));
}


TEST(loop_send_test, isRight)
{
    int n = 0;
    while(n < 10)
    {
        MSG_INFO msgInfo;
        char msgData[128];

        msgInfo.resType = RES1;  //设置动作对象
        msgInfo.msg.eventID = R1_FUN1; //设置应该做什么动作
        EXPECT_EQ(TRUE, apl_sendMessage(RES1, R1_FUN1, msgData)); //发送开始消息及动作参数

        //apl_unRegistResponser(RES1);

        msgInfo.msg.eventID = R1_FUN2;
        int a = 10, b = 122;
        apl_msgPacker(msgData,sizeof(int), &a,sizeof(int), &b, -1);
        EXPECT_EQ(TRUE, apl_sendMessage(RES1, R1_FUN2, msgData));

        msgInfo.resType = RES2;
        msgInfo.msg.eventID = R2_FUN1;
        double c = 4.23, d = 2.32;
        apl_msgPacker(msgData,sizeof(double), &c,sizeof(double), &d, -1);
        EXPECT_EQ(TRUE, apl_sendMessage(RES2, R2_FUN1, msgData));

        msgInfo.msg.eventID = R2_FUN2;
        a = 20;
        b = 30;
        apl_msgPacker(msgData,sizeof(int), &a,sizeof(int), &b, -1);
        EXPECT_EQ(TRUE, apl_sendMessage(RES2, R2_FUN2, msgData));

        sleep(1);
        ++n;
    }
}


// Step 3. Call RUN_ALL_TESTS() in main().
//
// We do this by linking in src/gtest_main.cc file, which consists of
// a main() function which calls RUN_ALL_TESTS() for us.
//
// This runs all the tests you've defined, prints the result, and
// returns 0 if successful, or 1 otherwise.
//
// Did you notice that we didn't register the tests?  The
// RUN_ALL_TESTS() macro magically knows about all the tests we
// defined.  Isn't this convenient?
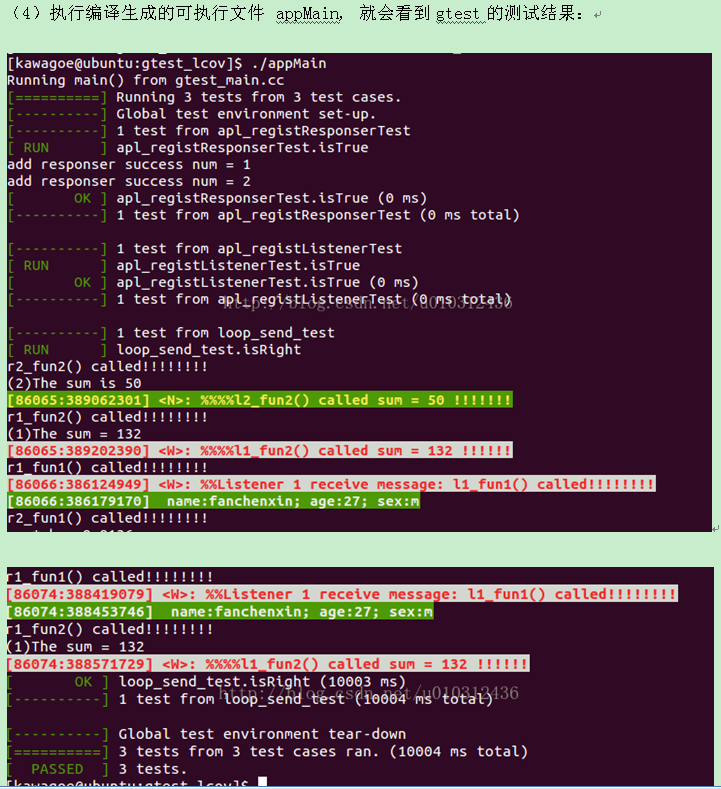
主要测试三个case,消息回应者、对应监听器的注册和消息的传递和监听。
编写好test_case.c以后文件以后,关键的关键就是makefile的编写了,我的makefile是gtest源码包example测试makefile基础上修改的,内容如下:
# A sample Makefile for building Google Test and using it in user
# tests. Please tweak it to suit your environment and project. You
# may want to move it to your project’s root directory.
#
# SYNOPSIS:
#
# make [all] – makes everything.
# make TARGET – makes the given target.
# make clean – removes all files generated by make.
# Please tweak the following variable definitions as needed by your
# project, except GTEST_HEADERS, which you can use in your own targets
# but shouldn’t modify.
# Points to the root of Google Test, relative to where this file is.
# Remember to tweak this if you move this file.
GTEST_DIR = ./gtest_tool #gtest 源码所在目录
XX = g++
CC = gcc
# Where to find user code.
USER_DIR = .. #测试代码所在目录
# Flags passed to the preprocessor.
# Set Google Test’s header directory as a system directory, such that
# the compiler doesn’t generate warnings in Google Test headers.
CPPFLAGS += -isystem $(GTEST_DIR)/include
# Flags passed to the C++ compiler.
CXXFLAGS += -g -Wall -Wextra -pthread
CXXFLAGS2 += -g -Wall -Wextra -pthread -fprofile-arcs -ftest-coverage #多了两个编译选项
# All tests produced by this Makefile. Remember to add new tests you
# created to the list.
TARGET = appMain
# the link library you should change according to your need
LINK_LIB = -L$(USER_DIR)/lib -lSendMsgModel -lpthread -lrt
# All Google Test headers. Usually you shouldn’t change this
# definition.
GTEST_HEADERS = $(GTEST_DIR)/include/gtest/*.h \
$(GTEST_DIR)/include/gtest/internal/*.h
# House-keeping build targets.
all : $(TARGET)
# Builds gtest.a and gtest_main.a.
# Usually you shouldn’t tweak such internal variables, indicated by a
# trailing _.
GTEST_SRCS_ = $(GTEST_DIR)/src/*.cc $(GTEST_DIR)/src/*.h $(GTEST_HEADERS)
# For simplicity and to avoid depending on Google Test’s
# implementation details, the dependencies specified below are
# conservative and not optimized. This is fine as Google Test
# compiles fast and for ordinary users its source rarely changes.
gtest-all.o : $(GTEST_SRCS_)
g++ $(CPPFLAGS) -I$(GTEST_DIR) -c \
$(GTEST_DIR)/src/gtest-all.cc
gtest_main.o : $(GTEST_SRCS_)
g++ $(CPPFLAGS) -I$(GTEST_DIR) -c \
$(GTEST_DIR)/src/gtest_main.cc
gtest.a : gtest-all.o
$(AR) $(ARFLAGS) $@ $^
gtest_main.a : gtest-all.o gtest_main.o
$(AR) $(ARFLAGS) $@ $^
# Builds a sample test. A test should link with either gtest.a or
# gtest_main.a, depending on whether it defines its own main()
# function.
XX_SOURCES = $(wildcard $(USER_DIR)/myListeners/*.cpp $(USER_DIR)/myResponsers/*.cpp)
CC_SOURCES = $(wildcard $(USER_DIR)/logout/*.c)
XX_OBJECTS = $(patsubst %.cpp,%.o,$(XX_SOURCES))
CC_OBJECTS = $(patsubst %.c,%.o,$(CC_SOURCES))
INCLUDE_DIRS = -I$(USER_DIR)/include -I$(USER_DIR)/myListeners -I$(USER_DIR)/myResponsers -I$(USER_DIR)/logout
TEST_CASE_O = ./test_case.o #gtest 测试案例
$(TEST_CASE_O) : %.o : %.c
$(XX) -c $(CPPFLAGS) $< -o $@ $(INCLUDE_DIRS)
$(CC_OBJECTS) : %.o : %.c
$(CC) -c $(CXXFLAGS2) $< -o $@ $(INCLUDE_DIRS) #需要用lcov查看哪个文件的代码覆盖率,编译的时候就加上-fprofile-arcs -ftest-coverage编译选项
$(XX_OBJECTS) : %.o : %.cpp
$(XX) -c $(CXXFLAGS2) $< -o $@ $(INCLUDE_DIRS)
$(TARGET) : $(XX_OBJECTS) $(CC_OBJECTS) $(TEST_CASE_O) gtest_main.a
$(XX) $(CXXFLAGS2) $^ -o $@ $(LINK_LIB)
#删除代码目录的 *.gcda,*.gcno和*.o文件
SUBDIRS = $(USER_DIR)/myListeners $(USER_DIR)/myResponsers $(USER_DIR)/logout
GCDA_FILES = $(foreach dir, $(SUBDIRS), $(wildcard $(dir)/*.gcda))
GCNO_FILES = $(foreach dir, $(SUBDIRS), $(wildcard $(dir)/*.gcno))
OBJS_FILES = $(foreach dir, $(SUBDIRS), $(wildcard $(dir)/*.o))
clean :
rm -rf $(TARGET) gtest.a gtest_main.a *.o *.gcno *.gcda *.info lcov_out/* \
$(GCDA_FILES) $(GCNO_FILES) $(OBJS_FILES)
执行完后也会在生成gcon文件的目录下生成gcda文件。
(6)最后把测试的命令(1~5)命令写到run.sh脚本里,执行./run.sh就ok了。
#! /bin/bash
cd ..
make clean
cd ./gtest_lcov
make clean
sudo rm -rf ./lcov_out/*
make
./appMain
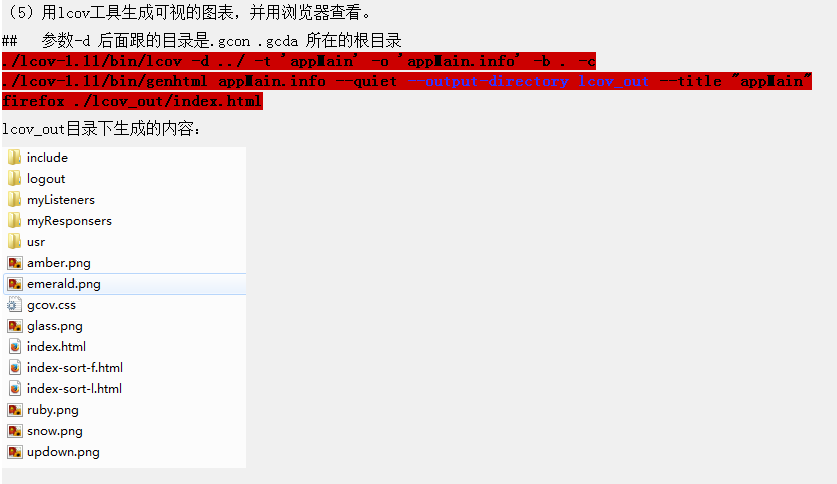
./lcov-1.11/bin/lcov -d ../ -t ‘appMain’ -o’appMain.info’ -b . -c
./lcov-1.11/bin/genhtml appMain.info –quiet –output-directory lcov_out–title “appMain”
firefox ./lcov_out/index.html
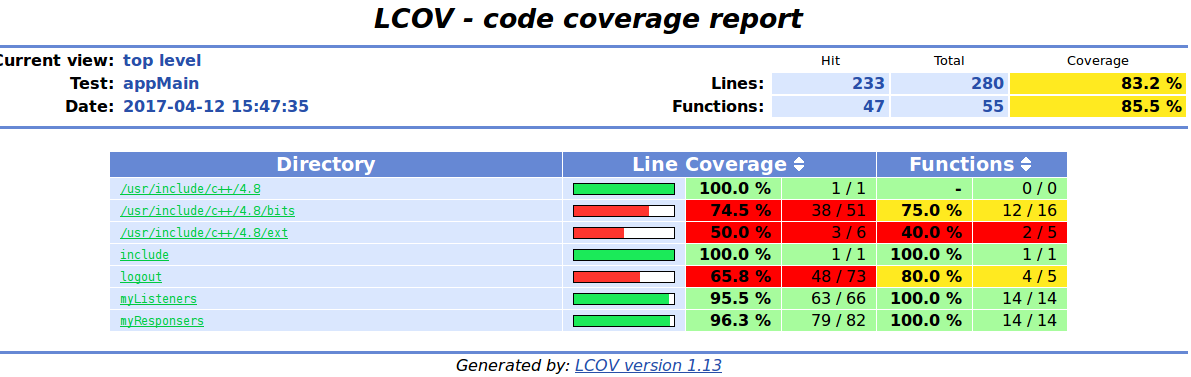
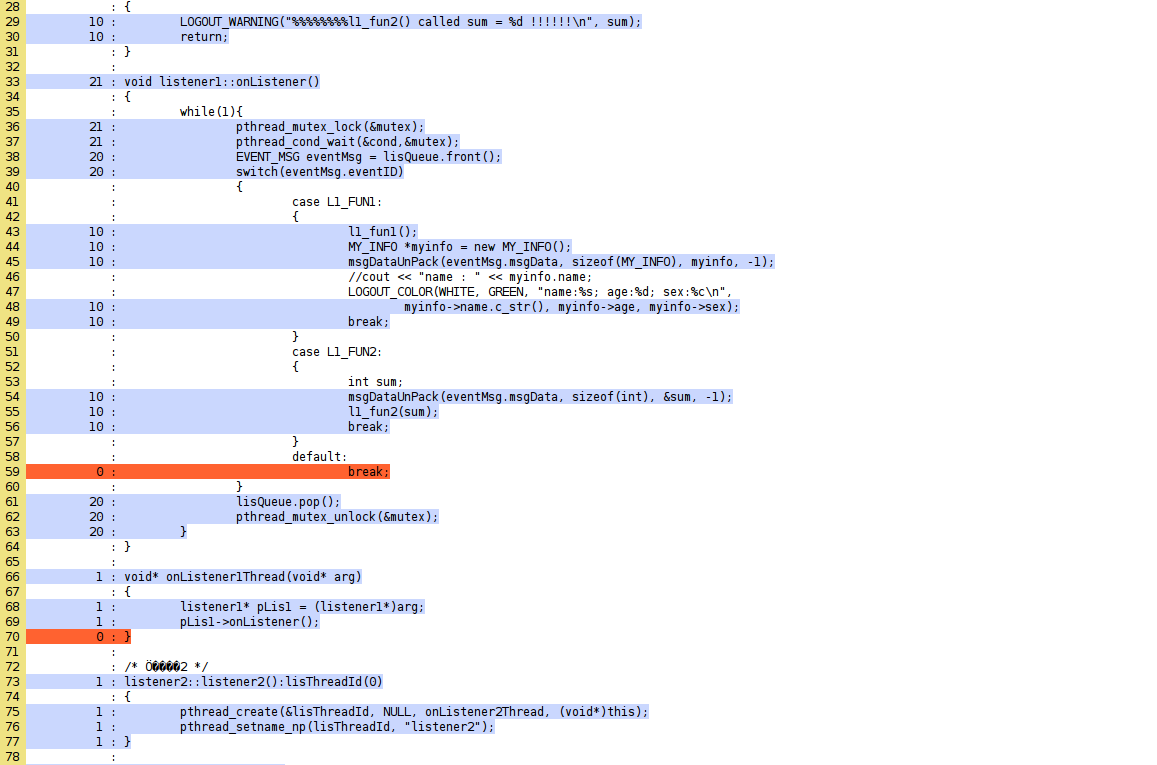
(7)覆盖率统计图表:
至此,gtest单元测试工具和lcov覆盖率统计工具的结合使用介绍完毕,共同学习进步。
代码github仓库:https://github.com/fanchenxinok/gtest-lcov
2022/6/20: 更新run.sh脚本,将不需要关心覆盖率的头文件去掉。
发布者:全栈程序员-用户IM,转载请注明出处:https://javaforall.cn/187834.html原文链接:https://javaforall.cn
【正版授权,激活自己账号】: Jetbrains全家桶Ide使用,1年售后保障,每天仅需1毛
【官方授权 正版激活】: 官方授权 正版激活 支持Jetbrains家族下所有IDE 使用个人JB账号...
