大家好,又见面了,我是你们的朋友全栈君。如果您正在找激活码,请点击查看最新教程,关注关注公众号 “全栈程序员社区” 获取激活教程,可能之前旧版本教程已经失效.最新Idea2022.1教程亲测有效,一键激活。
Jetbrains全系列IDE稳定放心使用
RST 和 Markdown
关键词: vscode rst md sphinx 开发环境
无论是写博客还是相关技术文档,都或多或少会接触到文档文本的编辑,txt不足以满足我们的需求,rst和md文档就应运而生。
本博客系列文档主要使用rst文档编写,也有部分md文档,rst文档预览以及文档编译使用到Sphinx和ReadTheDocs,
编辑器使用vscode,vscode配置参考这里。
主要内容:
- sphinx 环境配置
- sphinx 基本使用
- 文档格式转换
- rst 语法
- md 语法
文档参考:
- Sphinx 使用手册 https://zh-sphinx-doc.readthedocs.io/en/latest/index.html
- Sphinx 主题 http://sphinx-themes.org
- readthedocs 在线托管平台 https://readthedocs.org
- pandoc 文档格式转换工具 https://pandoc.org/installing.html
- rst 转换为 markdown 格式 https://www.cnblogs.com/azureology/p/13438004.html
- rst 官方语法教程 https://zh-sphinx-doc.readthedocs.io/en/latest/rest.html
- 野火 rst 语法教程 https://ebf-contribute-guide.readthedocs.io/zh_CN/latest/rest-syntax/base-syntax.html
- csdn博客模板-系列文章模板
最新地址: https://taotaodiy-linux.readthedocs.io/en/latest/env/rstRule.html
sphinx 环境配置
首先需要安装 vscode和安装插件reStructuredText
接着配置python环境
然后安装 sphinx
pip install sphinx
sphinx 使用
这里演示使用 sphinx 创建一个全新的sphinx工程。
sphinx-quickstart
新建目录 taotaodiy,新建一个 git 仓库,参考git使用。 当然也可以是空目录。然后在该目录下载执行sphinx-quickstart。
Windows可以使用cmd,先切换到该目录再执行sphinx-quickstart,也可以使用VSCode的终端。
Ubuntu就很容易了,命令行直接执行。输出如下:
root@bluseli:/home/share/taotaodiy# sphinx-quickstart
欢迎使用 Sphinx 3.2.1 快速配置工具。

Please enter values for the following settings (just press Enter to
accept a default value, if one is given in brackets).

Selected root path: .

You have two options for placing the build directory for Sphinx output.
Either, you use a directory "_build" within the root path, or you separate
"source" and "build" directories within the root path.
> 独立的源文件和构建目录(y/n) [n]: Y

The project name will occur in several places in the built documentation.
> 项目名称: taotaodiy
> 作者名称: bluseli
> 项目发行版本 []: 0

If the documents are to be written in a language other than English,
you can select a language here by its language code. Sphinx will then
translate text that it generates into that language.

For a list of supported codes, see
https://www.sphinx-doc.org/en/master/usage/configuration.html#confval-language.
> 项目语种 [en]: zh_CN

创建文件 /home/share/taotaodiy/source/conf.py。
创建文件 /home/share/taotaodiy/source/index.rst。
创建文件 /home/share/taotaodiy/Makefile。
创建文件 /home/share/taotaodiy/make.bat。

完成:已创建初始目录结构。

You should now populate your master file /home/share/taotaodiy/source/index.rst and create other documentation
source files. Use the Makefile to build the docs, like so:
make builder
where "builder" is one of the supported builders, e.g. html, latex or linkcheck.
执行成功,则配置成功。检查目录如下,其中:
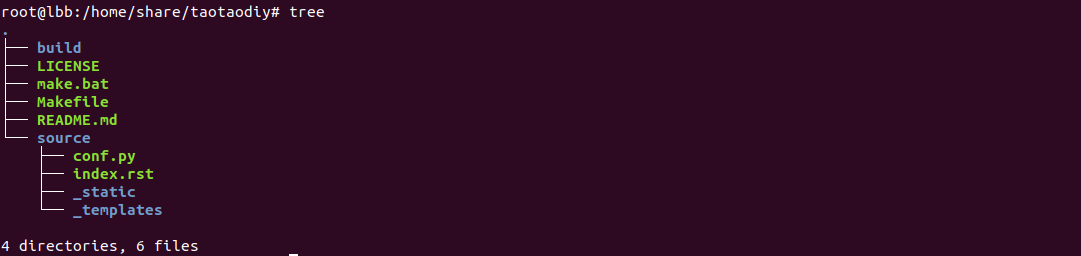

- build 为项目编译输出(例如产生的.html),
- make.bat 为 Windows 下的批处理文件,类似与 Makefile ,在 Windows
下编译项目。 - source 为项目源文件(也就是我们编辑的 rst 文档,最终会生成 .html ),
- conf.py 为项目配置文件,后面我们根据这个配置文件修改主题等等。
- index.rst 为所有 html 的索引页面。
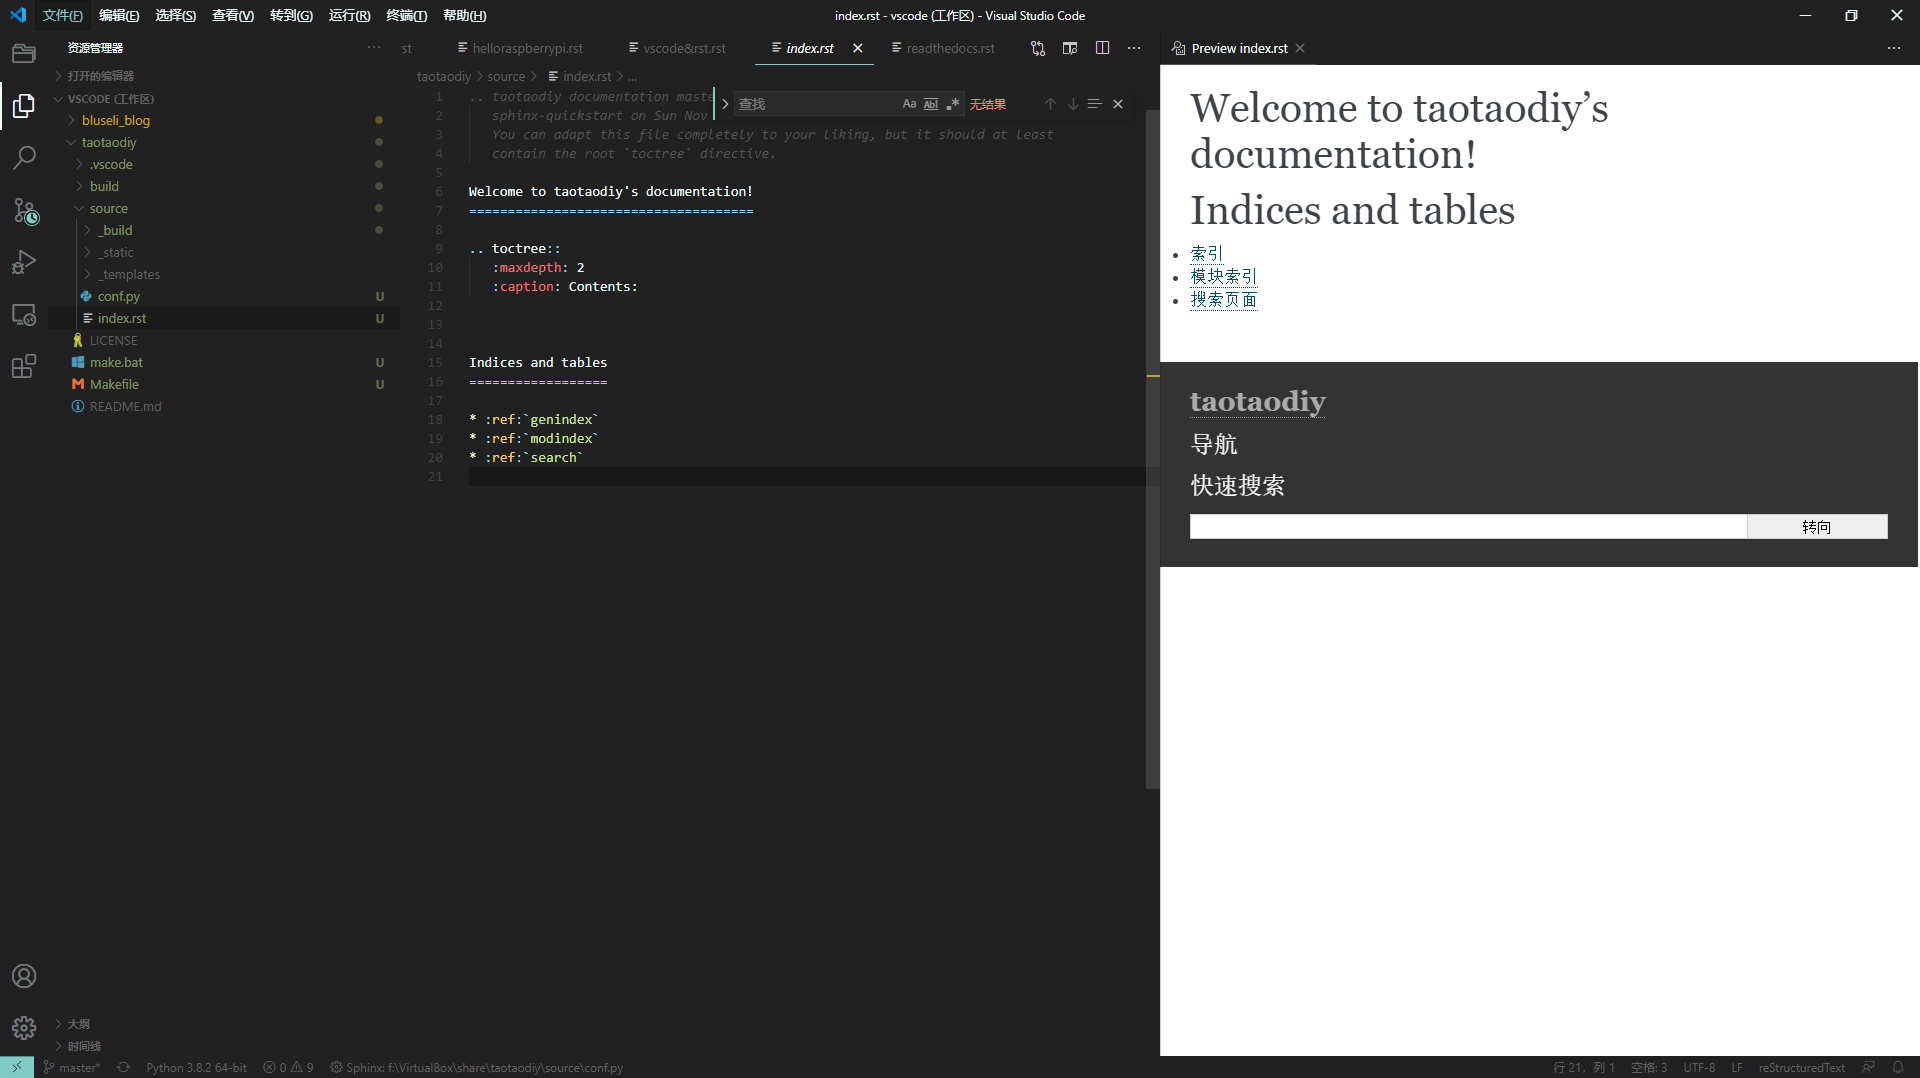
编译 rst 文件
Ubuntu 直接在目录中执行 make html,然后 sphinx 会根据 Makefile 和
conf.py 编译项目, Windows 则,可以利用 VSCode 直接运行
conf.py,便可以编译并预览。预览的插件即为上面推荐的 reStructuredText 。
sphinx 不仅仅可以将我们编写的 rst 文档编译成 html
,其他形式的文件同样可以,具体看如下参数。
root@bluseli:/home/share/taotaodiy# make
Sphinx v3.2.1
Please use 'make target' where target is one of
html        to make standalone HTML files
dirhtml     to make HTML files named index.html in directories
singlehtml  to make a single large HTML file
pickle      to make pickle files
json        to make JSON files
htmlhelp    to make HTML files and an HTML help project
qthelp      to make HTML files and a qthelp project
devhelp     to make HTML files and a Devhelp project
epub        to make an epub
latex       to make LaTeX files, you can set PAPER=a4 or PAPER=letter
latexpdf    to make LaTeX and PDF files (default pdflatex)
latexpdfja  to make LaTeX files and run them through platex/dvipdfmx
text        to make text files
man         to make manual pages
texinfo     to make Texinfo files
info        to make Texinfo files and run them through makeinfo
gettext     to make PO message catalogs
changes     to make an overview of all changed/added/deprecated items
xml         to make Docutils-native XML files
pseudoxml   to make pseudoxml-XML files for display purposes
linkcheck   to check all external links for integrity
doctest     to run all doctests embedded in the documentation (if enabled)
coverage    to run coverage check of the documentation (if enabled)
编译 html
root@bluseli:/home/share/taotaodiy# make html
正在运行 Sphinx v3.2.1
正在加载翻译 [zh_CN]... 完成
创建输出目录... 完成
构建 [mo]: 0 个 po 文件的目标文件已过期
构建 [html]: 1 个源文件的目标文件已过期
更新环境: [新配置] 已添加 1,0 已更改,0 已移除
阅读源... [100%] index
查找当前已过期的文件... 没有找到
pickling环境... 完成
检查一致性... 完成
准备文件... 完成
写入输出... [100%] index
generating indices...  genindex完成
writing additional pages...  search完成
复制静态文件... ... 完成
copying extra files... 完成
dumping search index in Chinese (code: zh)... 完成
dumping object inventory... 完成
构建 成功.

HTML 页面保存在 build/html 目录。
编译成功VSCode便可预览效果。查看 build
目录,会发现生成了很多文件。找到其中 index.html
使用浏览器打开同样可以看到效果。
Windows效果
Ubuntu效果
[外链图片转存失败,源站可能有防盗链机制,建议将图片保存下来直接上传(img-80yytR7O-1621216433113)(https://taotaodiy-linux.readthedocs.io/en/latest/_images/createSphinx003.png)]
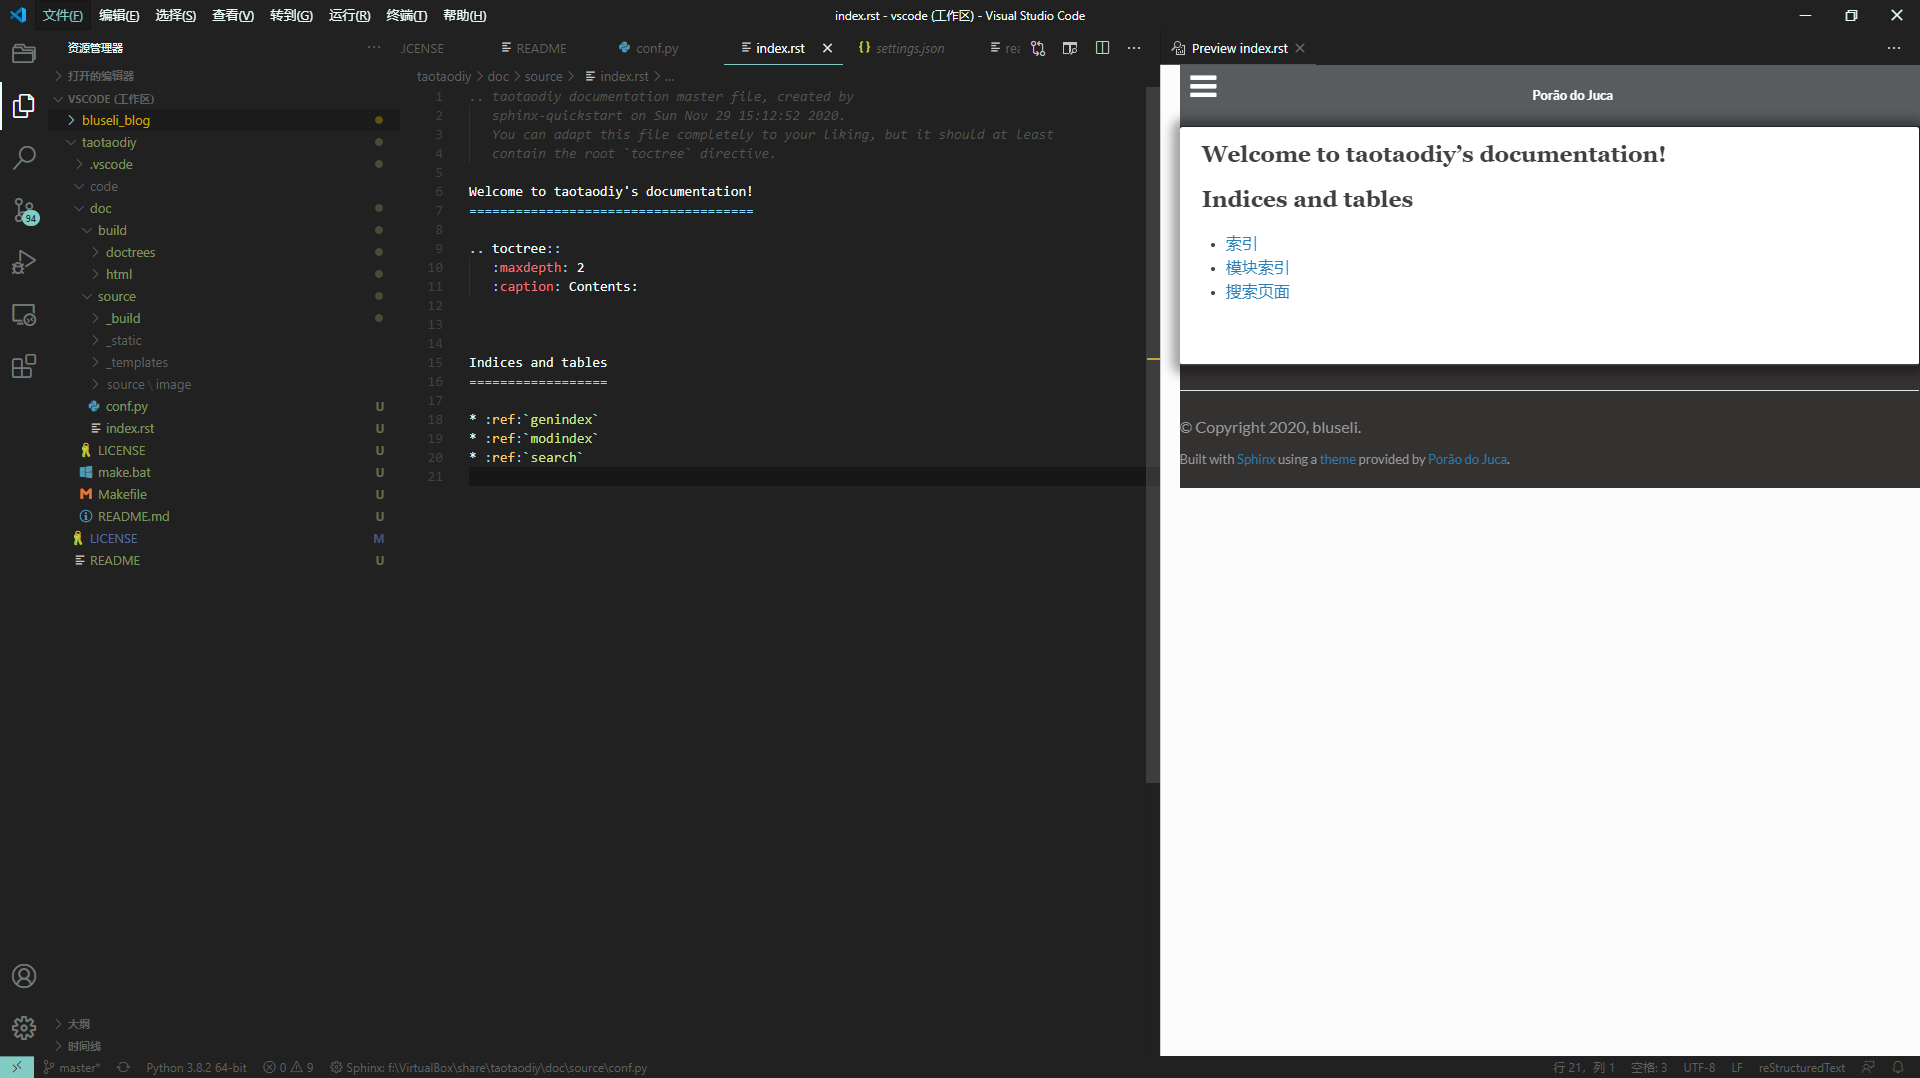
添加主题和文档插件
sphinx 支持很多中主题,这个网址可以选择你喜欢的 主题。
我在这里演示如何使用 sphinx-pdj-theme
这个主题。 首先找到在这个主题的 conf.py,是的,可以直接将该文件内容复制到你的 conf.py 中。
对比我们 conf.py 和预设主题的 conf.py,如下代码不相同。只需替换掉我们的代码。
#---sphinx-themes-----
html_theme = 'sphinx_pdj_theme'
import sphinx_pdj_theme
html_theme_path = [sphinx_pdj_theme.get_html_theme_path()]
最后,还需要安装该主题。
pip install -i https://mirrors.aliyun.com/pypi/simple/ -U sphinx-pdj-theme
再次编译,即可
这里再推荐如下三个文档编辑能用到的插件。 sphinx 的插件。安装命令如下:
pip install -i https://mirrors.aliyun.com/pypi/simple/  -U sphinx_markdown_tables
pip install -i https://mirrors.aliyun.com/pypi/simple/  -U recommonmark
pip install -i https://mirrors.aliyun.com/pypi/simple/  -U sphinxprettysearchresults
在 conf.py 中添加如下代码即可启用。
extensions = [
    'sphinx.ext.autodoc',
    'sphinx.ext.napoleon',
    'sphinx.ext.mathjax',
    'recommonmark',
]
readthedocs在线托管
在托管平台注册账号,或者使用其他平台账号登陆。
在线托管平台。
进入主页,点击导入项目,添加其他项目。填入如下信息。
[外链图片转存失败,源站可能有防盗链机制,建议将图片保存下来直接上传(img-xGgPNlJ3-1621216433115)(https://taotaodiy-linux.readthedocs.io/en/latest/_images/createDoc001.png)]
直接下一步,build version。然后开始构建。如果出现问题,可以在这里查找
解决办法。
文档格式转换
rst 与 makedown 文档转换
Windows下载 msi安装包,直接安装。
Ubuntu使用命令安装 sudo apt install paandoc
手动转换命令: pandoc xxx.rst -f rst -t markdown -o xxx.md
PDF 文档转换
rst 语法
rst语法请参考 rst 官方手册 和 野火 rst 语法规范
野火sphinx文档规范

图片
.. image:: media/logo.png
    :align: center

代码引用
.. literalinclude:: ../../base_code/hello.c
    :caption: ../../base_code/hello.c
    :language: c
    :linenos:

类似docx的题注引用
.. literalinclude:: ../../base_code/hello.c
    :caption: ../../base_code/hello.c
    :language: c
    :name: 代码清单或自己起的引用名字
    :linenos:

引用的方式是使用 ":name:"定义的名字加下划线 "_",如:

代码清单或自己起的引用名字_

.. image:: ../media/rest-syntax/pic-video/logo.png
    :align: center
    :name: 野火logo

引用的方式是使用 ":name:"定义的名字加下划线 "_",如:

野火logo_

.. list-table:: Frozen Delights!
    :widths: 15 10 30
    :header-rows: 1
    :name: 测试表格

    * - Treat
    - Quantity
    - Description
    * - Albatross
    - 2.99
    - On a stick!
    * - Crunchy Frog
    - 1.49
    - If we took the bones out, it wouldn't be
        crunchy, now would it?
    * - Gannet Ripple
    - 1.99
    - On a stick!

引用的方式是使用 ":name:"定义的名字加下划线 "_",如:

测试表格_


首行          .. vim: syntax=rst

ReST基础语法

一级标题
==============================

二级标题 安装工具
~~~~~~~~~~~~~~~~~~~~~~~~~~~~~~

三级标题 实现方式二 i_cdev变量
------------------------------

四级标题
^^^^^^^^^^^^^^^^^^^^^^^^^^^^^^

五级标题
""""""""""""""""""""""""""""""

六级标题
******************************

**强调**

*斜体*

``monospace,会变色,具体作用不清楚``


无序列表
---------------------------
- hhhhhhhh
- hhhhhhhh
- hhhhhhhh
- hhhhhhhh
- hhhhhhhh
- hhhhhhhh


有序列表
------------------------
支持数字、大小写字母和罗马数字

1. hhhhhhhh
#. hhhhhhhh
#. hhhhhhhh
#. hhhhhhhh
#. hhhhhhhh
#. hhhhhhhh

a. hhhhhhhh
#. hhhhhhhh
#. hhhhhhhh
#. hhhhhhhh
#. hhhhhhhh
#. hhhhhhhh


表格
------------------------
.. list-table:: Frozen Delights!
    :widths: 15 10 30
    :header-rows: 1

    * - Treat
    - Quantity
    - Description
    * - Albatross
    - 2.99
    - On a stick!
    * - Crunchy Frog
    - 1.49
    - If we took the bones out, it wouldn't be
        crunchy, now would it?
    * - Gannet Ripple
    - 1.99
    - On a stick!

=====  =====  =======
A      B      A and B
=====  =====  =======
False  False  False
True   False  False
False  True   False
True   True   True
=====  =====  =======

.. csv-table:: Frozen Delights!
    :header: "Treat", "Quantity", "Description"
    :widths: 15, 10, 30

    "Albatross", 2.99, "On a stick!"
    "Crunchy Frog", 1.49, "If we took the bones out, it wouldn't be
    crunchy, now would it?"
    "Gannet Ripple", 1.99, "On a stick!"

标志位

超链接
------------------------
直接嵌入网址:
`野火公司官网 <http://www.embedfire.com>`_

使用引用的方式把具体网址定义在其它地方: `野火公司官网`_

.. _野火公司官网: http://www.embedfire.com


图片引用
------------------------
.. _my-reference-label支持中文:

.. figure:: ../media/rest-syntax/pic-video/logo.png
    :alt: 野火logo
    :align: center

引用方式 :ref:`my-reference-label支持中文` 。


表格引用
------------------------
.. _拨码开关启动配置表:

.. table:: 拨码开关启动配置表

==== ====== ========== ==== == ===
编号 名称   NAND FLASH eMMC SD USB
==== ====== ========== ==== == ===
1    MODE0  0          0    0  1
2    MODE1  1          1    1  0
3    CFG1-4 1          0    0  X
4    CFG1-5 0          1    0  X
5    CFG1-6 0          1    1  X
6    CFG1-7 1          0    0  X
7    CFG2-3 0          1    0  X
8    CFG2-5 0          0    1  X
==== ====== ========== ==== == ===

引用示例 :ref:`拨码开关启动配置表` 。
自定义名称引用 :ref:`自定义名称 <拨码开关启动配置表>` 。


引用文档
------------------------
自定义引用文字

:doc:`引用本地的其它rst文档,rst后缀要省略,如about_us <../about_us>`

使用标题文字
:doc:`../about_us`


使用标签引用文档
------------------------
:ref:`自定义链接文字 <about_embedfire>`

:ref:`about_embedfire`


跨文档引用标题
------------------------
文档A
=============
Some Document
=============


Internal Headline
=================

文档B
===============
Some Other Doc
===============


A link-  :ref:`Internal Headline`


引用非rst文档
------------------------
:download:`引用非rst的本地文档 <../requirements.txt>`.


快速定义代码块
------------------------
.. highlight:: sh

此指令后如下的“::”定义的块都会以sh语法进行高亮,直到遇到下一条highlight指令。

::

#此命令在主机执行
sudo apt install python
echo "helloworld,this is a script test!"


code-block代码高亮
------------------------
shell 高亮测试
    .. code-block:: sh
    :caption: test
    :name: test333
    :emphasize-lines: 2
    :linenos:

#此命令在主机执行
sudo apt install python
echo "helloworld,this is a script test!"

C高亮测试
    .. code-block:: c
    :caption: c test
    :emphasize-lines: 4,5
    :linenos:

#include <stdio.h>

int main()
{
    printf("hello, world! This is a C program.\n");
    for(int i=0;i<10;i++ ){
    printf("output i=%d\n",i);
    }

    return 0;
}

verilog高亮测试
.. code-block:: v
    :caption: verilog test
    :emphasize-lines: 4,5
    :linenos:

module  key_filter
#(
    parameter CNT_MAX = 20'd999_999 //计数器计数最大值
)
(
    input   wire    sys_clk     ,   //系统时钟50Mhz
    input   wire    sys_rst_n   ,   //全局复位
    input   wire    key_in      ,   //按键输入信号

    output  reg     key_flag        //key_flag为1时表示消抖后检测到按键被按下
                                    //key_flag为0时表示没有检测到按键被按下
);


literalinclude直接嵌入本地文件并高亮(嵌入整个文件)
------------------------
插入C代码
.. literalinclude:: ../../base_code/hello.c
    :caption: ../../base_code/hello.c
    :language: c
    :emphasize-lines: 5,7-12
    :linenos:
    :name: hello.c

插入shell代码
.. literalinclude:: ../../base_code/hello_world.sh
    :caption: ../../base_code/hello_world.sh
    :language: sh
    :linenos:

插入Makefile代码
.. literalinclude:: ../../base_code/Makefile
    :caption: ../../base_code/Makefile
    :language: makefile
    :linenos:


literalinclude直接嵌入本地文件并高亮(嵌入文件的某部分)
------------------------
.. literalinclude:: ../../base_code/hello.c
    :caption: ../../base_code/hello.c
    :language: c
    :linenos:
    :lines: 1,3,5-8

文件对比
.. literalinclude:: ../../base_code/hello.c
    :diff: ../../base_code/hello_diff.c


插入图片
------------------------
figure命令
.. figure: ../media/rest-syntax/pic-video/logo.png
    :alt: 野火logo
    :align: center
    :caption: 野火logo

image命令
.. image:: ../media/rest-syntax/pic-video/logo.png
    :align: center
    :alt: 野火logo

|logo|,使用"|宏名|"的形式替换文字。
.. |logo| image:: ../media/rest-syntax/pic-video/logo.png

.. image:: ../media/rest-syntax/pic-video/logo.png
    :align: center
    :width: 5.63529in
    :height: 0.97222in


插入图片
------------------------
.. note:: This is a note admonition.
    This is the second line of the first paragraph.

- The note contains all indented body elements
    following.
- It includes this bullet list.

.. hint:: This is a hint admonition.

.. important:: This is a important admonition.

.. tip:: This is a tip admonition.

.. warning:: This is a warning admonition.

.. caution:: This is a caution admonition.

.. attention:: This is a attention admonition.

.. error:: This is a error admonition.

.. danger:: This is a danger admonition.
md 语法
md语法参考 csdn博客模板之系列文章模板
# 系列文章目录
<font color=#999AAA >提示:这里可以添加系列文章的所有文章的目录,目录需要自己手动添加
例如:第一章 Python 机器学习入门之pandas的使用
<hr style=" border:solid; width:100px; height:1px;" color=#000000 size=1">

<font color=#999AAA >提示:写完文章后,目录可以自动生成,如何生成可参考右边的帮助文档

@[TOC](文章目录)

</font>

<hr style=" border:solid; width:100px; height:1px;" color=#000000 size=1">

# 前言

<font color=#999AAA >提示:这里可以添加本文要记录的大概内容:
例如:随着人工智能的不断发展,机器学习这门技术也越来越重要,很多人都开启了学习机器学习,本文就介绍了机器学习的基础内容。</font>

<hr style=" border:solid; width:100px; height:1px;" color=#000000 size=1">

<font color=#999AAA >提示:以下是本篇文章正文内容,下面案例可供参考

# 一、pandas是什么?

<font color=#999AAA >示例:pandas 是基于NumPy 的一种工具,该工具是为了解决数据分析任务而创建的。

# 二、使用步骤
## 1.引入库

<font color=#999AAA >代码如下(示例):

```c
import numpy as np
import pandas as pd
import matplotlib.pyplot as plt
import seaborn as sns
import warnings
warnings.filterwarnings('ignore')
import  ssl
ssl._create_default_https_context = ssl._create_unverified_context
```

## 2.读入数据

<font color=#999AAA >代码如下(示例):

```c
data = pd.read_csv(
    'https://labfile.oss.aliyuncs.com/courses/1283/adult.data.csv')
print(data.head())
```

<font color=#999AAA >该处使用的url网络请求的数据。

<hr style=" border:solid; width:100px; height:1px;" color=#000000 size=1">

# 总结
<font color=#999AAA >提示:这里对文章进行总结:
例如:以上就是今天要讲的内容,本文仅仅简单介绍了pandas的使用,而pandas提供了大量能使我们快速便捷地处理数据的函数和方法。
原文链接
https://taotaodiy-linux.readthedocs.io/en/latest/env/rstRule.html
发布者:全栈程序员-用户IM,转载请注明出处:https://javaforall.cn/187015.html原文链接:https://javaforall.cn
【正版授权,激活自己账号】: Jetbrains全家桶Ide使用,1年售后保障,每天仅需1毛
【官方授权 正版激活】: 官方授权 正版激活 支持Jetbrains家族下所有IDE 使用个人JB账号...
