大家好,又见面了,我是你们的朋友全栈君。如果您正在找激活码,请点击查看最新教程,关注关注公众号 “全栈程序员社区” 获取激活教程,可能之前旧版本教程已经失效.最新Idea2022.1教程亲测有效,一键激活。
Jetbrains全系列IDE稳定放心使用
前言
由于本人这学期修了一门《智能工程》的课程,课程的大作业要求大家自主编写机器人导航程序,包括:路径规划、轨迹规划、控制器、机器人建模等相关程序,因此特在此写下一篇博客,记录开发过程。
这是第一篇博客,用于记录如何将自己编写的A星算法用于ROS中。
python编写A星算法
描述
先声明:在使用Python编写A*算法的过程中,深深的体会到了C++的链表、指针的便利性,但奈何已经1年多没使用C++写过程序了,所以还是用了Python来完成的。我编写的A星算法的时间复杂度和空间复杂度肯定都很高,希望大家看了轻喷。
由于要用在ROS的map中寻找路径,所以我把A星算法写成了一个类,只需要传进去三个参数,一个是二维的List(ROS中规定:可走区域的数值为0,障碍物数值为100,未知领域数值为-1),一个是起始点的坐标,一个是终点的坐标。
最后程序会返回一个List,里面的内容是从终点到起点的最短路径,用每一个点的坐标表示。
比如下面是一张地图:
| 0 | 1 | 2 | 3 | 4 | 5 | 6 | 7 | |
|---|---|---|---|---|---|---|---|---|
| 0 | 0 | 0 | 0 | 0 | 0 | 0 | 0 | 0 |
| 1 | 0 | 0 | 0 | 100 | 0 | 0 | 0 | 0 |
| 2 | 0 | 0 | 0 | 100 | 0 | 0 | 0 | 0 |
| 3 | 0 | 0 | 0 | 100 | 0 | 0 | 0 | 0 |
| 4 | 0 | 0 | 0 | 100 | 0 | 0 | 0 | 0 |
| 5 | 0 | 0 | 0 | 0 | 0 | 0 | 0 | 0 |
| 6 | 0 | 0 | 0 | 0 | 0 | 0 | 0 | 0 |
规定起点为[2,2],终点为[2,4],则返回的内容为:[(2,4),(1,4),(0,3),(1,2),(2,2)]
具体实现
对于地图中每一个像素点,如果这个像素点可到达,那就计算当前的G代价(self.cost_g),H代价(self.cost_h),F代价(self.cost_f)
这个类,相当于C++中的struct
class map_node():
    def __init__(self):
    	# x、y代表该像素点在地图中的横纵坐标
        self.x = 0
        self.y = 0
        # F = G + H
        self.cost_f = 0
        self.cost_g = 0
        self.cost_h = 0
        # 父节点的横纵坐标
        self.parent = [0,0]
主要类:
class find_path():
类初始化函数:
-
extend_map函数是将地图扩展一圈,加一圈障碍物(像素值为1)
-
声明一个state_map用于保存map中每一个像素点的状态:
- 2代表已经在open表中
- 3代表已经在close表中
- 0代表还没有处理过
-
起点和终点自然横纵坐标都+=1
-
初始化一些变量 openlist、closelist
    def __init__(self, map, start, goal):
        # map是一个二维地图, start是起点坐标[],goal是终点坐标[]
        self.map = self.extend_map(map)
        # 2代表在open表中 3代表在close表中
        self.state_map = np.zeros([len(map) + 2, len(map[0]) + 2])
        # print self.map

        self.start = start
        self.start[0] += 1
        self.start[1] += 1
        self.goal = goal
        self.goal[0] += 1
        self.goal[1] += 1
        self.open_list = []
        self.cloase_list = []
        self.path = []
        self.if_reach = False
扩展地图边界的函数
      def extend_map(self, map):
        new_row = np.ones(len(map[0]))
        new_col = np.ones(len(map) + 2)
        x = np.insert(map, 0, new_row, axis=0)
        x = np.insert(x, len(map) + 1, new_row, axis=0)
        x = np.insert(x, 0 , new_col, axis=1)
        x = np.insert(x, len(map[0]) + 1 , new_col, axis=1)
        return x
主要的寻找路径的函数
- 如果设置的起始点和终点不可达,print 提示,然后直接退出
- append_around_open函数是把该点周围的8个点加到open表中
- 把起始点加到close表中
- 进入循环,利用find_min_cost_f每次寻找open表中最小的cost_f,把它周围的8个点加到open表中,然后把这个节点加到close表,直到找到了到终点的路径,然后利用append_path函数回溯父节点直到回溯到起点。
    def start_find(self):
        #第一次操作,把起点的周围的点指向起点,起点和周围的点加到open list,
        # print "-----start point-----",self.start
        if self.map[self.start[0]][self.start[1]] != 0:
            print "\033[0;31m[E] : Please set the valid start point\033[0m"
            print "value = ", self.map[self.start[0]][self.start[1]]
            return "None"
        if self.map[self.goal[0]][self.goal[1]] != 0:
            print "\033[0;31m[E] : Please set the valid goal point\033[0m"
            return "None"
        self.append_around_open(self.start, cost_g=0)

        # 把起始节点加到close_list
        temp = map_node()
        temp.x = self.start[0]
        temp.y = self.start[1]
        self.append_close(temp)
        while True:
            # print "-----"
            min_cost, index_min_cost = self.find_min_cost_f()
            current_node = self.open_list[index_min_cost]
            # print current_node.x
            # 如果最小的节点正好等于终点
            # print current_node.x, current_node.y
            # print self.state_map
            # time.sleep(1)
            if current_node.x == self.goal[0] and current_node.y == self.goal[1]:
                self.append_path(current_node)
                break
            self.append_around_open([current_node.x, current_node.y], cost_g=current_node.cost_g)
            # 加到close list
            self.append_close(current_node)
            self.open_list.remove(current_node)
        return self.path
利用循环遍历该点周围的8个点
注意:如果cost_f有更小的,要更新cost_f和父节点
        def append_around_open(self, coordinate, cost_g):
        for i in [-1, 0, 1]:
            for j in [-1, 0, 1]:
                if i == 0 and j == 0:
                    continue
                if self.map[coordinate[0] + i][coordinate[1] + j] == 0 \
                        and self.state_map[coordinate[0] + i][coordinate[1] + j] != 3:
                    temp = map_node()
                    # 计算G和H代价
                    temp.cost_g = 10 + cost_g
                    temp.cost_h = (abs(self.goal[0] - (coordinate[0] + i)) + abs(self.goal[1] - (coordinate[1] + j))) * 10
                    temp.cost_f = temp.cost_g + temp.cost_h
                    temp.x = coordinate[0] + i
                    temp.y = coordinate[1] + j
                    #链接父节点
                    temp.parent[0] = coordinate[0]
                    temp.parent[1] = coordinate[1]
                    # print "temp", temp
                    if self.state_map[coordinate[0] + i][coordinate[1] + j] == 2:
                        current_index = self.find_index(coordinate[0] + i, coordinate[1] + j)
                        # 如果之前的cost比现在的cost大,就替换父节点和cost
                        if self.open_list[current_index].cost_f > temp.cost_f:
                            self.open_list[current_index] = temp
                    else:
                        self.state_map[coordinate[0] + i][coordinate[1] + j] = 2
                        # 加入open list
                        self.open_list.append(temp)
回溯父节点,然后把每一个节点的坐标append到self.path这变量中
    # 最后找到终点,把最短路径append到path里
    def append_path(self, node):
        while True:
            self.path.append([node.x - 1, node.y - 1])
            if node.x == self.start[0] and node.y == self.start[1]:
                break
            current_index = self.find_close_index(node.parent[0], node.parent[1])
            # print "----------------", current_index
            # print self.cloase_list
            node = self.cloase_list[current_index]
寻找open表中的最小的cost_f
    # 寻找open表中的最小代价节点和index
    def find_min_cost_f(self):
        # 记录最小花费和其在openlist中的下标
        # print "--------------------------------one time----------------"
        min_cost = 100000
        index_min_cost = 0
        for i in range(len(self.open_list)):
            # print self.open_list[i].cost_f, min_cost
            if self.open_list[i].cost_f < min_cost:
                min_cost = self.open_list[i].cost_f
                index_min_cost = i
        return min_cost, index_min_cost
其它函数
    def find_close_index(self, x, y):
        for i in range(len(self.cloase_list)):
            if self.cloase_list[i].x == x and self.cloase_list[i].y == y:
                return i

    def find_index(self, x, y):
        for i in range(len(self.open_list)):
            if self.open_list[i].x == x and self.open_list[i].y == y:
                return i

    def append_close(self, node):
        # 更改节点状态
        self.state_map[node.x][node.y] = 3
        self.cloase_list.append(node)
ROS结合A星算法
描述
由于本人ROS学的并不是很深入,目前只掌握了topic这一种消息传输机制,因此,程序中只包括利用topic传输消息。
通过ROS中的Topic订阅”/map”、”/initialpose”、”/move_base_simple/goal”这三个话题,然后通过计算,将path发布出去(”/path_my_A_star”)
具体实现
类初始化函数
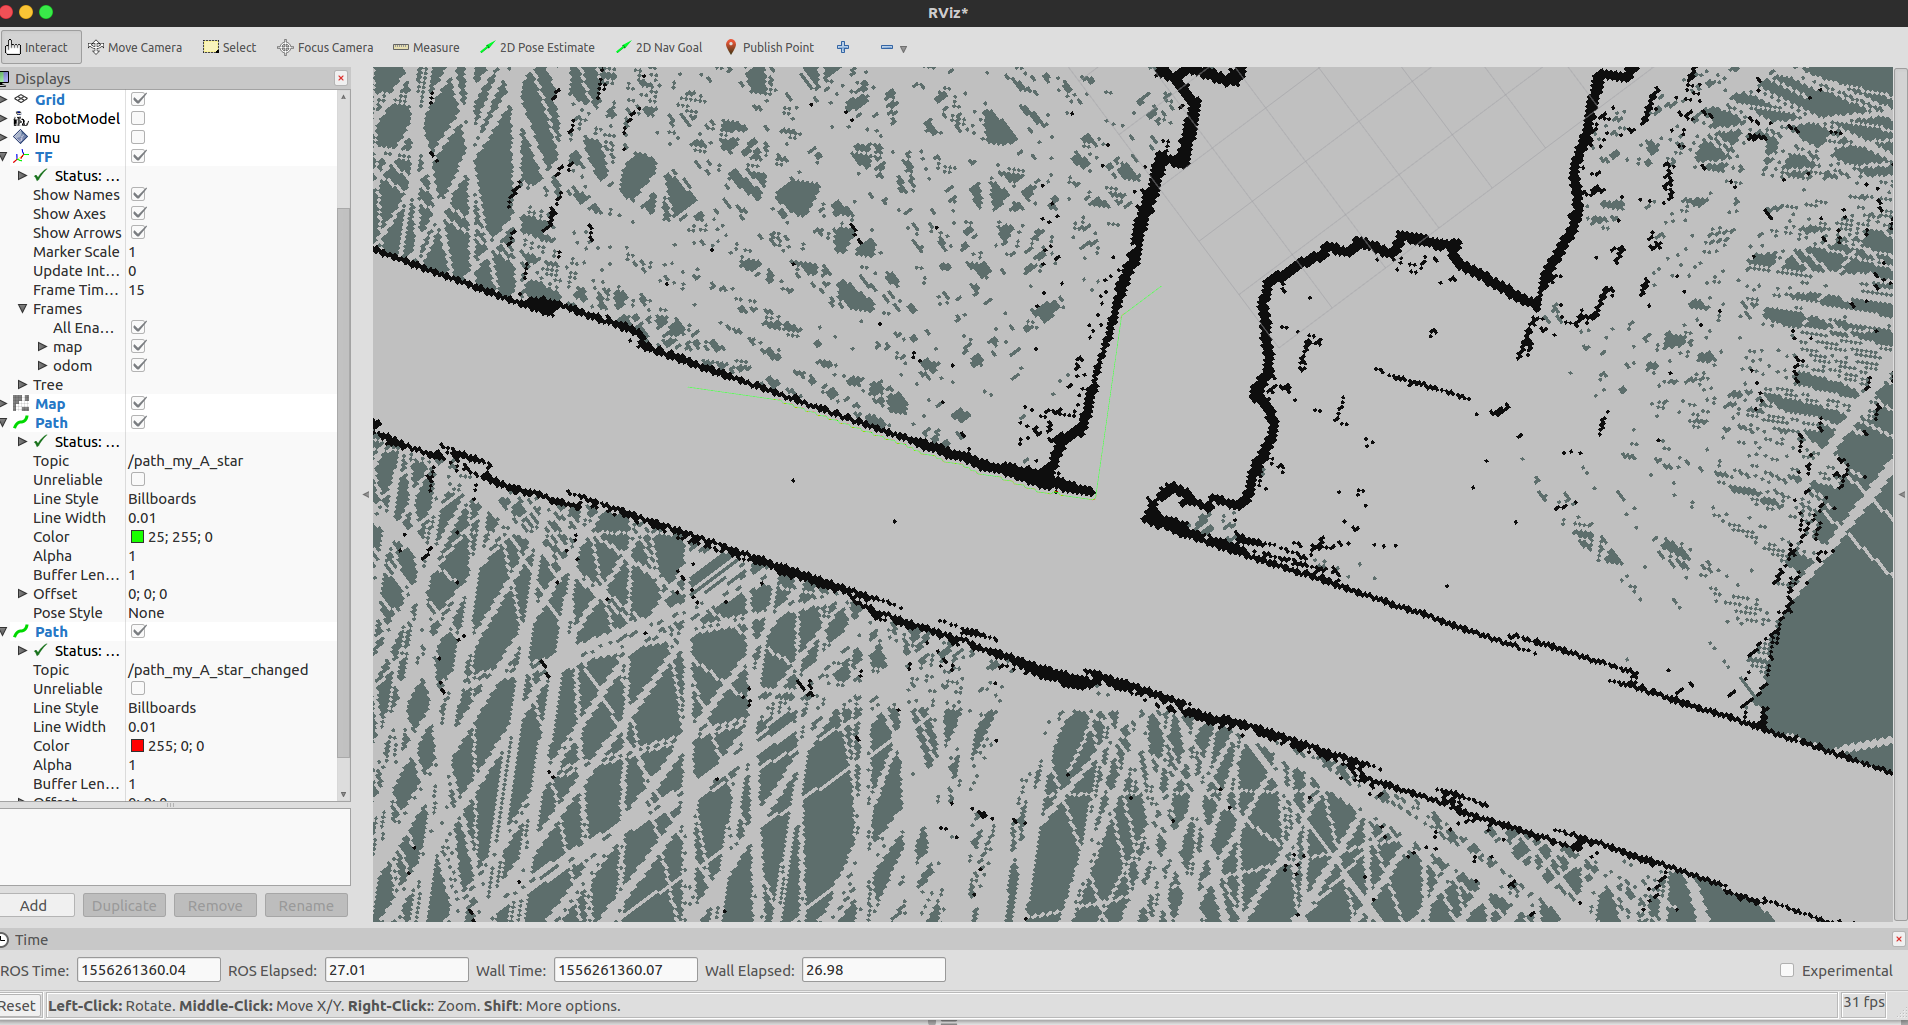
- “/path_my_A_star”是未进行平滑处理的路径,有直角等,”/path_my_A_star_changed”是平滑处理的
    def __init__(self):
        rospy.init_node("path_pub")
        self.path_pub = rospy.Publisher("/path_my_A_star", Path, queue_size=15)
        self.path_pub_changed = rospy.Publisher("/path_my_A_star_changed", Path, queue_size=15)

        # 关于地图的一些变量
        self.origin_x = 0
        self.origin_y = 0
        self.resolution = 0
        self.width = 0
        self.height = 0
        # self.map_test_pub = rospy.Publisher("/map_test", OccupancyGrid, queue_size=15)
        self.map_sub = rospy.Subscriber("/map", OccupancyGrid, self.map_callback)
        self.current_path = Path()
        self.current_path_changed = Path()
        rospy.sleep(1)
        # 起始点和目标点
        self.start_map_point = []
        self.goal_map_point = []
        # 地图上的路径
        self.path_map = []
        self.path_world = []
        # 是否要寻找路径的开关
        self.if_start_find_path = False
        self.goal_pose = PoseStamped()
        self.init_pose = PoseWithCovarianceStamped()
        self.init_pose_sub = rospy.Subscriber("/initialpose", PoseWithCovarianceStamped, self.init_pose_callback)
        self.goal_pose_sub = rospy.Subscriber("/move_base_simple/goal", PoseStamped, self.goal_pose_callback)
        self.last_time = rospy.get_rostime()
        self.start_find_path()
        rospy.Rate(1)
        rospy.spin()
起始点回调函数
    def init_pose_callback(self, msg):
        # print "===========get initial pose================"
        self.init_pose = msg
        # print msg
        # print "----------------worldtomap------------------"
        self.start_map_point =  self.WorldTomap(msg.pose.pose.position.x, msg.pose.pose.position.y)
        print "----------------start point----------------",self.start_map_point
        print "value = ", self.map[self.start_map_point[0]][self.start_map_point[1]]
        if self.start_map_point == [-1, -1]:
            print "\033[0;31m[E] : Please set the valid goal point\033[0m"
终点回调函数
   def goal_pose_callback(self, msg):
        self.path_map = []
        self.goal_pose = msg
        self.if_start_find_path = True
        # print msg
        self.goal_map_point =  self.WorldTomap(msg.pose.position.x, msg.pose.position.y)
        print "-----------------goal point---------------",self.goal_map_point
        if self.goal_map_point == [-1, -1]:
            print "\033[0;30m[Kamerider E] : Please set the valid goal point\033[0m"
            return
        else:
            self.start_find_path()
地图回调函数
    def map_callback(self, msg):
        print msg.header
        print "------"
        print msg.info
        print "------"
        print len(msg.data)
        # 初始化map里的参数值
        self.origin_x = msg.info.origin.position.x
        self.origin_y = msg.info.origin.position.y
        self.resolution = msg.info.resolution
        self.width = msg.info.width
        self.height = msg.info.height
        print "-------",self.width
        raw = np.array(msg.data, dtype=np.int8)
        self.map = raw.reshape((self.height, self.width))
        self.map_sub.unregister()
将起始点和终点的topic里的World坐标系的数值转化为map上的像素坐标,用于world坐标系映射到map下的离散的像素点
    def WorldTomap(self, wx, wy):
        # 返回-1,-1就是有问题
        # print wx, wy
        # print self.origin_x, self.origin_y
        if wx < self.origin_x or wy < self.origin_y:
            # print "<<<<<<<"
            return [-1, -1]
        mx = (int)((wx - self.origin_x) / self.resolution)
        my = (int)((wy - self.origin_y) / self.resolution)
        if mx < self.width and my < self.height:
            # print ">>>>>>>>>>>"
            return [my, mx]
        return [-1, -1]
调用A星算法寻找路径
    def start_find_path(self):
        if self.if_start_find_path:
            print ('\033[0;32m[I] : Start find path with A* \033[0m')
            temp = A_star.find_path(self.map, self.start_map_point, self.goal_map_point)
            self.path_map = temp.start_find()
            print self.path_map
            self.publisher_path()
        else:
            rospy.sleep(1)
            print ('\033[0;33m[W] : Please set goal pose\033[0m')
            return
发布两种不同的路径,一种是原始路径,一种是利用插值平滑处理过的
    def publisher_path(self):
        time = 1
        y1 = []
        y2 = []
        for i in range(len(self.path_map)):
            current_time = rospy.get_rostime()
            current_pose = PoseStamped()
            current_pose.pose.position.x, current_pose.pose.position.y= self.mapToWorld(self.path_map[i][1], self.path_map[i][0])
            y1.append(self.mapToWorld(self.path_map[i][1], self.path_map[i][0])[0])
            y2.append(self.mapToWorld(self.path_map[i][1], self.path_map[i][0])[1])
            current_pose.pose.position.z = 0.0
            current_pose.pose.orientation.x = 0.0
            current_pose.pose.orientation.y = 0.0
            current_pose.pose.orientation.z = 0.0
            current_pose.pose.orientation.w = 1.0
            time += 1
            self.current_path.header.stamp = current_time
            self.current_path.header.frame_id = "odom"
            self.current_path.poses.append(current_pose)
            self.path_pub.publish(self.current_path)
            self.last_time = current_time


        # 通过差值做平滑处理
        length = len(self.path_map)
        x = np.array([num for num in range(length)])
        xnew = np.arange(0,length - 1, 0.1)
        func1 = interpolate.interp1d(x, y1, kind='cubic')
        func2 = interpolate.interp1d(x, y2, kind='cubic')
        ynew1 = func1(xnew)
        ynew2 = func2(xnew)
        for i in range(len(ynew1)):
            current_time = rospy.get_rostime()
            current_pose = PoseStamped()
            current_pose.pose.position.x = ynew1[i]
            current_pose.pose.position.y = ynew2[i]
            current_pose.pose.position.z = 0.0
            current_pose.pose.orientation.x = 0.0
            current_pose.pose.orientation.y = 0.0
            current_pose.pose.orientation.z = 0.0
            current_pose.pose.orientation.w = 1.0
            time += 1
            self.current_path_changed.header.stamp = current_time
            self.current_path_changed.header.frame_id = "odom"
            self.current_path_changed.poses.append(current_pose)
            self.path_pub_changed.publish(self.current_path_changed)
            self.last_time = current_time
实现结果
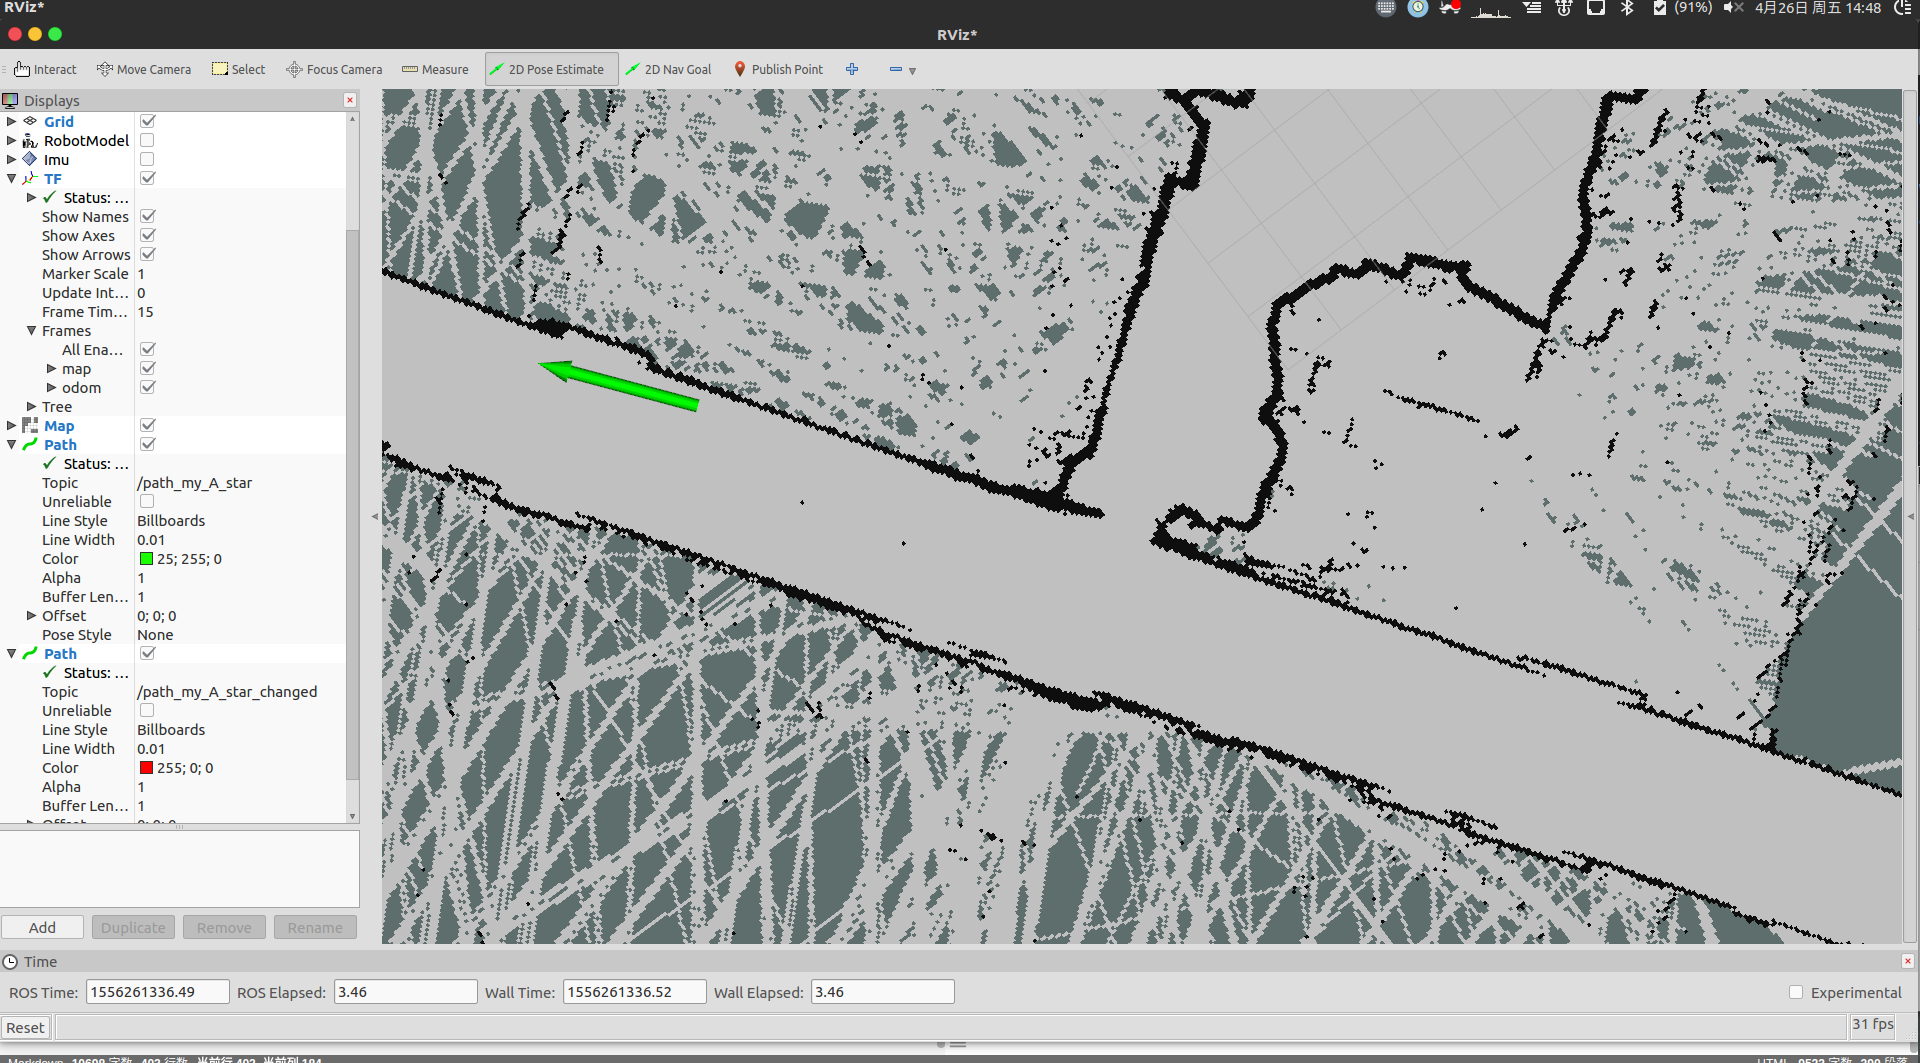
设置起点

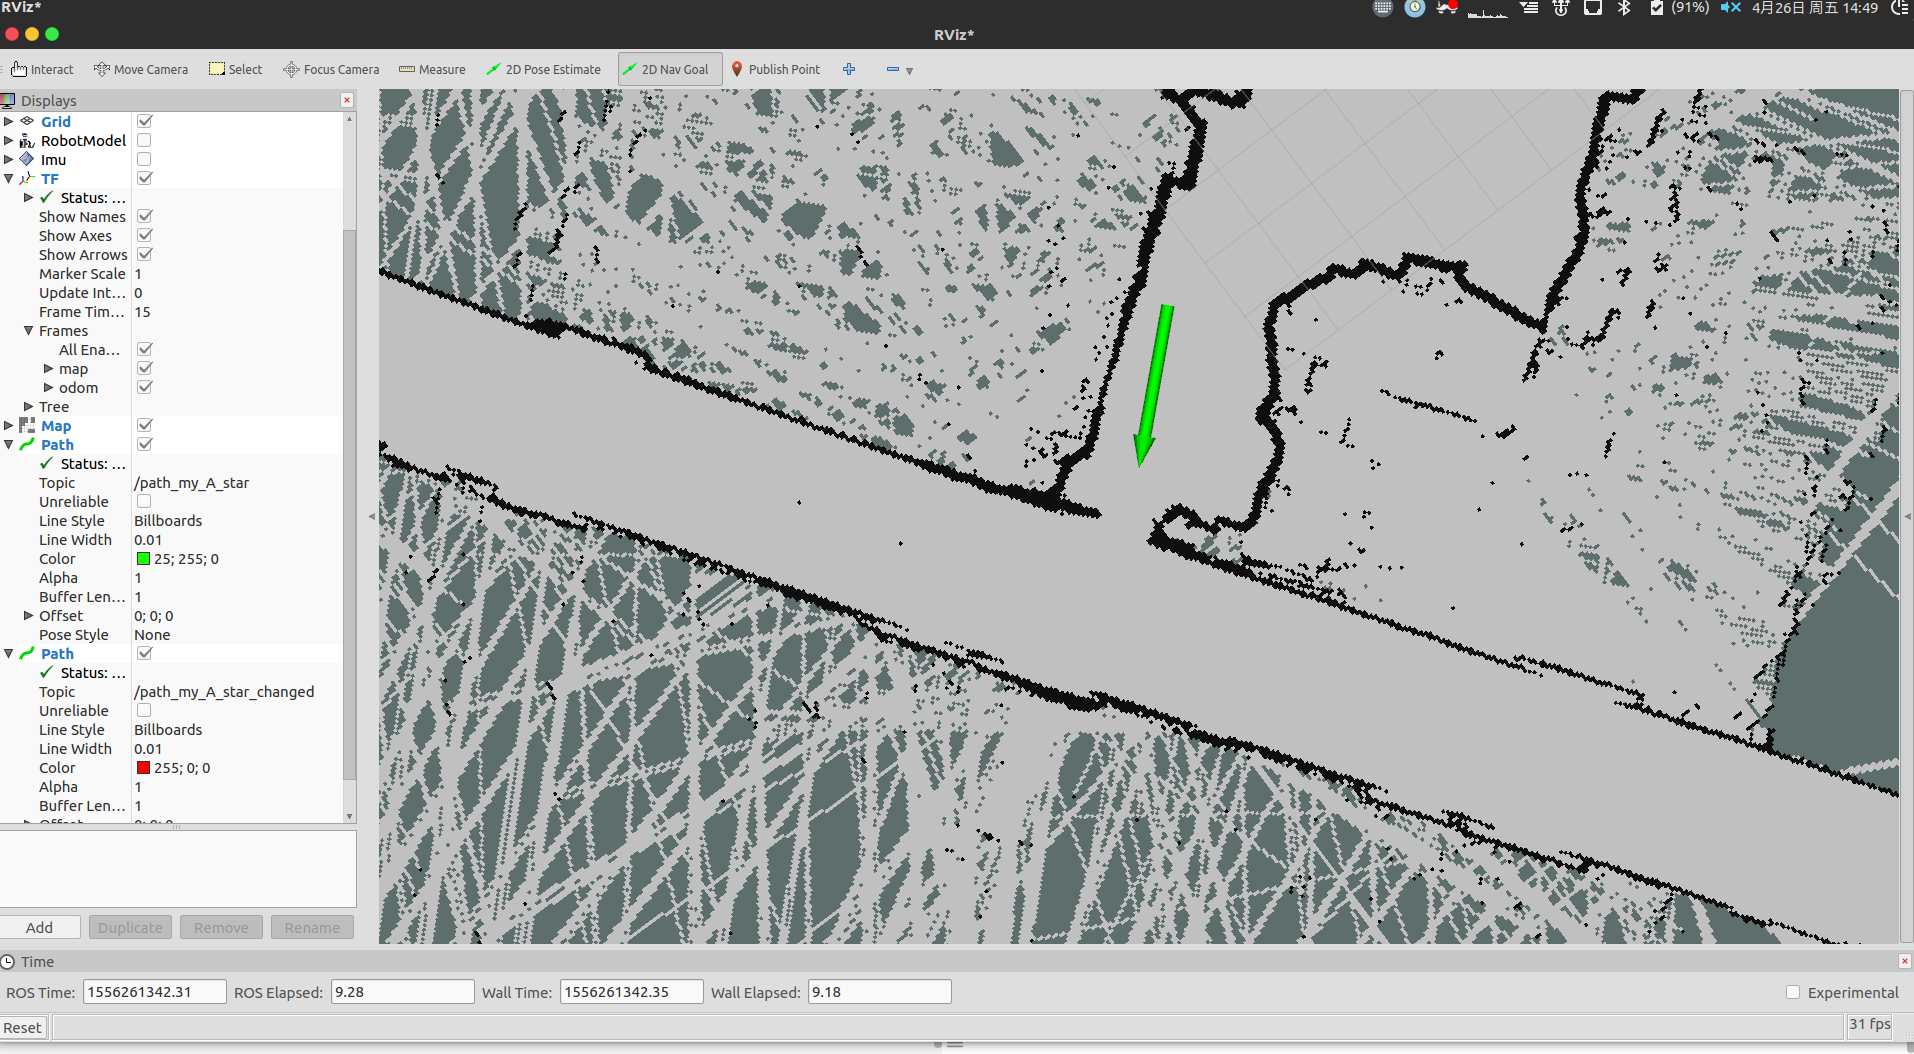
设置终点
生成的路径
发布者:全栈程序员-用户IM,转载请注明出处:https://javaforall.cn/185228.html原文链接:https://javaforall.cn
【正版授权,激活自己账号】: Jetbrains全家桶Ide使用,1年售后保障,每天仅需1毛
【官方授权 正版激活】: 官方授权 正版激活 支持Jetbrains家族下所有IDE 使用个人JB账号...
