大家好,又见面了,我是你们的朋友全栈君。如果您正在找激活码,请点击查看最新教程,关注关注公众号 “全栈程序员社区” 获取激活教程,可能之前旧版本教程已经失效.最新Idea2022.1教程亲测有效,一键激活。
Jetbrains全系列IDE稳定放心使用
1.实现的效果:


实际的图片:
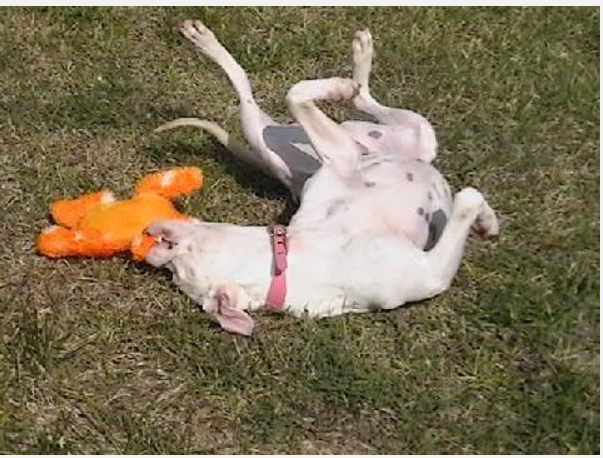
(1)可以看到ResNet50预测的前三个结果中第一个结果为:whippet(小灵狗)
(2)ResNet50预测的前三个结果中第一个结果为:Walker_hound(步行猎犬)
(3)从结果上来看,比之前的VGG16和VGG19预测的效果都要好(这里虽然不知道图片中的够具体是什么狗,但是结果都预测成了“狗”的类别)
关于InceptionV3(159层),Xception(126层),Inception_ResNet_V2(572层):
https://mydreamambitious.blog.csdn.net/article/details/123907490
关于VGG16和VGG19:
https://mydreamambitious.blog.csdn.net/article/details/123906643
关于MobileNet(88层)和MobileNetV2(88层):
https://mydreamambitious.blog.csdn.net/article/details/123907955
关于DenseNet121(121层),DenseNet169(169层),DenseNet201(201层):
https://mydreamambitious.blog.csdn.net/article/details/123908742
EfficientNetBX
https://mydreamambitious.blog.csdn.net/article/details/123929264
2.主文件TransorResNet.py:
import os
import keras
import numpy as np
from PIL import Image
from keras.preprocessing import image
from keras.preprocessing.image import img_to_array
from keras.applications.resnet import preprocess_input,decode_predictions

def load_ResNet50():
    #加载ResNet50并且保留顶层(也就是全连接层)
    model_ResNet50=keras.applications.resnet.ResNet50(weights='imagenet')

    #图形路径
    curr_path=os.getcwd()
    img_path=curr_path+'\\images\\train\\dog\\1.jpg'
    #将图像转换为网络需要的大小,因为我们这里加载的模型都是固定输入大小224*224
    img=image.load_img(img_path,target_size=(224,224))
    #首先需要转换为向量的形式
    img_out=image.img_to_array(img)
    #扩充维度
    img_out=np.expand_dims(img_out,axis=0)
    #对输入的图像进行处理
    img_out=preprocess_input(img_out)
    # decode the results into a list of tuples (class, description, probability)
    # (one such list for each sample in the batch)
    #上面这段话的意思是输出包括(类别,图像描述,输出概率)
    preds=model_ResNet50.predict(img_out)
    #输出前三个结果的可能性
    print('Predicted: ',decode_predictions(preds,top=3)[0])
    print('Predicted: ',decode_predictions(preds,top=3))


def load_ResNet101():
    # 加载ResNet50并且保留顶层(也就是全连接层)
    model_ResNet50 = keras.applications.resnet.ResNet101(weights='imagenet')

    # 图形路径
    img_path = 'images/train/dog/1.jpg'
    # 将图像转换为网络需要的大小,因为我们这里加载的模型都是固定输入大小224*224
    img = image.load_img(img_path, target_size=(224, 224))
    # 首先需要转换为向量的形式
    img_out = image.img_to_array(img)
    # 扩充维度
    img_out = np.expand_dims(img_out, axis=0)
    # 对输入的图像进行处理
    img_out = preprocess_input(img_out)
    # decode the results into a list of tuples (class, description, probability)
    # (one such list for each sample in the batch)
    # 上面这段话的意思是输出包括(类别,图像描述,输出概率)
    preds = model_ResNet50.predict(img_out)
    # 输出前三个结果的可能性
    print('Predicted: ', decode_predictions(preds, top=3)[0])
    print('Predicted: ', decode_predictions(preds, top=3))

if __name__ == '__main__':
    print('Pycharm')
    print('load_ResNet50:\n')
    load_ResNet50()
    print('load_ResNet101:\n')
    load_ResNet101()
发布者:全栈程序员-用户IM,转载请注明出处:https://javaforall.cn/185075.html原文链接:https://javaforall.cn
【正版授权,激活自己账号】: Jetbrains全家桶Ide使用,1年售后保障,每天仅需1毛
【官方授权 正版激活】: 官方授权 正版激活 支持Jetbrains家族下所有IDE 使用个人JB账号...
