大家好,又见面了,我是你们的朋友全栈君。如果您正在找激活码,请点击查看最新教程,关注关注公众号 “全栈程序员社区” 获取激活教程,可能之前旧版本教程已经失效.最新Idea2022.1教程亲测有效,一键激活。
Jetbrains全系列IDE稳定放心使用
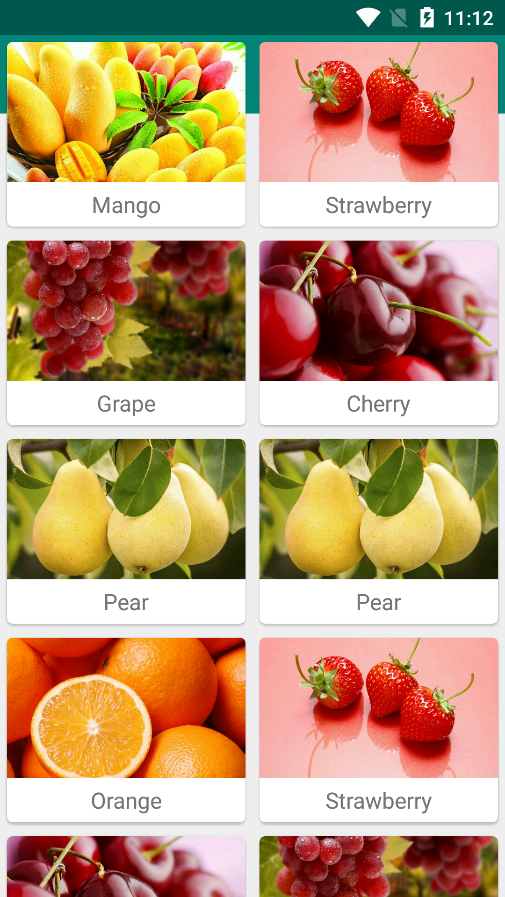
1. CardView
CardView是用于实现卡片式布局效果的重要控件,实际上也是一个frameLayout,只是额外提供了圆角和阴影,看上去有立体效果。
效果如下:


<?xml version="1.0" encoding="utf-8"?>
<androidx.cardview.widget.CardView
    xmlns:android="http://schemas.android.com/apk/res/android"
    xmlns:app="http://schemas.android.com/apk/res-auto"
    android:layout_width="match_parent"
    android:layout_height="wrap_content"
    android:layout_margin="5dp"
    app:cardCornerRadius="4dp">

    <LinearLayout
        android:orientation="vertical"
        android:layout_width="match_parent"
        android:layout_height="wrap_content">

        <ImageView
            android:id="@+id/fruit_image"
            android:layout_width="match_parent"
            android:layout_height="100dp"
            android:scaleType="centerCrop" />

        <TextView
            android:id="@+id/fruit_name"
            android:layout_width="wrap_content"
            android:layout_height="wrap_content"
            android:layout_gravity="center_horizontal"
            android:layout_margin="5dp"
            android:textSize="16sp" />
    </LinearLayout>

</androidx.cardview.widget.CardView>
MainActivity
package com.example.mycardview;

import androidx.appcompat.app.AppCompatActivity;
import androidx.recyclerview.widget.GridLayoutManager;
import androidx.recyclerview.widget.RecyclerView;

import android.os.Bundle;

import java.util.ArrayList;
import java.util.List;
import java.util.Random;

public class MainActivity extends AppCompatActivity {
    private Fruit[] fruits = {new Fruit("Apple", R.drawable.apple), new Fruit("Banana", R.drawable.banana),
            new Fruit("Orange", R.drawable.orange), new Fruit("Watermelon", R.drawable.watermelon),
            new Fruit("Pear", R.drawable.pear), new Fruit("Grape", R.drawable.grape),
            new Fruit("Pineapple", R.drawable.pineapple), new Fruit("Strawberry", R.drawable.strawberry),
            new Fruit("Cherry", R.drawable.cherry), new Fruit("Mango", R.drawable.mango)};
    private List<Fruit> fruitList = new ArrayList<>();

    @Override
    protected void onCreate(Bundle savedInstanceState) {
        super.onCreate(savedInstanceState);
        setContentView(R.layout.activity_main);
        initFruits();
        RecyclerView rl = findViewById(R.id.rl);
        GridLayoutManager layoutManager = new GridLayoutManager(this, 2);
        rl.setLayoutManager(layoutManager);
        FruitAdapter adapter = new FruitAdapter(fruitList);
        rl.setAdapter(adapter);
    }

    private void initFruits() {
        fruitList.clear();
        for (int i = 0; i < 50; i++) {
            Random random = new Random();
            int index = random.nextInt(fruits.length);
            fruitList.add(fruits[index]);
        }
    }
}
MainActivity .xml
<?xml version="1.0" encoding="utf-8"?>
<androidx.constraintlayout.widget.ConstraintLayout xmlns:android="http://schemas.android.com/apk/res/android"
    xmlns:app="http://schemas.android.com/apk/res-auto"
    xmlns:tools="http://schemas.android.com/tools"
    android:layout_width="match_parent"
    android:layout_height="match_parent"
    tools:context=".MainActivity">

    <androidx.recyclerview.widget.RecyclerView
        android:id="@+id/rl"
        android:layout_width="match_parent"
        android:layout_height="match_parent"
        />

</androidx.constraintlayout.widget.ConstraintLayout>
adapter:
package com.example.mycardview;

import android.content.Context;
import android.content.Intent;
import android.view.LayoutInflater;
import android.view.View;
import android.view.ViewGroup;
import android.widget.ImageView;
import android.widget.TextView;

import androidx.cardview.widget.CardView;
import androidx.recyclerview.widget.RecyclerView;

import com.bumptech.glide.Glide;

import java.util.List;

public class FruitAdapter extends RecyclerView.Adapter<FruitAdapter.ViewHolder> {

    private static final String TAG = "FruitAdapter";

    private Context mContext;

    private List<Fruit> mFruitList;

    static class ViewHolder extends RecyclerView.ViewHolder {
        CardView cardView;
        ImageView fruitImage;
        TextView fruitName;

        public ViewHolder(View view) {
            super(view);
            cardView = (CardView) view;
            fruitImage = (ImageView) view.findViewById(R.id.fruit_image);
            fruitName = (TextView) view.findViewById(R.id.fruit_name);
        }
    }

    public FruitAdapter(List<Fruit> fruitList) {
        mFruitList = fruitList;
    }

    @Override
    public ViewHolder onCreateViewHolder(ViewGroup parent, int viewType) {
        if (mContext == null) {
            mContext = parent.getContext();
        }
        View view = LayoutInflater.from(mContext).inflate(R.layout.fruit_item, parent, false);
        final ViewHolder holder = new ViewHolder(view);
        return holder;
    }

    @Override
    public void onBindViewHolder(ViewHolder holder, int position) {
        Fruit fruit = mFruitList.get(position);
        holder.fruitName.setText(fruit.getName());
        Glide.with(mContext).load(fruit.getImageId()).into(holder.fruitImage);
    }

    @Override
    public int getItemCount() {
        return mFruitList.size();
    }

}
item:
<?xml version="1.0" encoding="utf-8"?>
<androidx.cardview.widget.CardView
    xmlns:android="http://schemas.android.com/apk/res/android"
    xmlns:app="http://schemas.android.com/apk/res-auto"
    android:layout_width="match_parent"
    android:layout_height="wrap_content"
    android:layout_margin="5dp"
    app:cardCornerRadius="4dp">

    <LinearLayout
        android:orientation="vertical"
        android:layout_width="match_parent"
        android:layout_height="wrap_content">

        <ImageView
            android:id="@+id/fruit_image"
            android:layout_width="match_parent"
            android:layout_height="100dp"
            android:scaleType="centerCrop" />

        <TextView
            android:id="@+id/fruit_name"
            android:layout_width="wrap_content"
            android:layout_height="wrap_content"
            android:layout_gravity="center_horizontal"
            android:layout_margin="5dp"
            android:textSize="16sp" />
    </LinearLayout>

</androidx.cardview.widget.CardView>
Fruit
package com.example.mycardview;
public class Fruit {
private String name;
private int imageId;
public Fruit(String name, int imageId) {
this.name = name;
this.imageId = imageId;
}
public String getName() {
return name;
}
public int getImageId() {
return imageId;
}
}
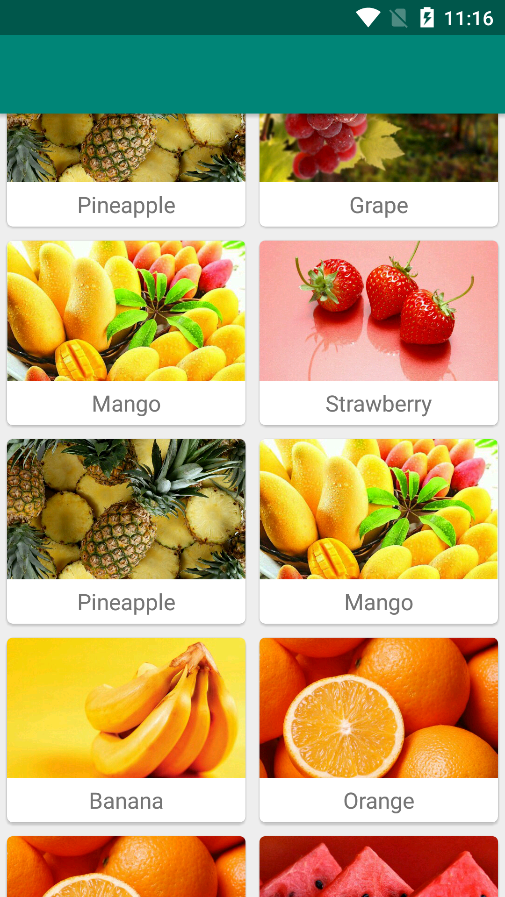
2.AppBarLayout
当toolbar和RecyclerView一起共用的时候,RV遮挡了toolbar如下:
<?xml version="1.0" encoding="utf-8"?>
<androidx.constraintlayout.widget.ConstraintLayout xmlns:android="http://schemas.android.com/apk/res/android"
    xmlns:app="http://schemas.android.com/apk/res-auto"
    xmlns:tools="http://schemas.android.com/tools"
    android:layout_width="match_parent"
    android:layout_height="match_parent"
    tools:context=".MainActivity">

        <androidx.appcompat.widget.Toolbar
            android:id="@+id/toobar"
            android:layout_width="match_parent"
            android:layout_height="?attr/actionBarSize"
            android:background="?attr/colorPrimary"
            android:popupTheme="@style/ThemeOverlay.AppCompat.Light"
            android:theme="@style/ThemeOverlay.AppCompat.Dark.ActionBar"
            app:layout_scrollFlags="scroll|enterAlways|snap" />
        <androidx.recyclerview.widget.RecyclerView
            android:id="@+id/rl"
            android:layout_width="match_parent"
            android:layout_height="match_parent"
            />


</androidx.constraintlayout.widget.ConstraintLayout>
这个时候可以使用AppBarLayout,他实际是一个垂直的linearLayout,修改代码:
<?xml version="1.0" encoding="utf-8"?>
<androidx.constraintlayout.widget.ConstraintLayout xmlns:android="http://schemas.android.com/apk/res/android"
xmlns:app="http://schemas.android.com/apk/res-auto"
xmlns:tools="http://schemas.android.com/tools"
android:layout_width="match_parent"
android:layout_height="match_parent"
tools:context=".MainActivity">
<com.google.android.material.appbar.AppBarLayout
    android:layout_width="match_parent"
    android:layout_height="wrap_content">

    <androidx.appcompat.widget.Toolbar
        android:id="@+id/toobar"
        android:layout_width="match_parent"
        android:layout_height="?attr/actionBarSize"
        android:background="?attr/colorPrimary"
        android:popupTheme="@style/ThemeOverlay.AppCompat.Light"
        android:theme="@style/ThemeOverlay.AppCompat.Dark.ActionBar"
        app:layout_scrollFlags="scroll|enterAlways|snap" />

</com.google.android.material.appbar.AppBarLayout>
<!-- <!– scroll:RV 向上滚动的时候ToolBar会跟着一起向上滚动并实现隐藏–>-->
<!-- <!– enterAlways:当RV像下滚动的时候 toolbar会跟着一起向下滑动–>-->
<!-- <!– snap:当还没有完全显示、隐藏的时候,会根据当前滚动的距离,自动显示隐藏–>-->
<androidx.recyclerview.widget.RecyclerView
    android:id="@+id/rl"
    android:layout_width="match_parent"
    android:layout_height="match_parent"
    app:layout_behavior="@string/appbar_scrolling_view_behavior" />
</androidx.constraintlayout.widget.ConstraintLayout>
AppBarLayout包裹Toolbar
<com.google.android.material.appbar.AppBarLayout
android:layout_width="match_parent"
android:layout_height="wrap_content">
<androidx.appcompat.widget.Toolbar
android:id="@+id/toobar"
android:layout_width="match_parent"
android:layout_height="?attr/actionBarSize"
android:background="?attr/colorPrimary"
android:popupTheme="@style/ThemeOverlay.AppCompat.Light"
android:theme="@style/ThemeOverlay.AppCompat.Dark.ActionBar"
app:layout_scrollFlags="scroll|enterAlways|snap" />
</com.google.android.material.appbar.AppBarLayout>
app:layout_behavior=”@string/appbar_scrolling_view_behavior”
<androidx.recyclerview.widget.RecyclerView
android:id="@+id/rl"
android:layout_width="match_parent"
android:layout_height="match_parent"
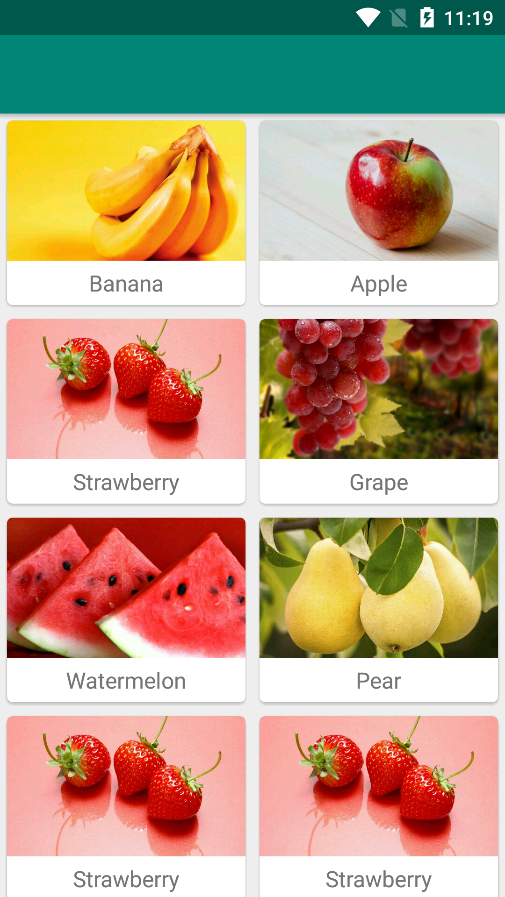
app:layout_behavior="@string/appbar_scrolling_view_behavior" />效果如下,但是toolbar遮挡了部分rv
可以使用CoordinatorLayout解决:
<?xml version="1.0" encoding="utf-8"?>
<androidx.constraintlayout.widget.ConstraintLayout xmlns:android="http://schemas.android.com/apk/res/android"
xmlns:app="http://schemas.android.com/apk/res-auto"
xmlns:tools="http://schemas.android.com/tools"
android:layout_width="match_parent"
android:layout_height="match_parent"
tools:context=".MainActivity">
<androidx.coordinatorlayout.widget.CoordinatorLayout
android:layout_width="match_parent"
android:layout_height="match_parent">
<com.google.android.material.appbar.AppBarLayout
android:layout_width="match_parent"
android:layout_height="wrap_content">
<androidx.appcompat.widget.Toolbar
android:id="@+id/toobar"
android:layout_width="match_parent"
android:layout_height="?attr/actionBarSize"
android:background="?attr/colorPrimary"
android:popupTheme="@style/ThemeOverlay.AppCompat.Light"
android:theme="@style/ThemeOverlay.AppCompat.Dark.ActionBar"
app:layout_scrollFlags="scroll|enterAlways|snap" />
</com.google.android.material.appbar.AppBarLayout>
<!-- <!– scroll:RV 向上滚动的时候ToolBar会跟着一起向上滚动并实现隐藏–>-->
<!-- <!– enterAlways:当RV像下滚动的时候 toolbar会跟着一起向下滑动–>-->
<!-- <!– snap:当还没有完全显示、隐藏的时候,会根据当前滚动的距离,自动显示隐藏–>-->
<androidx.recyclerview.widget.RecyclerView
android:id="@+id/rl"
android:layout_width="match_parent"
android:layout_height="match_parent"
app:layout_behavior="@string/appbar_scrolling_view_behavior" />
</androidx.coordinatorlayout.widget.CoordinatorLayout>
</androidx.constraintlayout.widget.ConstraintLayout>使用CoordinatorLayout将所有的布局包裹一下:
转发标明出处:https://blog.csdn.net/qq_35698774/article/details/108112074
android互助群:

感谢:郭霖的《第一行代码 第二版》
发布者:全栈程序员-用户IM,转载请注明出处:https://javaforall.cn/183077.html原文链接:https://javaforall.cn
【正版授权,激活自己账号】: Jetbrains全家桶Ide使用,1年售后保障,每天仅需1毛
【官方授权 正版激活】: 官方授权 正版激活 支持Jetbrains家族下所有IDE 使用个人JB账号...
