大家好,又见面了,我是你们的朋友全栈君。
1. requestCode和resultCode
requestCode:由跳转前的界面定义,通过startActivityForResult()来将定义的intent(同时也代表着要跳转的界面)与requestCode绑定。接着复写onActivityResult(int requestCode, int resultCode, Intent data)来获取发生事件的界面。
resultCode: 由跳转后的界面定义,通过setResult()来将跳转后界面的intent与resultCode绑定。此时跳转前的界面可通过resultCode来选择跳转后界面的intent(一般在判断某个具体的界面后使用)。
本次例子中,假设点击充值按钮后的充值界面的requestCode == PAY_REQUEST_CODE == 1。接着设置点击充值成功后的resultCode == 2,取消充值为resultCode == 3。
2. MainActivity(跳转前界面)
package com.example.infotransmission2;

import androidx.annotation.Nullable;
import androidx.appcompat.app.AppCompatActivity;

import android.content.Intent;
import android.os.Bundle;
import android.view.View;
import android.widget.Button;
import android.widget.TextView;

/**
 * 数据回传
 * 点击充值按钮,跳转到第二个界面进行充值
 * 第二个界面进行充值,充值完成以后告诉第一个界面结果,包括充值成功或者失败
 *
 */
public class MainActivity extends AppCompatActivity {

    private Button mBtnRecharge;
    private TextView mTextPayResult;
    private static int PAY_REQUEST_CODE = 1;

    @Override
    protected void onCreate(Bundle savedInstanceState) {
        super.onCreate(savedInstanceState);
        setContentView(R.layout.activity_main);

        // Refactor-Extract Method
        initView();

        initListener();
    }

    private void initListener() {
        mBtnRecharge.setOnClickListener(new View.OnClickListener() {
            @Override
            public void onClick(View v) {
                // 设置一个点击事件,跳转到第二个界面进行充值
                Intent intent = new Intent(MainActivity.this, PayActivity.class);
                // 第一步,使用startActivityForResult代替原来的startActivity,表明跳转到别的页面后(该界面与requestCode绑定),
                // 等待该界面的相关返回码
                startActivityForResult(intent,1);
            }
        });
    }

    /**
     * 第二步,复写方法,返回的结果就会在这里回调
     * @param requestCode
     * @param resultCode
     * @param data
     */
    @Override
    protected void onActivityResult(int requestCode, int resultCode, Intent data) {
        super.onActivityResult(requestCode, resultCode, data);
        // 通过requestCode来判断返回的Activity是哪一个
        if (requestCode == PAY_REQUEST_CODE) {
            String resultContent = null;
            if (resultCode == 2) {
                // 充值成功
                resultContent = data.getStringExtra("resultContent");
            }
            else if(resultCode == 3){
                // 充值失败
                resultContent = data.getStringExtra("resultContent");
            }
            mTextPayResult.setText(resultContent);
        }
    }

    /**
     * 初始化控件
     */
    private void initView() {
        mBtnRecharge = (Button) this.findViewById(R.id.btn_recharge);
        mTextPayResult = (TextView) this.findViewById(R.id.pay_result);
    }
}
3. PayActivity(跳转后的界面)
 1 package com.example.infotransmission2;
 2
 3 import androidx.appcompat.app.AppCompatActivity;
 4
 5 import android.content.Intent;
 6 import android.os.Bundle;
 7 import android.text.TextUtils;
 8 import android.view.View;
 9 import android.widget.Button;
10 import android.widget.EditText;
11 import android.widget.Toast;
12
13 public class PayActivity extends AppCompatActivity {
14
15     private EditText mEditInput;
16     private Button mBtnChargein;
17     private Button mBtnCancelCharge;
18
19     @Override
20     protected void onCreate(Bundle savedInstanceState) {
21         super.onCreate(savedInstanceState);
22         setContentView(R.layout.activity_pay);
23
24         initView();
25
26         initListener();
27     }
28
29     private void initListener() {
30         mBtnCancelCharge.setOnClickListener(new View.OnClickListener() {
31             @Override
32             public void onClick(View v) {
33                 handlerCancel();
34             }
35         });
36
37         mBtnChargein.setOnClickListener(new View.OnClickListener() {
38             @Override
39             public void onClick(View v) {
40                 handlerPay();
41             }
42         });
43     }
44
45     private void handlerCancel() {
46         Intent intent = new Intent();
47         intent.putExtra("resultContent", "充值失败!");
48         // 将该intent与设定的resultCode值相绑定
49         setResult(3, intent);
50         finish();
51     }
52
53     private void handlerPay() {
54         String payNumber = mEditInput.getText().toString().trim();
55         if (TextUtils.isEmpty(payNumber)) {
56             Toast.makeText(this, "请输入充值金额", Toast.LENGTH_SHORT).show();
57             return;
58         }
59
60         // 进行充值(模拟,需要网络编程)
61         // 将该intent与设定的resultCode值相绑定
62         Intent intent = new Intent();
63         intent.putExtra("resultContent", "充值成功!");
64         setResult(2, intent);
65         finish();
66     }
67
68     private void initView() {
69         mEditInput = (EditText) this.findViewById(R.id.edit_input);
70         mBtnChargein = (Button) this.findViewById(R.id.btn_chargein);
71         mBtnCancelCharge = (Button) this.findViewById(R.id.btn_cancelCharge);
72     }
73
74 }
4. activity_main
<?xml version="1.0" encoding="utf-8"?>
<LinearLayout xmlns:android="http://schemas.android.com/apk/res/android"
    xmlns:app="http://schemas.android.com/apk/res-auto"
    xmlns:tools="http://schemas.android.com/tools"
    android:layout_width="match_parent"
    android:layout_height="match_parent"
    tools:context=".MainActivity"
    android:orientation="vertical">

    <Button
        android:layout_width="match_parent"
        android:layout_height="wrap_content"
        android:text="点击充值"
        android:id="@+id/btn_recharge"/>

    <TextView
        android:layout_width="match_parent"
        android:layout_height="match_parent"
        android:id="@+id/pay_result"/>

</LinearLayout>


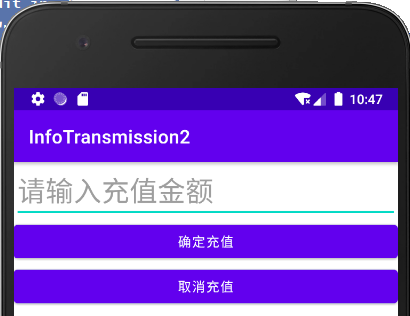
5. activity_pay
 1 <?xml version="1.0" encoding="utf-8"?>
 2 <LinearLayout
 3     xmlns:android="http://schemas.android.com/apk/res/android"
 4     xmlns:app="http://schemas.android.com/apk/res-auto"
 5     xmlns:tools="http://schemas.android.com/tools"
 6     android:layout_width="match_parent"
 7     android:layout_height="match_parent"
 8     tools:context=".PayActivity"
 9     android:orientation="vertical">
10
11     <EditText
12         android:layout_width="match_parent"
13         android:layout_height="wrap_content"
14         android:hint="请输入充值金额"
15         android:id="@+id/edit_input"
16         android:inputType="number"
17         android:textSize="30sp"/>
18
19     <Button
20         android:layout_width="match_parent"
21         android:layout_height="wrap_content"
22         android:id="@+id/btn_chargein"
23         android:text="确定充值"/>
24
25     <Button
26         android:layout_width="match_parent"
27         android:layout_height="wrap_content"
28         android:text="取消充值"
29         android:id="@+id/btn_cancelCharge"/>
30
31 </LinearLayout>
版权声明:本文内容由互联网用户自发贡献,该文观点仅代表作者本人。本站仅提供信息存储空间服务,不拥有所有权,不承担相关法律责任。如发现本站有涉嫌侵权/违法违规的内容, 请发送邮件至 举报,一经查实,本站将立刻删除。
发布者:全栈程序员-用户IM,转载请注明出处:https://javaforall.cn/155759.html原文链接:https://javaforall.cn
【正版授权,激活自己账号】: Jetbrains全家桶Ide使用,1年售后保障,每天仅需1毛
【官方授权 正版激活】: 官方授权 正版激活 支持Jetbrains家族下所有IDE 使用个人JB账号...
