大家好,又见面了,我是你们的朋友全栈君。
做个学习笔记。SpringBoot创建的项目由于不存在xml配置文件了,对于用惯Spring的xml配置事务犯了难,百度了下,大多文章都是用@Transactional对每一个方法或类手动添加任务,这样很麻烦,就自己摸索了下,实现了对指定切点事务的统一添加。有两种方式。PS:启动类,对,就是包含main方法的那个类一定要放在包的最外层,不然有很多坑。包括但不限于不能扫描到你配置的类,连接ES时自定义接口无法自动注入等等。
1.Xml方式
跟Spring中差不多两步骤
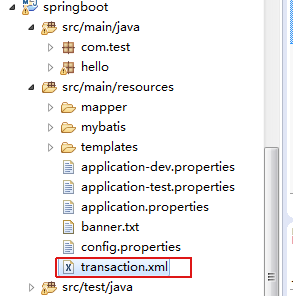
①.在resources文件夹下创建xml文件。例如:transaction.xml

xml的具体内容如下
<?xml version="1.0" encoding="UTF-8"?>
<beans xmlns="http://www.springframework.org/schema/beans"
    xmlns:xsi="http://www.w3.org/2001/XMLSchema-instance" xmlns:aop="http://www.springframework.org/schema/aop"
    xmlns:tx="http://www.springframework.org/schema/tx"
    xsi:schemaLocation="
        http://www.springframework.org/schema/beans
        http://www.springframework.org/schema/beans/spring-beans.xsd
        http://www.springframework.org/schema/tx
        http://www.springframework.org/schema/tx/spring-tx.xsd
        http://www.springframework.org/schema/aop
        http://www.springframework.org/schema/aop/spring-aop.xsd">


    <bean id="txManager"
        class="org.springframework.jdbc.datasource.DataSourceTransactionManager">
        <property name="dataSource" ref="dataSource" ></property>
    </bean>
    <tx:advice id="txAdvice" transaction-manager="txManager">
        <tx:attributes>
            <tx:method name="query*" propagation="SUPPORTS" read-only="true" ></tx:method>
            <tx:method name="get*" propagation="SUPPORTS" read-only="true" ></tx:method>
            <tx:method name="select*" propagation="SUPPORTS" read-only="true" ></tx:method>
            <tx:method name="*" propagation="REQUIRED" rollback-for="Exception" ></tx:method>
        </tx:attributes>
    </tx:advice>
     <aop:config>
        <aop:pointcut id="allManagerMethod" expression="execution (* com.test.service.*.*(..))" />
        <aop:advisor advice-ref="txAdvice" pointcut-ref="allManagerMethod" order="0"/>
    </aop:config>

</beans>
注意:dataSource是直接拿来用的,所以你在加载DataSource对象时候必须命名为dataSource。比如我用的连接池是阿里的druid,这样写
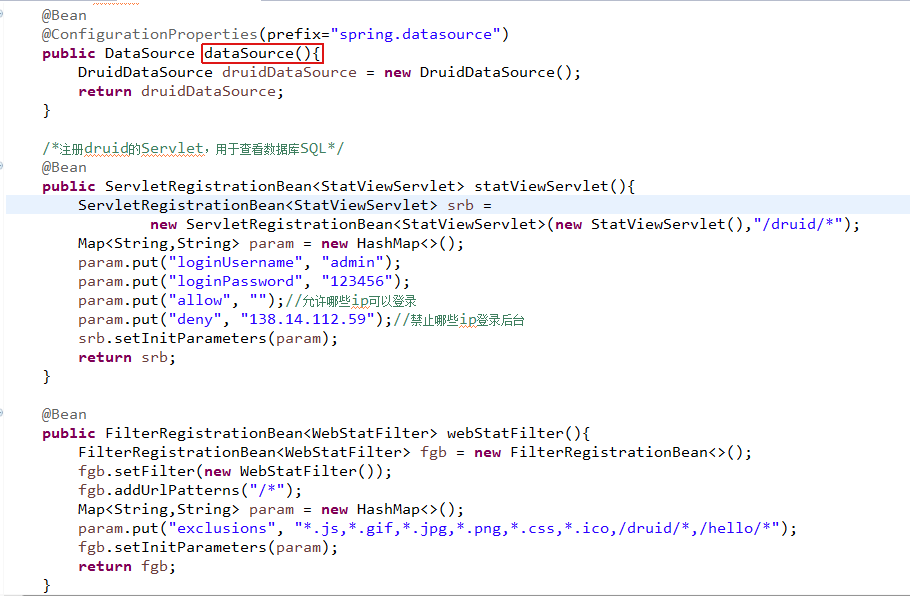
要么方法名用dataSource,要么注解写成@Bean(“dataSource”)
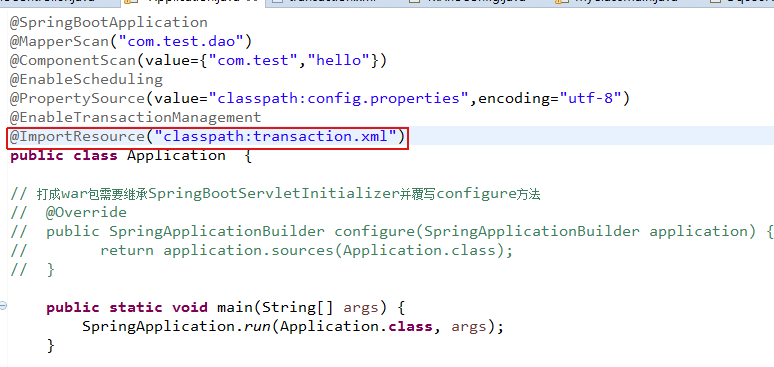
②、在启动类上添加@ImportResource注解,例如:@ImportResource(“classpath:transaction.xml”)
两步完成,运行就完事儿了
2.注解方式
关于SpringBoot中的注解事务配置,网上一搜基本都是用@Transactional,那给每个类或方法配要给人累死了。
非常不推荐。所以想上面xml一样全局配置怎么办?同样是两步
①、配置事务类
package com.test.aop;

import java.util.Collections;
import java.util.HashMap;
import java.util.Map;

import javax.sql.DataSource;

import org.springframework.aop.aspectj.AspectJExpressionPointcut;
import org.springframework.aop.support.DefaultPointcutAdvisor;
import org.springframework.beans.factory.annotation.Autowired;
import org.springframework.context.annotation.Bean;
import org.springframework.context.annotation.Configuration;
import org.springframework.jdbc.datasource.DataSourceTransactionManager;
import org.springframework.transaction.TransactionDefinition;
import org.springframework.transaction.interceptor.NameMatchTransactionAttributeSource;
import org.springframework.transaction.interceptor.RollbackRuleAttribute;
import org.springframework.transaction.interceptor.RuleBasedTransactionAttribute;
import org.springframework.transaction.interceptor.TransactionAttribute;
import org.springframework.transaction.interceptor.TransactionInterceptor;

import com.test.domain.DqeProfileDefine;

@Configuration
public class TxAnoConfig {


	@Autowired
    private DataSource dataSource;

	@Bean("txManager")
	public DataSourceTransactionManager txManager() {
		return new DataSourceTransactionManager(dataSource);
	}

    /*事务拦截器*/
    @Bean("txAdvice")
    public 	TransactionInterceptor txAdvice(DataSourceTransactionManager txManager){

    	NameMatchTransactionAttributeSource source = new NameMatchTransactionAttributeSource();
          /*只读事务,不做更新操作*/
         RuleBasedTransactionAttribute readOnlyTx = new RuleBasedTransactionAttribute();
         readOnlyTx.setReadOnly(true);
         readOnlyTx.setPropagationBehavior(TransactionDefinition.PROPAGATION_NOT_SUPPORTED );
         /*当前存在事务就使用当前事务,当前不存在事务就创建一个新的事务*/
         //RuleBasedTransactionAttribute requiredTx = new RuleBasedTransactionAttribute();
         //requiredTx.setRollbackRules(
         //    Collections.singletonList(new RollbackRuleAttribute(Exception.class)));
         //requiredTx.setPropagationBehavior(TransactionDefinition.PROPAGATION_REQUIRED);
         RuleBasedTransactionAttribute requiredTx = new RuleBasedTransactionAttribute(TransactionDefinition.PROPAGATION_REQUIRED,
             Collections.singletonList(new RollbackRuleAttribute(Exception.class)));
         requiredTx.setTimeout(5);
         Map<String, TransactionAttribute> txMap = new HashMap<>();
         txMap.put("add*", requiredTx);
         txMap.put("save*", requiredTx);
         txMap.put("insert*", requiredTx);
         txMap.put("update*", requiredTx);
         txMap.put("delete*", requiredTx);
         txMap.put("get*", readOnlyTx);
         txMap.put("query*", readOnlyTx);
         source.setNameMap( txMap );
        return new TransactionInterceptor(txManager ,source) ;
    }

    /**切面拦截规则 参数会自动从容器中注入*/
    @Bean
    public DefaultPointcutAdvisor defaultPointcutAdvisor(TransactionInterceptor txAdvice){
    	DefaultPointcutAdvisor pointcutAdvisor = new DefaultPointcutAdvisor();
        pointcutAdvisor.setAdvice(txAdvice);
        AspectJExpressionPointcut pointcut = new AspectJExpressionPointcut();
        pointcut.setExpression("execution (* com.test.service.*.*(..))");
        pointcutAdvisor.setPointcut(pointcut);
        return pointcutAdvisor;
    }


}
②、在pom.xml中添加依赖
<dependency>
		<groupId>org.springframework</groupId>
		<artifactId>spring-aspects</artifactId>
</dependency>
这里也不讲事务传播和隔离级别了,去百度吧,一大堆,也很简单。
如果你不嫌麻烦用@Aspect这个注解也行,具体百度Spring中怎么用
两种方式比较:
我还是比较推荐xml,一眼望去,清清楚楚。功能强大,不管是哪个类中哪个方法,只要你配置了事务就能生效
注解方式,即使controller层配置了事务,切点为* com.test.controller.*.*(..),事务也不生效,不知道为啥,@service层中的方法正常配置就有效。有坑。当然,对于@controller层中也要做事务,可以用@Transactional,不过一般人不需要controller开启事务吧
发布者:全栈程序员-用户IM,转载请注明出处:https://javaforall.cn/136816.html原文链接:https://javaforall.cn
【正版授权,激活自己账号】: Jetbrains全家桶Ide使用,1年售后保障,每天仅需1毛
【官方授权 正版激活】: 官方授权 正版激活 支持Jetbrains家族下所有IDE 使用个人JB账号...
