大家好,又见面了,我是你们的朋友全栈君。
LAMP是Linux Apache MySQL PHP的简写,即把Apache、MySQL以及PHP安装在Linux系统上,组成一个环境来运行PHP的脚本语言,通常是网站。
Apache是最常用的web服务软件,而MySQL是比较小型的数据库软件,这两个软件以及PHP都可以安装在一台机器上,也可以分开安装,但Apache和PHP必须安装在同一台机器上,因为PHP是作为Apache的一个模块存在的。
11.1 安装MySQL
MySQL官网:https://www.mysql.com/
MySQL是一个关系型数据库,由瑞典MySQL AB 公司开发,目前属于 Oracle 旗下产品,关系数据库将数据保存在不同的表中,而不是将所有数据放在一个大仓库内,这样就增加了速度并提高了灵活性。
MariaDB官网:https://mariadb.com
MariaDB是MySQL的一个分支,由MySQL原作者开发,MariaDB 5.5版本对应MySQL 5.5版本,而MariaDB 10.0版本对应MySQL 5.6版本,有以下版本:
- Community 社区版
- Enterprise 企业版
- GA(Generally Available)通用版
- DMR(Development Milestone Release)开发里程碑发布版
- RC(Release Candidate)发行候选版
- Alpha 内部测试版
- Beta 开放测试版
MySQL的最新版本是 5.7GA和8.0DMR ,MariaDB的最新版本是10.3.7 。
下载软件包
我们可以到官网去下载对应版本的MySQL/MariaDB的包,在这里,我使用的是免编译的二进制包。在CentOS7之前的版本都有区分32位和64位,CentOS7可以直接选择64位的包下载,带有x86_64字样的就是64位的包,带有i686字样的就是32位的包。
- 查看linux是多少位的:
# uname -i
x86_64
- 下载MySQL5.6的二进制包:
# cd /usr/local/src/

# wget http://mirrors.sohu.com/mysql/MySQL-5.6/mysql-5.6.36-linux-glibc2.5-x86_64.tar.gz
正在解析主机 mirrors.sohu.com (mirrors.sohu.com)... 221.236.12.140
正在连接 mirrors.sohu.com (mirrors.sohu.com)|221.236.12.140|:80... 已连接。
已发出 HTTP 请求,正在等待回应... 200 OK
长度:316320366 (302M) [application/octet-stream]
正在保存至: “mysql-5.6.36-linux-glibc2.5-x86_64.tar.gz”

100%[=========================================================================>] 316,320,366  475KB/s 用时 14m 48s

2018-06-26 14:47:30 (348 KB/s) - 已保存 “mysql-5.6.36-linux-glibc2.5-x86_64.tar.gz” [316320366/316320366])
初始化
- 解压下载的包:
# tar zxvf mysql-5.6.36-linux-glibc2.5-x86_64.tar.gz
移动解压完的目录并更改名字为mysql(容易出现的错误,local下已经存在mysql文件,如果这样移动,会变成移动到mysql下,这样就会报错,mv前提前进入local看下是否已存在mysql文件夹)。
# [ -d /usr/local/mysql ] && mv /usrlocal/mysql /usr/local/mysql_old

# mv mysql-5.6.36-linux-glibc2.5-x86_64 /usr/local/mysql
上面用到特殊符号&&,它表示当前面的命令执行成功时,才会执行后面的命令。如果/usr/local/mysql目录已经存在,就要把它改个名字,否则后面步骤会出错。
- 建立MySQL用户,启动mysql需要该用户:
# useradd -s /sbin/nologin mysql

# cd /usr/local/mysql
- 创建datadir,数据库文件会放到这里:
# mkdir -p data/mysql
- 更改权限,否则后面会报错:
# chown -R mysql:mysql data/mysql
- 进行初始化,指定用户为
mysql,指定数据存放路径/usr/local/mysql/data/mysql:
# ./scripts/mysql_install_db --user=mysql --datadir=/usr/local/mysql/data/mysql
FATAL ERROR: please install the following Perl modules before executing ./scripts/mysql_install_db:
Data::Dumper
上面出错了,有提示“Dumper”,我们可以查查
# yum list |grep perl | grep -i Dumper
perl-Data-Dumper.x86_64                   2.145-3.el7                    @base
perl-Data-Dumper-Concise.noarch           2.020-6.el7                    epel
perl-Data-Dumper-Names.noarch             0.03-17.el7                    epel
perl-XML-Dumper.noarch                    0.81-17.el7                    base
不知道的情况下,可以一个个去安装上面的包,这里我们知道是第一个,使用yum安装
# yum install -y perl-Data-Dumper.x86_64
- 再次初始化:
# ./scripts/mysql_install_db --user=mysql --datadir=/data/mysql
FATAL ERROR: The parent directory for the data directory '/data/mysql' does not exist.
If that path was really intended, please create that directory path and then
restart this script.
If some other path was intended, please use the correct path when restarting this script.
提示没有这样的目录或文件,我们需要在data/mysql前面加上绝对路径
# ./scripts/mysql_install_db --user=mysql --datadir=/usr/local/mysql/data/mysql
Installing MySQL system tables..../bin/mysqld: error while loading shared libraries: libaio.so.1: cannot open shared object file: No such file or directory
又报错了,提示没有libaio.so.1,没有就安装:
# yum install -y libaio*
- 安装完之后再次执行初始化:
# ./scripts/mysql_install_db --user=mysql --datadir=/usr/local/mysql/data/mysql

Installing MySQL system tables...2018-06-26 15:59:53 0 [Warning] TIMESTAMP with implicit DEFAULT value is deprecated. Please use --explicit_defaults_for_timestamp server option (see documentation for more details).
2018-06-26 15:59:53 0 [Note] Ignoring --secure-file-priv value as server is running with --bootstrap.
2018-06-26 15:59:53 0 [Note] ./bin/mysqld (mysqld 5.6.36) starting as process 3349 ...
2018-06-26 15:59:53 3349 [Note] InnoDB: Using atomics to ref count buffer pool pages
2018-06-26 15:59:53 3349 [Note] InnoDB: The InnoDB memory heap is disabled
2018-06-26 15:59:53 3349 [Note] InnoDB: Mutexes and rw_locks use GCC atomic builtins
2018-06-26 15:59:53 3349 [Note] InnoDB: Memory barrier is not used
2018-06-26 15:59:53 3349 [Note] InnoDB: Compressed tables use zlib 1.2.3
2018-06-26 15:59:53 3349 [Note] InnoDB: Using Linux native AIO
2018-06-26 15:59:53 3349 [Note] InnoDB: Using CPU crc32 instructions
2018-06-26 15:59:53 3349 [Note] InnoDB: Initializing buffer pool, size = 128.0M
2018-06-26 15:59:53 3349 [Note] InnoDB: Completed initialization of buffer pool
2018-06-26 15:59:53 3349 [Note] InnoDB: The first specified data file ./ibdata1 did not exist: a new database to be created!
2018-06-26 15:59:53 3349 [Note] InnoDB: Setting file ./ibdata1 size to 12 MB
2018-06-26 15:59:53 3349 [Note] InnoDB: Database physically writes the file full: wait...
2018-06-26 15:59:53 3349 [Note] InnoDB: Setting log file ./ib_logfile101 size to 48 MB
2018-06-26 15:59:54 3349 [Note] InnoDB: Setting log file ./ib_logfile1 size to 48 MB
2018-06-26 15:59:55 3349 [Note] InnoDB: Renaming log file ./ib_logfile101 to ./ib_logfile0
2018-06-26 15:59:55 3349 [Warning] InnoDB: New log files created, LSN=45781
2018-06-26 15:59:55 3349 [Note] InnoDB: Doublewrite buffer not found: creating new
2018-06-26 15:59:55 3349 [Note] InnoDB: Doublewrite buffer created
2018-06-26 15:59:55 3349 [Note] InnoDB: 128 rollback segment(s) are active.
2018-06-26 15:59:55 3349 [Warning] InnoDB: Creating foreign key constraint system tables.
2018-06-26 15:59:55 3349 [Note] InnoDB: Foreign key constraint system tables created
2018-06-26 15:59:55 3349 [Note] InnoDB: Creating tablespace and datafile system tables.
2018-06-26 15:59:55 3349 [Note] InnoDB: Tablespace and datafile system tables created.
2018-06-26 15:59:55 3349 [Note] InnoDB: Waiting for purge to start
2018-06-26 15:59:55 3349 [Note] InnoDB: 5.6.36 started; log sequence number 0
2018-06-26 15:59:55 3349 [Note] Binlog end
2018-06-26 15:59:55 3349 [Note] InnoDB: FTS optimize thread exiting.
2018-06-26 15:59:55 3349 [Note] InnoDB: Starting shutdown...
2018-06-26 15:59:57 3349 [Note] InnoDB: Shutdown completed; log sequence number 1625977
OK

Filling help tables...2018-06-26 15:59:57 0 [Warning] TIMESTAMP with implicit DEFAULT value is deprecated. Please use --explicit_defaults_for_timestamp server option (see documentation for more details).
2018-06-26 15:59:57 0 [Note] Ignoring --secure-file-priv value as server is running with --bootstrap.
2018-06-26 15:59:57 0 [Note] ./bin/mysqld (mysqld 5.6.36) starting as process 3371 ...
2018-06-26 15:59:57 3371 [Note] InnoDB: Using atomics to ref count buffer pool pages
2018-06-26 15:59:57 3371 [Note] InnoDB: The InnoDB memory heap is disabled
2018-06-26 15:59:57 3371 [Note] InnoDB: Mutexes and rw_locks use GCC atomic builtins
2018-06-26 15:59:57 3371 [Note] InnoDB: Memory barrier is not used
2018-06-26 15:59:57 3371 [Note] InnoDB: Compressed tables use zlib 1.2.3
2018-06-26 15:59:57 3371 [Note] InnoDB: Using Linux native AIO
2018-06-26 15:59:57 3371 [Note] InnoDB: Using CPU crc32 instructions
2018-06-26 15:59:57 3371 [Note] InnoDB: Initializing buffer pool, size = 128.0M
2018-06-26 15:59:57 3371 [Note] InnoDB: Completed initialization of buffer pool
2018-06-26 15:59:57 3371 [Note] InnoDB: Highest supported file format is Barracuda.
2018-06-26 15:59:57 3371 [Note] InnoDB: 128 rollback segment(s) are active.
2018-06-26 15:59:57 3371 [Note] InnoDB: Waiting for purge to start
2018-06-26 15:59:57 3371 [Note] InnoDB: 5.6.36 started; log sequence number 1625977
2018-06-26 15:59:57 3371 [Note] Binlog end
2018-06-26 15:59:57 3371 [Note] InnoDB: FTS optimize thread exiting.
2018-06-26 15:59:57 3371 [Note] InnoDB: Starting shutdown...
2018-06-26 15:59:59 3371 [Note] InnoDB: Shutdown completed; log sequence number 1625987
OK

To start mysqld at boot time you have to copy
support-files/mysql.server to the right place for your system

PLEASE REMEMBER TO SET A PASSWORD FOR THE MySQL root USER !
To do so, start the server, then issue the following commands:

  ./bin/mysqladmin -u root password 'new-password'
  ./bin/mysqladmin -u root -h localhost.localdomain password 'new-password'

Alternatively you can run:

  ./bin/mysql_secure_installation

which will also give you the option of removing the test
databases and anonymous user created by default.  This is
strongly recommended for production servers.

See the manual for more instructions.

You can start the MySQL daemon with:

  cd . ; ./bin/mysqld_safe &

You can test the MySQL daemon with mysql-test-run.pl

  cd mysql-test ; perl mysql-test-run.pl

Please report any problems at http://bugs.mysql.com/

The latest information about MySQL is available on the web at

  http://www.mysql.com

Support MySQL by buying support/licenses at http://shop.mysql.com

WARNING: Found existing config file ./my.cnf on the system.
Because this file might be in use, it was not replaced,
but was used in bootstrap (unless you used --defaults-file)
and when you later start the server.
The new default config file was created as ./my-new.cnf,
please compare it with your file and take the changes you need.

WARNING: Default config file /etc/my.cnf exists on the system
This file will be read by default by the MySQL server
If you do not want to use this, either remove it, or use the
--defaults-file argument to mysqld_safe when starting the server
可以看到,上面出现了两个OK,这就说明初始化成功,还可以检验一下
# echo $?
0
输出为0,说明上一条命令已经正确执行。
配置MySQL
初始化完成之后,接下来就是配置。
- 首先复制配置文件:
# cp support-files/my-default.cnf /etc/my.cnf
cp:是否覆盖"/etc/my.cnf"? y
- 打开配置文件,做以下修改:
[mysqld]

# Remove leading # and set to the amount of RAM for the most important data
# cache in MySQL. Start at 70% of total RAM for dedicated server, else 10%.
 innodb_buffer_pool_size = 128M

# Remove leading # to turn on a very important data integrity option: logging
# changes to the binary log between backups.
# log_bin =

# These are commonly set, remove the # and set as required.
 basedir = /usr/local/mysql
 datadir = /usr/local/mysql/data/mysql
 port = 3306
# server_id = .....
# socket = .....

# Remove leading # to set options mainly useful for reporting servers.
其中,basedir是MySQL包所在的路径,datadir是定义的存放数据的地方,port定义MySQL服务监听的端口,如果不定义默认就是3306,server_id定义该MySQL服务的ID号,用于做主从配置。
- 然后复制启动脚本文件并修改其属性:
# cp support-files/mysql.server /etc/init.d/mysqld

# chmod 755 /etc/init.d/mysqld
- 然后修改启动脚本:
# vim /etc/init.d/mysqld

basedir=/usr/local/mysql
datadir=/usr/local/mysql/data/mysql
- 接下来将启动脚本加入系统服务项并设置开机启动:
# chkconfig --add mysqld

# chkconfig mysqld on
- 最后启动服务:
# service mysqld start
Starting MySQL.Logging to '/usr/local/mysql/data/mysql/localhost.localdomain.err'.
. SUCCESS!
上面已经启动成功,如果没有成功启动,我们也可以到/usr/local/mysql//data/mysql目录下查看错误日志。
- 检查MySQL是否启动的命令为:
# ps aux |grep mysqld #结果应该大于2行
root       3494  0.0  0.0  11816  1612 pts/0    S    16:32   0:00 /bin/sh /usr/local/mysql/bin/mysqld_safe --datadir=/usr/local/mysql/data/mysql --pid-file=/usr/local/mysql/data/mysql/localhost.localdomain.pid
mysql      3655  0.5 24.3 1300820 453380 pts/0  Sl   16:32   0:01 /usr/local/mysql/bin/mysqld --basedir=/usr/local/mysql --datadir=/usr/local/mysql/data/mysql --plugin-dir=/usr/local/mysql/lib/plugin --user=mysql --log-error=/usr/local/mysql/data/mysql/localhost.localdomain.err --pid-file=/usr/local/mysql/data/mysql/localhost.localdomain.pid --port=3306
root       3681  0.0  0.0 112720   984 pts/0    S+   16:36   0:00 grep --color=auto mysqld

# netstat -lntp |grep 3306 #查看是否在监听3306端口
tcp6       0      0 :::3306                 :::*                    LISTEN      3655/mysqld
如果是上面这样的情况,说明MySQL启动成功。
另外,停止MySQL服务:
# service mysqld stop
还可以以命令行的方式启动脚本,--defaults-file指定配置文件,指定用户,指定目录,最后加上&符号,放到后台执行。
# /usr/local/mysql/bin/mysqld_safe --defaults-file=/etc/my.cnf --user=mysql --datadir=/data/mysql &
以命令行的方式启动的mysql脚本不能直接stop,可以使用killall停止服务。
使用killall会停止当前的写读操作,再将没有写入到磁盘中的数据写到磁盘里面去,写完之后再将进程杀死。
如果遇到mysql的进程杀不死,可能说明数据量比较大,在慢慢写入磁盘,这时候不要使用kill -9强制杀死进程,可能会损坏数据。
最后,MariaDB的安装方法与MySQL大致相同,这里不做更多赘述。
11.2 安装Apache
Apache官网:https://www.apache.org
Apache是一个基金会的名字,httpd才是我们要安装的软件包,早期它的名字就叫apache。
编译安装apache之前先安装apr以及apr-util,apr和apr-util是一个通用的函数库,主要为上层应用提供支持,它让httpd可以不关心底层的操作系统平台,可以很方便地移植(从linux移植到windows)。
- 下载httpd:
# cd /usr/local/src

# wget http://mirrors.cnnic.cn/apache/httpd/httpd-2.4.33.tar.gz
- 下载apr:
# wget http://mirrors.cnnic.cn/apache/apr/apr-1.6.3.tar.gz
- 下载apr-util:
# wget http://mirrors.cnnic.cn/apache/apr/apr-util-1.6.1.tar.bz2
- 解压下载好的源码包:
# tar zxvf httpd-2.4.33.tar.gz

# tar zxvf apr-1.6.3.tar.gz

# tar jxvf apr-util-1.6.1.tar.bz2
- 安装apr(进入apr目录):
# cd apr-1.6.3

# ./configure --prefix=/usr/local/apr

# make && make install
- 安装apr-util(进入apr-util目录):
# cd /usr/local/src/apr-util-1.6.1

# ./configure --prefix=/usr/local/apr-util --with-apr=/usr/local/apr

# make && make install
如果上面在安装时出现错误,可以试着去安装expat-devel,因为apr-util需要expat-devel依赖。
- 继续安装httpd(进入httpd目录):
# cd /usr/local/src/httpd-2.4.33

# ./configure \
> --prefix=/usr/local/apache2.4 \
> --with-apr=/usr/local/apr \
> --with-apr-util=/usr/local/apr-util \
> --enable-so \
> --enable-mods-shared=most
上面,
\		表示转义字符,加上它可以将一行命令写成多行,更加直观

--prefix		指定安装目录

--enable-so		表示启用DSO,表示支持扩展模块,动态扩展模块,apache和php都支持以一个模块的形式存在

--enable-mods-shared=most		表示指定需要哪些动态扩展的模块,需要加载哪些呢?most就是绝大多数
为了避免在make的时候出错,我们可以提前安装pcre和pcre-devel:
# yum install -y pcre pcre-devel
- 最后编译和安装:
# make

# make install
上面两个步骤都可以通过echo $?来判断上一条命令是否正确执行。
安装完之后,我们可以查看httpd的目录结构及modules目录下面的模块文件:
# ls /usr/local/apache2.4/
bin  build  cgi-bin  conf  error  htdocs  icons  include  logs  man  manual  modules
bin				命令放置的目录
conf			主要存放了配置文件httpd.conf,这个是最重要的配置文件,Apache的所有主要权限和功能都在这个文件中进行了详细的设置htdocs
logs			日志相关的目录
modules			模块放置的目录
查看apache加载了哪些模块,使用命令(两条命令一样):
/usr/local/apache2.4/bin/httpd -M
/usr/local/apache2.4/bin/apachectl -M
# /usr/local/apache2.4/bin/apachectl -M

AH00558: httpd: Could not reliably determine the server's fully qualified domain name, using localhost.localdomain. Set the 'ServerName' directive globally to suppress this message
Loaded Modules:
 core_module (static)
 so_module (static)
 http_module (static)
 mpm_event_module (static)
 authn_file_module (shared)
 authn_core_module (shared)
 authz_host_module (shared)
 authz_groupfile_module (shared)
 authz_user_module (shared)
 authz_core_module (shared)
 access_compat_module (shared)
 auth_basic_module (shared)
 reqtimeout_module (shared)
 filter_module (shared)
 mime_module (shared)
 log_config_module (shared)
 env_module (shared)
 headers_module (shared)
 setenvif_module (shared)
 version_module (shared)
 unixd_module (shared)
 status_module (shared)
 autoindex_module (shared)
 dir_module (shared)
 alias_module (shared)
前面以AH0058开头的行,并不是错误,仅仅是一个警告。带有 shared 字样的,表示该模块为动态共享模块;带有 static 字样的,它表示以静态形式存在。
两者区别在于,静态模块直接和主程序/usr/local/apache2.4/bin/httpd绑定在一起,动态模块则是一个个独立存在的文件。
- 启动apache:
# /usr/local/apache2.4/bin/apachectl start
AH00558: httpd: Could not reliably determine the server's fully qualified domain name, using localhost.localdomain. Set the 'ServerName' directive globally to suppress this message
暂且不管提示的这段信息,我们查看httpd服务是否启动:
# ps aux |grep httpd
root      25761  0.0  0.1  70932  2240 ?        Ss   20:45   0:00 /usr/local/apache2.4/bin/httpd -k start
daemon    25762  0.3  0.2 359896  4260 ?        Sl   20:45   0:00 /usr/local/apache2.4/bin/httpd -k start
daemon    25763  0.3  0.2 359896  4248 ?        Sl   20:45   0:00 /usr/local/apache2.4/bin/httpd -k start
daemon    25768  0.3  0.2 359896  4248 ?        Sl   20:45   0:00 /usr/local/apache2.4/bin/httpd -k start
root      25849  0.0  0.0 112720   980 pts/0    S+   20:45   0:00 grep --color=auto httpd

# netstat -lntp
Active Internet connections (only servers)
Proto Recv-Q Send-Q Local Address           Foreign Address         State       PID/Program name
tcp        0      0 0.0.0.0:22              0.0.0.0:*               LISTEN      910/sshd
tcp        0      0 127.0.0.1:25            0.0.0.0:*               LISTEN      1292/master
tcp6       0      0 :::3306                 :::*                    LISTEN      1218/mysqld
tcp6       0      0 :::80                   :::*                    LISTEN      25761/httpd
tcp6       0      0 :::22                   :::*                    LISTEN      910/sshd
tcp6       0      0 ::1:25                  :::*                    LISTEN      1292/master
上面我们可以看到,httpd服务已经成功启动,正在监听80端口。
11.3 安装PHP
PHP官网:http://www.php.net/
前面讲到,PHP是作为Apache的一个模块存在的,而PHP的当前主流版本为5.6/7.1,所以我们两个都去安装。
安装PHP5
- 下载并解压php5源码包:
# cd /usr/local/src

# wget http://cn2.php.net/distributions/php-5.6.36.tar.bz2

# tar jxvf php-5.6.36.tar.bz2
- 然后配置编译各种参数(进入php5目录):
# cd php-5.6.36

# ./configure \
> --prefix=/usr/local/php \
> --with-apxs2=/usr/local/apache2.4/bin/apxs \
> --with-config-file-path=/usr/local/php/etc \
> --with-mysql=/usr/local/mysql \
> --with-pdo-mysql=/usr/local/mysql \
> --with-mysqli=/usr/local/mysql/bin/mysql_config \
> --with-libxml-dir \
> --with-gd \
> --with-jpeg-dir \
> --with-png-dir \
> --with-freetype-dir \
> --with-iconv-dir \
> --with-zlib-dir \
> --with-bz2 \
> --with-openssl \
> --with-mcrypt \
> --enable-soap \
> --enable-gd-native-ttf \
> --enable-mbstring \
> --enable-sockets \
> --enable-exif
关于PHP的编译参数比较多,编译参数可以指定我们需要的功能模块,跟前面的httpd类似。上面的这些参数算是常用的,如果没有特殊要求,直接使用这些参数即可。
另外,apxs是httpd的一个工具,因为有它才会自动把PHP模块安装到httpd的modules目录下,也就是说PHP将会以一个模块的形式和httpd结合在一起工作。
- 在上一步编译PHP的过程中,我遇到了这些错误:
- configure: error: xml2-config not found. Please check your libxml2 installation.
安装所需的包然后继续编译:
# yum install -y libxml2-devel

# ./configure --prefix=/usr/local/php --with-apxs2=/usr/local/apache2.4/bin/apxs --with-config-file-path=/usr/local/php/etc --with-mysql=/usr/local/mysql --with-pdo-mysql=/usr/local/mysql --with-mysqli=/usr/local/mysql/bin/mysql_config --with-libxml-dir --with-gd --with-jpeg-dir --with-png-dir --with-freetype-dir --with-iconv-dir --with-zlib-dir --with-bz2 --with-openssl --with-mcrypt --enable-soap --enable-gd-native-ttf --enable-mbstring --enable-sockets --enable-exif
- configure: error: Cannot find OpenSSL’s <evp.h>
安装所需的包然后继续编译:
# yum install -y openssl openssl-devel

# ./configure --prefix=/usr/local/php --with-apxs2=/usr/local/apache2.4/bin/apxs --with-config-file-path=/usr/local/php/etc --with-mysql=/usr/local/mysql --with-pdo-mysql=/usr/local/mysql --with-mysqli=/usr/local/mysql/bin/mysql_config --with-libxml-dir --with-gd --with-jpeg-dir --with-png-dir --with-freetype-dir --with-iconv-dir --with-zlib-dir --with-bz2 --with-openssl --with-mcrypt --enable-soap --enable-gd-native-ttf --enable-mbstring --enable-sockets --enable-exif
- configure: error: Please reinstall the BZip2 distribution
安装所需的包然后继续编译:
# yum install -y bzip2 bzip2-devel

# ./configure --prefix=/usr/local/php --with-apxs2=/usr/local/apache2.4/bin/apxs --with-config-file-path=/usr/local/php/etc --with-mysql=/usr/local/mysql --with-pdo-mysql=/usr/local/mysql --with-mysqli=/usr/local/mysql/bin/mysql_config --with-libxml-dir --with-gd --with-jpeg-dir --with-png-dir --with-freetype-dir --with-iconv-dir --with-zlib-dir --with-bz2 --with-openssl --with-mcrypt --enable-soap --enable-gd-native-ttf --enable-mbstring --enable-sockets --enable-exif
- configure: error: jpeglib.h not found.
安装所需的包然后继续编译:
# yum -y install libjpeg-devel

# ./configure --prefix=/usr/local/php --with-apxs2=/usr/local/apache2.4/bin/apxs --with-config-file-path=/usr/local/php/etc --with-mysql=/usr/local/mysql --with-pdo-mysql=/usr/local/mysql --with-mysqli=/usr/local/mysql/bin/mysql_config --with-libxml-dir --with-gd --with-jpeg-dir --with-png-dir --with-freetype-dir --with-iconv-dir --with-zlib-dir --with-bz2 --with-openssl --with-mcrypt --enable-soap --enable-gd-native-ttf --enable-mbstring --enable-sockets --enable-exif
- configure: error: png.h not found.
安装所需的包然后继续编译:
# yum install -y libpng libpng-devel

# ./configure --prefix=/usr/local/php --with-apxs2=/usr/local/apache2.4/bin/apxs --with-config-file-path=/usr/local/php/etc --with-mysql=/usr/local/mysql --with-pdo-mysql=/usr/local/mysql --with-mysqli=/usr/local/mysql/bin/mysql_config --with-libxml-dir --with-gd --with-jpeg-dir --with-png-dir --with-freetype-dir --with-iconv-dir --with-zlib-dir --with-bz2 --with-openssl --with-mcrypt --enable-soap --enable-gd-native-ttf --enable-mbstring --enable-sockets --enable-exif
- configure: error: freetype-config not found.
安装所需的包然后继续编译:
# yum install -y freetype freetype-devel

# ./configure --prefix=/usr/local/php --with-apxs2=/usr/local/apache2.4/bin/apxs --with-config-file-path=/usr/local/php/etc --with-mysql=/usr/local/mysql --with-pdo-mysql=/usr/local/mysql --with-mysqli=/usr/local/mysql/bin/mysql_config --with-libxml-dir --with-gd --with-jpeg-dir --with-png-dir --with-freetype-dir --with-iconv-dir --with-zlib-dir --with-bz2 --with-openssl --with-mcrypt --enable-soap --enable-gd-native-ttf --enable-mbstring --enable-sockets --enable-exif
- configure: error: mcrypt.h not found. Please reinstall libmcrypt.
安装所需的包然后继续编译:
# yum install -y epel-release

# yum install -y libmcrypt-devel

# ./configure --prefix=/usr/local/php --with-apxs2=/usr/local/apache2.4/bin/apxs --with-config-file-path=/usr/local/php/etc --with-mysql=/usr/local/mysql --with-pdo-mysql=/usr/local/mysql --with-mysqli=/usr/local/mysql/bin/mysql_config --with-libxml-dir --with-gd --with-jpeg-dir --with-png-dir --with-freetype-dir --with-iconv-dir --with-zlib-dir --with-bz2 --with-openssl --with-mcrypt --enable-soap --enable-gd-native-ttf --enable-mbstring --enable-sockets --enable-exif
- 终于不再提示错误,有这样的信息:
+--------------------------------------------------------------------+
| License:                                                           |
| This software is subject to the PHP License, available in this     |
| distribution in the file LICENSE.  By continuing this installation |
| process, you are bound by the terms of this license agreement.     |
| If you do not agree with the terms of this license, you must abort |
| the installation process at this point.                            |
+--------------------------------------------------------------------+

Thank you for using PHP.

config.status: creating php5.spec
config.status: creating main/build-defs.h
config.status: creating scripts/phpize
config.status: creating scripts/man1/phpize.1
config.status: creating scripts/php-config
config.status: creating scripts/man1/php-config.1
config.status: creating sapi/cli/php.1
config.status: creating sapi/cgi/php-cgi.1
config.status: creating ext/phar/phar.1
config.status: creating ext/phar/phar.phar.1
config.status: creating main/php_config.h
config.status: executing default commands
这就说明PHP5配置编译参数完成。
- 接下来就是编译:
# make
- 然后安装:
# make install
- 然后把配置文件放到
/usr/local/php/etc/目录下改名为php.ini:
# cp php.ini-production /usr/local/php/etc/php.ini
- 查看一下PHP的目录:
# ls /usr/local/php/
bin  etc  include  lib  php

# ls /usr/local/php/bin
pear  peardev  pecl  phar  phar.phar  php  php-cgi  php-config  phpize
其中,bin/和bin/php是PHP的核心文件。
- 查看httpd中有没有加载PHP模块:
# /usr/local/apache2.4/bin/apachectl -M

Loaded Modules:
 core_module (static)
 so_module (static)
 http_module (static)
 mpm_event_module (static)
 authn_file_module (shared)
 authn_core_module (shared)
 authz_host_module (shared)
 authz_groupfile_module (shared)
 authz_user_module (shared)
 authz_core_module (shared)
 access_compat_module (shared)
 auth_basic_module (shared)
 reqtimeout_module (shared)
 filter_module (shared)
 mime_module (shared)
 log_config_module (shared)
 env_module (shared)
 headers_module (shared)
 setenvif_module (shared)
 version_module (shared)
 unixd_module (shared)
 status_module (shared)
 autoindex_module (shared)
 dir_module (shared)
 alias_module (shared)
 php5_module (shared)
可以看到,已经加载PHP5模块。
- 查看PHP5加载的模块(都是静态模块):
# /usr/local/php/bin/php -m

[PHP Modules]
bz2
Core
ctype
date
dom
ereg
exif
fileinfo
filter
gd
hash
iconv
json
libxml
mbstring
mcrypt
mysql
mysqli
openssl
pcre
PDO
pdo_mysql
pdo_sqlite
Phar
posix
Reflection
session
SimpleXML
soap
sockets
SPL
sqlite3
standard
tokenizer
xml
xmlreader
xmlwriter
zlib

[Zend Modules]
- 查看PHP的信息:
# /usr/local/php/bin/php -i
phpinfo()
PHP Version => 5.6.36
安装PHP7
- 下载并解压php7源码包:
# cd /usr/local/src/

# wget http://cn2.php.net/distributions/php-7.1.6.tar.bz2

# tar jxvf php-7.1.6.tar.bz2
- 然后配置编译各种参数(进入php7目录):
# cd php-7.1.6

# ./configure --prefix=/usr/local/php7 --with-apxs2=/usr/local/apache2.4/bin/apxs --with-config-file-path=/usr/local/php7/etc --with-mysql=/usr/local/mysql --with-pdo-mysql=/usr/local/mysql --with-mysqli=/usr/local/mysql/bin/mysql_config --with-libxml-dir --with-gd --with-jpeg-dir --with-png-dir --with-freetype-dir --with-iconv-dir --with-zlib-dir --with-bz2 --with-openssl --with-mcrypt --enable-soap --enable-gd-native-ttf --enable-mbstring --enable-sockets --enable-exif
和PHP5有两处不同:./configure --prefix=/usr/local/php7 --with-config-file-path=/usr/local/php7/etc。
这次就会快很多,也不会有上面那么多的报错,因为缺少的包在上面安装PHP5的时候就已经安装了。
+--------------------------------------------------------------------+
| License:                                                           |
| This software is subject to the PHP License, available in this     |
| distribution in the file LICENSE.  By continuing this installation |
| process, you are bound by the terms of this license agreement.     |
| If you do not agree with the terms of this license, you must abort |
| the installation process at this point.                            |
+--------------------------------------------------------------------+

Thank you for using PHP.

config.status: creating php7.spec
config.status: creating main/build-defs.h
config.status: creating scripts/phpize
config.status: creating scripts/man1/phpize.1
config.status: creating scripts/php-config
config.status: creating scripts/man1/php-config.1
config.status: creating sapi/cli/php.1
config.status: creating sapi/cgi/php-cgi.1
config.status: creating ext/phar/phar.1
config.status: creating ext/phar/phar.phar.1
config.status: creating main/php_config.h
config.status: main/php_config.h is unchanged
config.status: executing default commands
configure: WARNING: unrecognized options: --with-mysql
出现这样的提示信息,这就说明PHP7配置编译参数完成。
- 接下来就是编译和安装:
# make && make install
- 然后把配置文件放到
/usr/local/php7/etc/目录下改名为php.ini:
# cp php.ini-production /usr/local/php7/etc/php.ini
- 安装完成以后,我们可以查看:
# ls /usr/local/apache2.4/modules/libphp*
/usr/local/apache2.4/modules/libphp5.so  /usr/local/apache2.4/modules/libphp7.so

# ls /usr/local/apache2.4/modules/libphp7.so
/usr/local/apache2.4/modules/libphp7.so

# du -sh !$
du -sh /usr/local/apache2.4/modules/libphp7.so
37M	/usr/local/apache2.4/modules/libphp7.so
- 查看httpd中有没有加载PHP模块:
# /usr/local/apache2.4/bin/apachectl -M

Loaded Modules:
 core_module (static)
 so_module (static)
 http_module (static)
 mpm_event_module (static)
 authn_file_module (shared)
 authn_core_module (shared)
 authz_host_module (shared)
 authz_groupfile_module (shared)
 authz_user_module (shared)
 authz_core_module (shared)
 access_compat_module (shared)
 auth_basic_module (shared)
 reqtimeout_module (shared)
 filter_module (shared)
 mime_module (shared)
 log_config_module (shared)
 env_module (shared)
 headers_module (shared)
 setenvif_module (shared)
 version_module (shared)
 unixd_module (shared)
 status_module (shared)
 autoindex_module (shared)
 dir_module (shared)
 alias_module (shared)
 php5_module (shared)
 php7_module (shared)
可以看到,已经加载PHP7模块。
- 查看PHP7加载的模块(都是静态模块):
# /usr/local/php7/bin/php -m

[PHP Modules]
bz2
Core
ctype
date
dom
exif
fileinfo
filter
gd
hash
iconv
json
libxml
mbstring
mcrypt
mysqli
openssl
pcre
PDO
pdo_mysql
pdo_sqlite
Phar
posix
Reflection
session
SimpleXML
soap
sockets
SPL
sqlite3
standard
tokenizer
xml
xmlreader
xmlwriter
zlib

[Zend Modules]
和PHP5基本上一致。
- 查看PHP信息:
# /usr/local/php7/bin/php -i
phpinfo()
PHP Version => 7.1.6
11.4 Apache和PHP结合
httpd的主配置文件是 /usr/local/apache2.4/conf/httpd.conf,对于这个文件,我们要做4处修改:
# vim /usr/local/apache2.4/conf/httpd.conf #做下面修改

ServerName www.example.com:80

<Directory />
    AllowOverride none
    Require all granted				#目的是允许所有请求,如果不做修改,则访问时候会显示403错误
</Directory>

AddType application/x-gzip .gz .tgz
AddType application/x-httpd-php .php				#注意php和.php之间有空格

<IfModule dir_module>
    DirectoryIndex index.html index.php
</IfModule>
配置完成,保存退出。
- 可以测试一下配置语法是否正确:
# /usr/local/apache2.4/bin/apachectl -t
Syntax OK
说明配置语法没问题。
- 然后重新加载配置文件:
# /usr/local/apache2.4/bin/apachectl graceful
- 启动服务:
# /usr/local/apache2.4/bin/apachectl start
- 查看是否启动:
# netstat -lntp | grep 80
tcp6       0      0 :::80                   :::*                    LISTEN      5412/httpd
已经成功启动httpd。
另外,还可以使用curl命令测试一下:
# curl localhost
<html><body><h1>It works!</h1></body></html>
测试没问题。
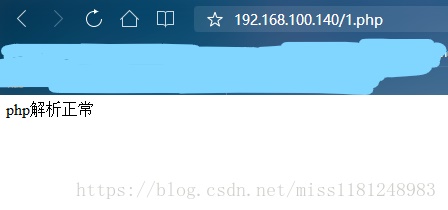
- 最后,我们还需要测试是否正确解析PHP:
# vim /usr/local/apache2.4/htdocs/1.php

<?php
 echo "php解析正常";
?>

# curl localhost/1.php
php解析正常[root@localhost php-5.6.36]#
说明PHP解析正确。
另外,如果是利用浏览器来访问Linux(虚拟)机器,需要在Linux机器上打开80端口:
# iptables -I INPUT -p tcp --dport 80 -j ACCEPT
然后用浏览器访问linux机器的IP地址:


更多资料参考:
发布者:全栈程序员-用户IM,转载请注明出处:https://javaforall.cn/134774.html原文链接:https://javaforall.cn
【正版授权,激活自己账号】: Jetbrains全家桶Ide使用,1年售后保障,每天仅需1毛
【官方授权 正版激活】: 官方授权 正版激活 支持Jetbrains家族下所有IDE 使用个人JB账号...
