在对容器进行迭代的情况下,我们可能遇到过ConcurrentModificationException这个异常,这是因为在设计迭代器时没有考虑到并发修改的问题,所以引用了ConcurrentModificationException这个善意的异常来警示开发者,这种策略叫做“及时失败”-fail-fast。注意ConcurrentModificationException不仅仅只是在多线程操作的情况下会出现,在单线程的情况下也可能会出现。先模拟一个单线程的情况下出现该异常的情况,并且从源码的角度分析异常产生的原因,最后如何避免出现该异常
1,单线程出现ConcurrentModificationException
import java.util.ArrayList;
import java.util.Iterator;
import java.util.List;

public class ConcurrentModificationExceptionTest {
	private List<Integer> list = new ArrayList<Integer>();
	public static void main(String[] args) {
		ConcurrentModificationExceptionTest cme = new ConcurrentModificationExceptionTest();
		//首先往list中增加内容
		for(int i=0;i<20;i++) {
			cme.list.add(i);//自动装箱
		}
		//迭代操作
		Iterator<Integer> ite = cme.list.iterator();
		while(ite.hasNext()) {
			Integer integer = ite.next();
			if(integer == 10) {//自动拆箱
				cme.list.remove(integer);
			}
		}
	}
}
运行上述代码出现异常


2,异常分析
从报错的位置可以看出报错的代码为Integer integer = ite.next(),那么我们来看看Iterator中的next()方法,注意该arraylist中得iterator是实现了Iterator接口的内部类
public E next() {
            checkForComodification();
            int i = cursor;
            if (i >= size)
                throw new NoSuchElementException();
            Object[] elementData = ArrayList.this.elementData;
            if (i >= elementData.length)
                throw new ConcurrentModificationException();
            cursor = i + 1;
            return (E) elementData[lastRet = i];
        }

final void checkForComodification() {
            if (modCount != expectedModCount)
                throw new ConcurrentModificationException();
}发生报错的位置是checkForComodification(),这个方法里面比较modcount(修改次数)和expectedmodCount(期望修改次数),也就是说报错的原因是这两个值不相等。好,那我们来跟踪这两个值。expectedModCount是iterator内部类的属性,在初始化的时候int expectedModCount = modCount,后面没有再进行更改过。protected transient int modCount = 0;modcount修改的地方比较多,在add、remove、clear、ensureCapacityInternal等,凡是设计到ArrayList对象修改的都会自增modCount属性。简而言之,就是每次修改arraylist对象都会引起modCount自增,所以就导致在代码cme.list.remove(integer);运行后modCount又自增了一次,导致expectedmodCount!=modCount,导致出现了ConcurrentModificationException
3,如何避免
使用迭代器进行删除iterator.remove()替代list.remove();
import java.util.ArrayList;
import java.util.Iterator;
import java.util.List;

public class ConcurrentModificationExceptionTest {
	private List<Integer> list = new ArrayList<Integer>();
	public static void main(String[] args) {
		ConcurrentModificationExceptionTest cme = new ConcurrentModificationExceptionTest();
		//首先往list中增加内容
		for(int i=0;i<20;i++) {
			cme.list.add(i);//自动装箱
		}
		//迭代操作
		Iterator<Integer> ite = cme.list.iterator();
		while(ite.hasNext()) {
			Integer integer = ite.next();
			if(integer == 10) {//自动拆箱
				//cme.list.remove(integer);
				ite.remove();
			}
		}
	}
}我们看下为什么使用iterator.remove()就不会抛异常呢,直接看源码
public void remove() {
            if (lastRet < 0)
                throw new IllegalStateException();
            checkForComodification();

            try {
                ArrayList.this.remove(lastRet);//最终也是掉了list中的删除
                cursor = lastRet;
                lastRet = -1;
                expectedModCount = modCount;//这是重点,保证了两者相等
            } catch (IndexOutOfBoundsException ex) {
                throw new ConcurrentModificationException();
            }
        }
从上述可以看到iterator的remove方法不仅删除了arraylist容器中的对象,它还加了一句expectedModCount = modCount;这样就保证再调用next()方法时就不会抛异常了。
单线程讨论完了,我们来看看多线程
import java.util.ArrayList;
import java.util.Iterator;
import java.util.List;

public class ConcurrentModificationExceptionTest {
	private List<Integer> list = new ArrayList<Integer>();
	public static void main(String[] args) {
		ConcurrentModificationExceptionTest cme = new ConcurrentModificationExceptionTest();
		//首先往list中增加内容
		for(int i=0;i<20;i++) {
			cme.list.add(i);//自动装箱
		}
		//迭代操作
		/*Iterator<Integer> ite = cme.list.iterator();
		while(ite.hasNext()) {
			Integer integer = ite.next();
			if(integer == 10) {//自动拆箱
				//cme.list.remove(integer);
				ite.remove();
			}
		}*/
		Thread thread1 = new Thread(new Runnable() {
            @Override
            public void run() {
                Iterator<Integer> iterator = cme.list.iterator();
                while (iterator.hasNext()) {
                    System.out.println("thread1 " + iterator.next());
                    try {
                        Thread.sleep(1000);
                    } catch (InterruptedException e) {
                        e.printStackTrace();
                    }
                }
            }
        });

        Thread thread2 = new Thread(new Runnable() {
            @Override
            public void run() {
            	Iterator<Integer> iterator = cme.list.iterator();
                while (iterator.hasNext()) {
                    System.out.println("thread2 " + iterator.next());
                    iterator.remove();
                }
            }
        });
        thread1.start();
        thread2.start();
	}
}
运行结果:
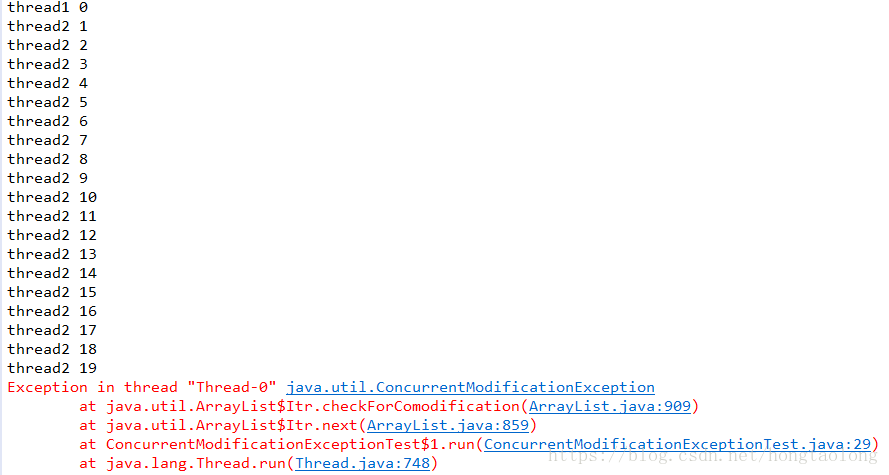
分析:
上述代码中thead1时进行了迭代操作,thead2进行了迭代和删除操作,从打印的结果来看,当thead1遍历第一个内容之后进行了sleep操作,1s中后,继续进行遍历,这个时候由于thead2进行了remove操作,则修改了arraylist中的modcount的值,虽然也修改了expectedmodcount,但是thead2修改的expecedmodcount时thread2创建的iterator中的expectedmodcount,和thead1中的expectedmodcount没关系,此时expectedmodcount还是20,而arraylist是thead1和thead2共享的变量,thead2修改了arraylist中的modcount导致了thead1迭代的时候expectedModCount!=modcount,因此抛异常了。
解决:使用同步的方法,将并行的操作变成串行操作
import java.util.ArrayList;
import java.util.Iterator;
import java.util.List;

public class ConcurrentModificationExceptionTest {
	private List<Integer> list = new ArrayList<Integer>();
	public static void main(String[] args) {
		ConcurrentModificationExceptionTest cme = new ConcurrentModificationExceptionTest();
		//首先往list中增加内容
		for(int i=0;i<20;i++) {
			cme.list.add(i);//自动装箱
		}
		//迭代操作
		/*Iterator<Integer> ite = cme.list.iterator();
		while(ite.hasNext()) {
			Integer integer = ite.next();
			if(integer == 10) {//自动拆箱
				//cme.list.remove(integer);
				ite.remove();
			}
		}*/
		Thread thread1 = new Thread(new Runnable() {
            @Override
            public void run() {
            	synchronized (cme.list) {

            		Iterator<Integer> iterator = cme.list.iterator();
            		while (iterator.hasNext()) {
            			System.out.println("thread1 " + iterator.next());
            			try {
            				Thread.sleep(1000);
            			} catch (InterruptedException e) {
            				e.printStackTrace();
            			}
            		}
				}
            }
        });

        Thread thread2 = new Thread(new Runnable() {
            @Override
            public void run() {
            	synchronized (cme.list) {

            		Iterator<Integer> iterator = cme.list.iterator();
            		while (iterator.hasNext()) {
            			System.out.println("thread2 " + iterator.next());
            			iterator.remove();
            		}
				}
            }
        });
        thread1.start();
        thread2.start();
	}
}
使用同步的方式,可以解决上述的问题,但是会影响性能,尤其是当同步的执行的方法比较耗时,且在代码中再引入了其他的锁,可能会产生死锁的问题。可以使用线程封闭技术或者使用CopyOnwriteArraylist、CopyOnWriteArraySet“写入时复制”容器替代,但是这些也会引入新的问题,就是复制list或者set时也会有一些新的开销,这就要做出权衡,一般来说,当迭代操作远远多于修改操作的情况下才使用“写入时复制”的容器,感兴趣的可以尝试一下。
发布者:全栈程序员-用户IM,转载请注明出处:https://javaforall.cn/111248.html原文链接:https://javaforall.cn
【正版授权,激活自己账号】: Jetbrains全家桶Ide使用,1年售后保障,每天仅需1毛
【官方授权 正版激活】: 官方授权 正版激活 支持Jetbrains家族下所有IDE 使用个人JB账号...
