大家好,又见面了,我是你们的朋友全栈君。

Idea下Spring Boot、thymeleaf、Jpa项目整合实例
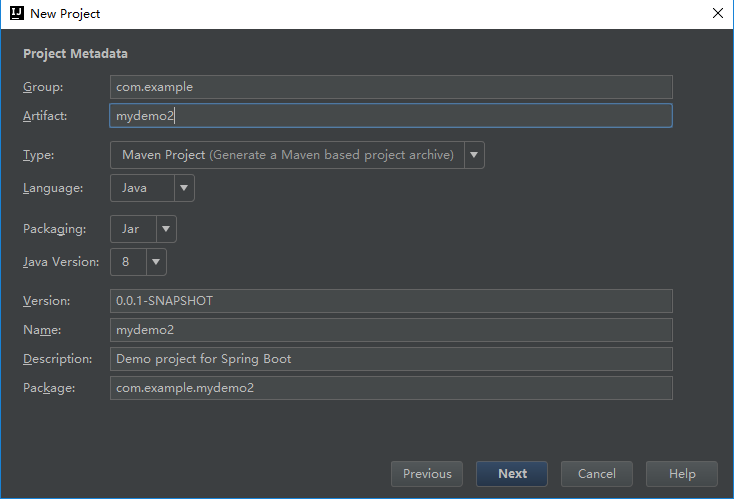
一、创建项目
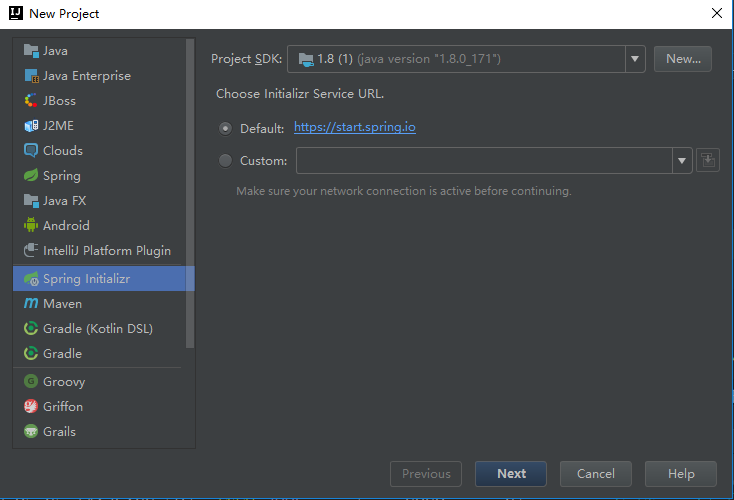

JDK选择1.8即可。
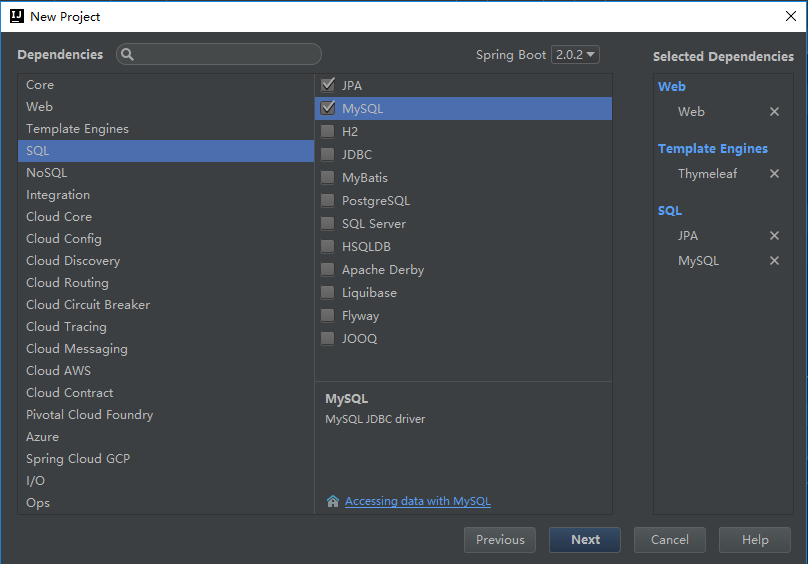
选中Web下的web、Template Engines下的Thymeleaf、SQL下的JPA和MySQL
然后点击Next,下一界面中,直接点击Finish
二、修改Mydemo2Application
package com.example.mydemo2;

import org.springframework.boot.SpringApplication;
import org.springframework.boot.autoconfigure.SpringBootApplication;
import org.springframework.boot.autoconfigure.jdbc.DataSourceAutoConfiguration;

@SpringBootApplication(exclude = DataSourceAutoConfiguration.class)
public class Mydemo2Application {

	public static void main(String[] args) {
		SpringApplication.run(Mydemo2Application.class, args);
	}
}
三、编写控制器
1.在com.example.mydemo2下新建package,名为controller
2.在controller新建控制器(Java类),命名为HelloController,其代码如下:
package com.example.mydemo2.controller;

import org.springframework.web.bind.annotation.RequestMapping;
import org.springframework.web.bind.annotation.RestController;

@RestController
public class HelloController {
    @RequestMapping("/")
    public String hello(){
        return "Hello Spring-Boot";
    }
}
3.执行程序
4.打开浏览器,在地址栏中输入:http://localhost:8080,出现如下页面

表明,环境配置成功
四、配置数据库连接信息
1.打开application.properties,该文件在resources下,配置内容如下:
####datasource###############
spring.datasource.url = jdbc:mysql://localhost:3306/db_student
spring.datasource.username = root
spring.datasource.password = 123456
spring.datasource.driverClassName = com.mysql.jdbc.Driver
spring.datasource.max-active=20
spring.datasource.max-idle=8
spring.datasource.min-idle=8
spring.datasource.initial-size=10
#################################
2.修改MyDemo2Application文件,做如下修改.
@SpringBootApplication(exclude = DataSourceAutoConfiguration.class)
//将上句修改为@SpringBootApplication
五、访问数据库
1.在src、java下创建package,“com.example.entity”,并创建实体类”StudentInfo”代码如下:
import javax.persistence.Table;

@Entity
@Table(name="tb_studentinfo")
public class StudentInfo {
    @Id
    private int id;
    private String name;
    private int age;
    private String address;

    public StudentInfo(){}
//此处省略了其get和set方法
2.创建数据访问层Dao层,在 src、java下新建package,”com.example.dao”,并创建接口StudentDao,代码如下:
package com.example.dao;

import com.example.entity.StudentInfo;
import org.springframework.data.jpa.repository.JpaRepository;

public interface StudentDao extends JpaRepository<StudentInfo,Integer>{
}
3.创建事务层接口StudentService
package com.example.mydemo2.service;

import com.example.mydemo2.entity.StudentInfo;

import java.util.List;

public interface StudentService {

    List<StudentInfo> getAllStudents();
}
3.创建事务层StudentServiceImpl类,实现StudentService接口
package com.example.mydemo2.service.impl;

import com.example.mydemo2.dao.StudentDao;
import com.example.mydemo2.entity.StudentInfo;
import com.example.mydemo2.service.StudentService;
import org.springframework.beans.factory.annotation.Autowired;
import org.springframework.stereotype.Service;

import java.util.List;

@Service
public class StudentServiceImpl implements StudentService {

    @Autowired
    private StudentDao studentDao;
    @Override
    public List<StudentInfo> getAllStudents() {
        return studentDao.findAll();
    }
}
六、创建控制器,测试数据库访问
1.在controller下新建StudentController控制器,代码如下:
package com.example.mydemo2.controller;
import com.example.mydemo2.entity.StudentInfo;
import com.example.mydemo2.service.StudentService;
import org.springframework.beans.factory.annotation.Autowired;
import org.springframework.web.bind.annotation.RequestMapping;
import org.springframework.web.bind.annotation.RestController;

import java.util.List;

@RestController
public class StudentController {

    @Autowired
   private StudentService studentService;

    @RequestMapping("/showInfo")
    public String showInfo(){
        List<StudentInfo> stus= studentService.getAllStudents();
        String name="姓名:";
        for(StudentInfo stu:stus){
            name=name+stu.getName();
        }
        return name;
    }
}
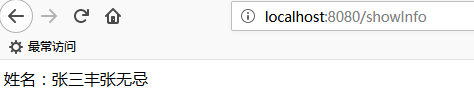
2.打开浏览器,输入localhost:8080/showInfo,结果如下
七、使用thymeleaf视图层
1.在resources下的templates下创建文件夹(Directory)student,并在其中创建StudentsInfo.html文件,内容如下:
<!DOCTYPE html>
<html xmlns:th="http://www.thymeleaf.org">
<head>
    <meta charset="UTF-8">
    <title>显示所有学生信息</title>
    <style>
        table,tr,td{
            border: 1px solid #115588;
        }
    </style>
</head>
<body>
    <table>
        <thead>
            <tr>
                <td>编号</td>
                <td>姓名</td>
                <td>年龄</td>
                <td>地址</td>
            </tr>
        </thead>
        <tbody>
            <tr th:each="stu:${stus}">
                <td th:text="${stu.getId()}"></td>
                <td th:text="${stu.getName()}"></td>
                <td th:text="${stu.getAge()}"></td>
                <td th:text="${stu.getAddress()}"></td>
            </tr>
        </tbody>
    </table>
</body>
</html>
2.修改StudentController控制器如下所示
package com.example.mydemo2.controller;
import com.example.mydemo2.entity.StudentInfo;
import com.example.mydemo2.service.StudentService;
import org.springframework.beans.factory.annotation.Autowired;
import org.springframework.stereotype.Controller;
import org.springframework.ui.Model;
import org.springframework.web.bind.annotation.RequestMapping;
import org.springframework.web.bind.annotation.RestController;

import java.util.List;

@Controller
public class StudentController {

    @Autowired
   private StudentService studentService;

    @RequestMapping("/showInfo")
    public String showInfo(Model model){
        List<StudentInfo> stus= studentService.getAllStudents();
        model.addAttribute("stus",stus);
        return "/student/StudentsInfo";
    }
}
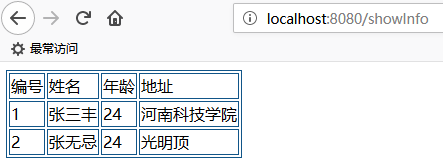
3.运行程序,打开浏览器,输入localhost:8080/showInfo,结果如下所示
转载于:https://my.oschina.net/u/3537796/blog/1819100
发布者:全栈程序员-用户IM,转载请注明出处:https://javaforall.cn/107498.html原文链接:https://javaforall.cn
【正版授权,激活自己账号】: Jetbrains全家桶Ide使用,1年售后保障,每天仅需1毛
【官方授权 正版激活】: 官方授权 正版激活 支持Jetbrains家族下所有IDE 使用个人JB账号...
