简介
Solr是一个独立的企业级搜索应用服务器,它对外提供类似于Web-service的API接口。用户可以通过http请求,向搜索引擎服务器提交一定格式的XML文件,生成索引;也可以通过Http Get操作提出查找请求,并得到XML格式的返回结果。

特点
Solr是一个高性能,采用Java开发,基于Lucene的全文搜索服务器。同时对其进行了扩展,提供了比Lucene更为丰富的查询语言,同时实现了可配置、可扩展并对查询性能进行了优化,并且提供了一个完善的功能管理界面,是一款非常优秀的全文搜索引擎。
工作方式
文档通过Http利用XML 加到一个搜索集合中。查询该集合也是通过http收到一个XML/JSON响应来实现。它的主要特性包括:高效、灵活的缓存功能,垂直搜索功能,高亮显示搜索结果,通过索引复制来提高可用性,提供一套强大Data Schema来定义字段,类型和设置文本分析,提供基于Web的管理界面等。

Lucene复习:
1、什么是lucene:全文检索工具包
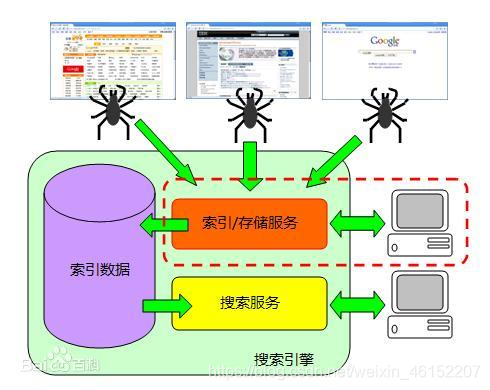
2、Lucene的工作原理:
索引数据的创建
从原始文件中提取一些可以用来搜索的数据(封装成各种Field),把各field再封装成document,然后对document进行分析(对各字段分词),得到一些索引目录写入索引库,document本身也会被写入一个文档信息库;
索引数据的查询
根据关键词解析(queryParser)出查询条件query(Termquery),利用搜索工具(indexSearcher)去索引库获取文档id,然后再根据文档id去文档信息库获取文档信息
分词器不同,建立的索引数据就不同;比较通用的一个中文分词器IKAnalyzer的用法
3、相关度得分
a) 在建立索引的时候,给指定文档的指定域设置一个权重
Field.setBoosts()
b) 在搜索的时候,可以给不同的搜索域设置不同的权重
Boosts = new HashMap<String,Float>
MultiFieldsQueryParser(fields,analyzer,boosts)
Solr笔记
1、站内搜索技术选型。
2、Solr相关概念
3、Solr的安装及配置
Solr整合tomcat
4、solr后台管理界面的功能介绍
a) 维护索引
b) 查询索引
5、solr实现索引库的维护
a) 增删改操作
b) 批量添加数据,从数据库中把数据导入到索引库。Dataimport插件。
6、索引库的查询
7、SolrJ客户端,
a) 索引库的维护
b) 索引库的查询
8、综合案例,电商网站的搜索。
站内搜索技术选型
1、Lucene:可以实现站内搜索。需要大量的开发工作。索引库的维护及优化。查询的优化等问题都需要我们自己来解决。不推荐使用。
2、使用第三方搜素引擎实现。使用百度实现站内搜索。免费的。索引库无法维护。适合一些小的网站。不推荐使用。
3、Solr:基于Solr实现站内搜索扩展性较好并且可以减少程序员的工作量,因为Solr提供了较为完备的搜索引擎解决方案,因此在门户、论坛等系统中常用此方案。提供了完整的集群方案,和索引库优化方案。
什么是solr 为什么要solr:
1、solr是将整个索引操作功能封装好了的搜索引擎系统(企业级搜索引擎产品)
2、solr可以部署到单独的服务器上(WEB服务),它可以提供服务,我们的业务系统就只要发送请求,接收响应即可,降低了业务系统的负载
3、solr部署在专门的服务器上,它的索引库就不会受业务系统服务器存储空间的限制
4、solr支持分布式集群,索引服务的容量和能力可以线性扩展
solr的工作机制:
1、solr就是在lucene工具包的基础之上进行了封装,而且是以web服务的形式对外提供索引功能
2、业务系统需要使用到索引的功能(建索引,查索引)时,只要发出http请求,并将返回数据进行解析即可
Solr
是Apache下的一个顶级开源项目,采用Java开发,它是基于Lucene的全文搜索服务器。Solr提供了比Lucene更为丰富的查询语言,同时实现了可配置、可扩展,并对索引、搜索性能进行了优化。Solr可以独立运行,运行在Jetty、Tomcat等这些Servlet容器中,Solr 索引的实现方法很简单,用 POST 方法向
Solr 服务器发送一个描述 Field 及其内容的 XML 文档,Solr根据xml文档添加、删除、更新索引 。Solr 搜索只需要发送
HTTP GET 请求,然后对 Solr
返回Xml、json等格式的查询结果进行解析,组织页面布局。Solr不提供构建UI的功能,Solr提供了一个管理界面,通过管理界面可以查询Solr的配置和运行情况。就是一个web工程
Solr和lucene区别
Lucene是一个开放源代码的全文检索引擎工具包,它不是一个完整的全文检索引擎,Lucene提供了完整的查询引擎和索引引擎,目的是为软件开发人员提供一个简单易用的工具包,以方便的在目标系统中实现全文检索的功能,或者以Lucene为基础构建全文检索引擎。
Solr的目标是打造一款企业级的搜索引擎系统,它是一个搜索引擎服务,可以独立运行,通过Solr可以非常快速的构建企业的搜索引擎,通过Solr也可以高效的完成站内搜索功能。
Solr的下载
环境准备
| IP | 服务 |
|---|---|
| 192.168.1.10 | solr、tomcat,java环境 |
| 软件 | 版本 |
|---|---|
| Tomcat | V8.5.42 |
| jdk | 1.8.0_201 |
| solr | V4.10.3 |
配置java环境
[root@localhost ~]# tar -zxf jdk-8u201-linux-x64.tar.gz
[root@localhost ~]# mv jdk1.8.0_201/ /usr/local/java
[root@localhost ~]# vi /etc/profile
export JAVA_HOME=/usr/local/java
export JRE_HOME=/usr/local/java/jre
export CLASSPATH=$JAVA_HOME/lib:$JRE_HOME/lib
export PATH=$PATH:$JAVA_HOME/bin:$JRE_HOME/bin
[root@localhost ~]# source /etc/profile
[root@localhost ~]# java -version
java version "1.8.0_201"
Java(TM) SE Runtime Environment (build 1.8.0_201-b09)
Java HotSpot(TM) 64-Bit Server VM (build 25.201-b09, mixed mode)
Solr集成tomcat
第一步:安装tomcat,建议安装一个全新的tomcat。
[root@localhost ~]# tar -zxf apache-tomcat-8.5.42.tar.gz
[root@localhost ~]# mv apache-tomcat-8.5.42 /usr/local
第二步:上传solr安装压缩包到服务器上,然后解压
[root@localhost ~]# unzip solr-4.10.3.zip
第三步:在tomcat的webapps中事先建立一个solr工程文件夹
mkdir /usr/local/apache-tomcat-8.5.42/webapps/solr
然后将solr的war包解压到solr工程文件夹里面去
unzip solr-4.10.3/dist/solr-4.10.3.war -d /usr/local/apache-tomcat-8.5.42/webapps/solr/
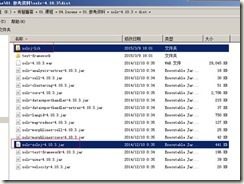
然后,将日志工具jar包添加到solr的war工程的WebInf的lib中
cp solr-4.10.3/example/lib/ext/*.jar /usr/local/apache-tomcat-8.5.42/webapps/solr/WEB-INF/lib/
第四步:从solr的安装目录中拷贝一个示例solrhome到我们的服务器真实部署目录中
拷贝:
cp -r solr-4.10.3/example/solr /usr/local
改名:
mv /usr/local/solr/ /usr/local/solrhome
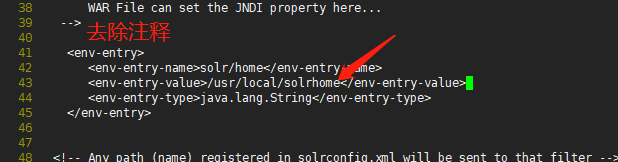
第五步:告诉solr的war工程,我们准备的solrhome目录所在的路径
vi /usr/local/apache-tomcat-8.5.42/webapps/solr/WEB-INF/web.xml
至此,可以启动tomcat,进行测试
[root@localhost bin]# ./startup.sh
Using CATALINA_BASE:   /usr/local/apache-tomcat-8.5.42
Using CATALINA_HOME:   /usr/local/apache-tomcat-8.5.42
Using CATALINA_TMPDIR: /usr/local/apache-tomcat-8.5.42/temp
Using JRE_HOME:        /usr/local/java/jre
Using CLASSPATH:       /usr/local/apache-tomcat-8.5.42/bin/bootstrap.jar:/usr/local/apache-tomcat-8.5.42/bin/tomcat-juli.jar
Tomcat started.
[root@localhost bin]# systemctl stop firewalld && systemctl disable firewalld && setenforce 0
Removed symlink /etc/systemd/system/multi-user.target.wants/firewalld.service.
Removed symlink /etc/systemd/system/dbus-org.fedoraproject.FirewallD1.service.
[root@localhost bin]# netstat -tunlp | grep 8080
tcp6       0      0 :::8080                 :::*                    LISTEN      12014/java
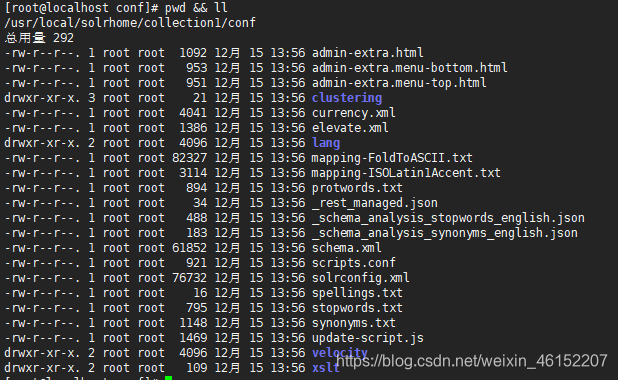
了解solrhome:
1、collection1:是一个solrcore,一个solrcore就是一个索引库。一个solr服务器上可以有多solrcore。每个索引库之间是相互独立的。
2、\solrhome\collection1\conf:是存放每个solrcore的个性配置。
3、Solrconfig.xml
a) luceneMatchVersion:匹配lucene的版本信息
b) Lib:solrcore扩展使用的jar包。默认值是collection1\lib,如果没有此文件夹就创建一个。
c) dataDir:索引库存放的目录。默认是collection1\data文件夹。如果没有solr会自动创建。如果想修改为其他位置,需要配置此节点。
d) requestHandler:配置solr对外提供服务的url
i. <requestHandler name="/select" class="solr.SearchHandler">:查询索引库使用的url
ii. <requestHandler name="/update" class="solr.UpdateRequestHandler">维护索引库使用的url
e) defaultQuery:管理页面默认的查询条件 :
4、Core.properties:配置了solrcore的名字。
第六步:访问
访问http://localhost:8080/solr
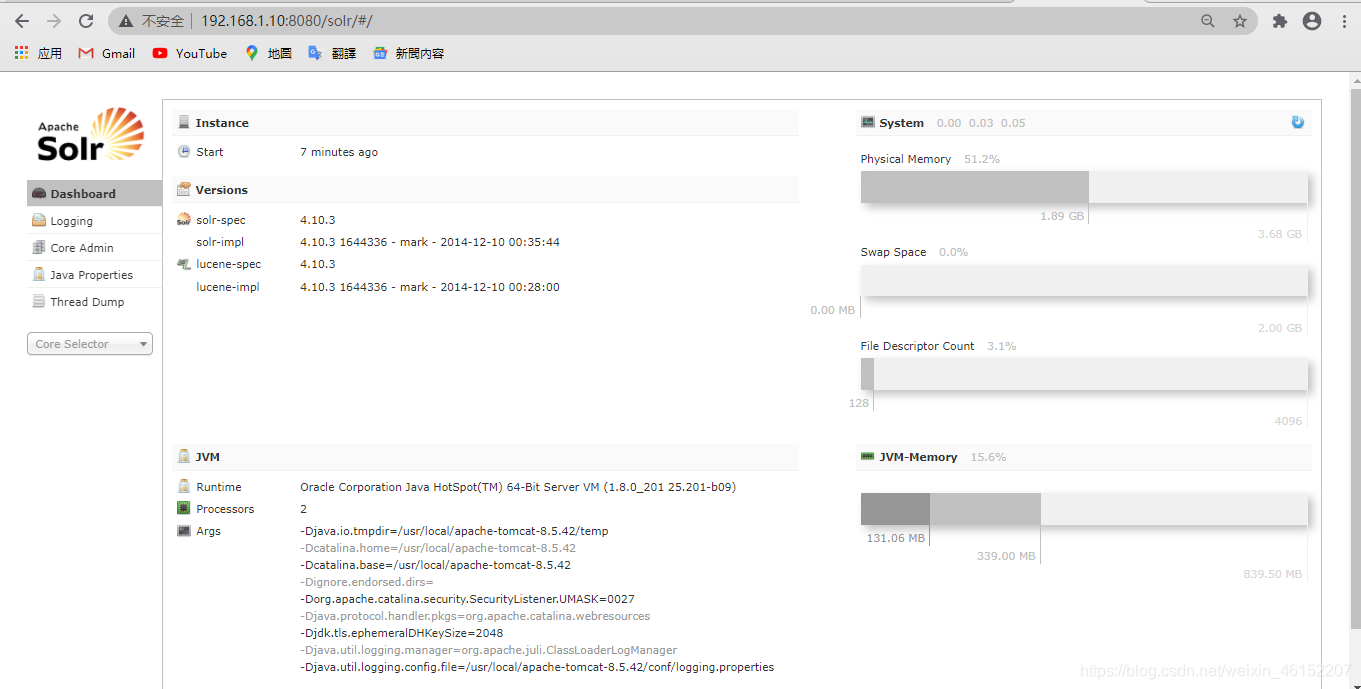
管理界面功能介绍
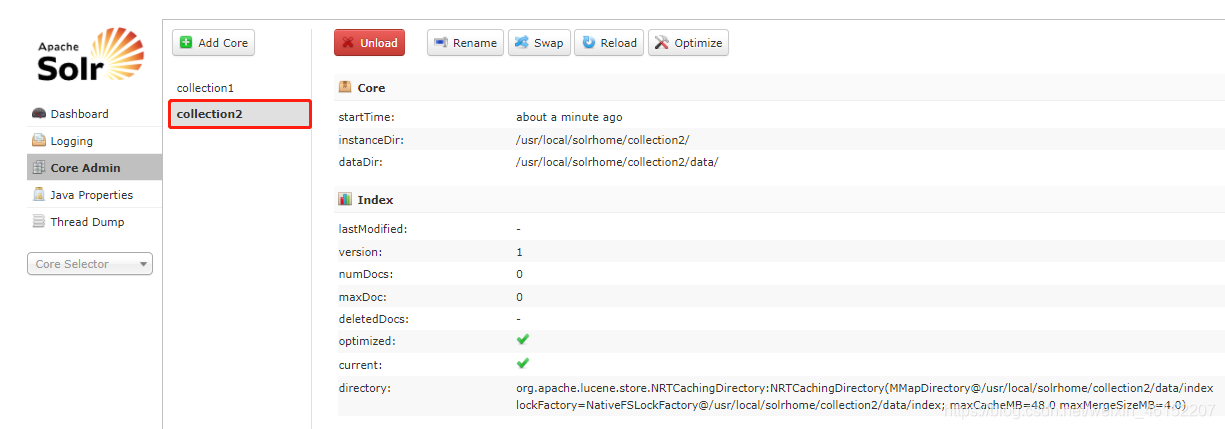
Core Admin
solrcore的管理 功能。
添加一个solrcore
添加步骤:
cd /usr/local/solrhome
第一步:把collection1复制一份改名为collection2
[root@localhost solrhome]# cp -rp collection1/ collection2

第二步:修改core.properties。name=collection2
cd /usr/local/solrhome/collection2
vi core.properties
修改:name=collection2
第三步:重启tomcat
cd /usr/local/apache-tomcat-8.5.42/bin
./shutdown.sh  #关闭
./startup.sh  #开启
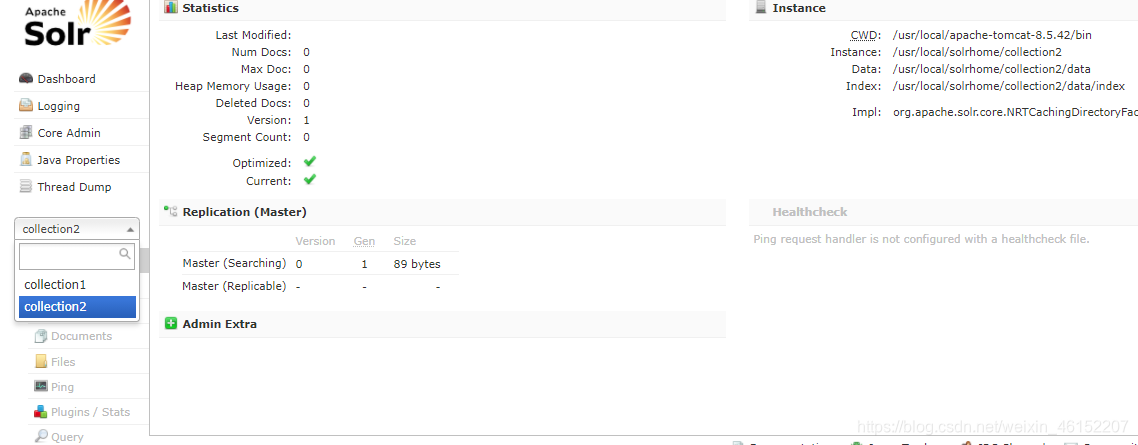
Core Selecter
选择要管理哪个solrcore。
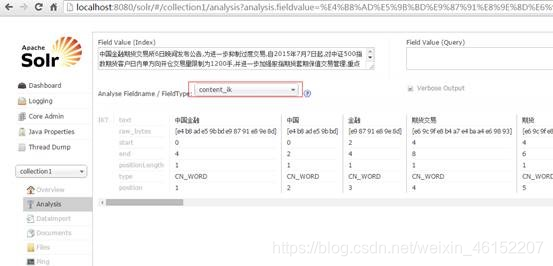
Analysis
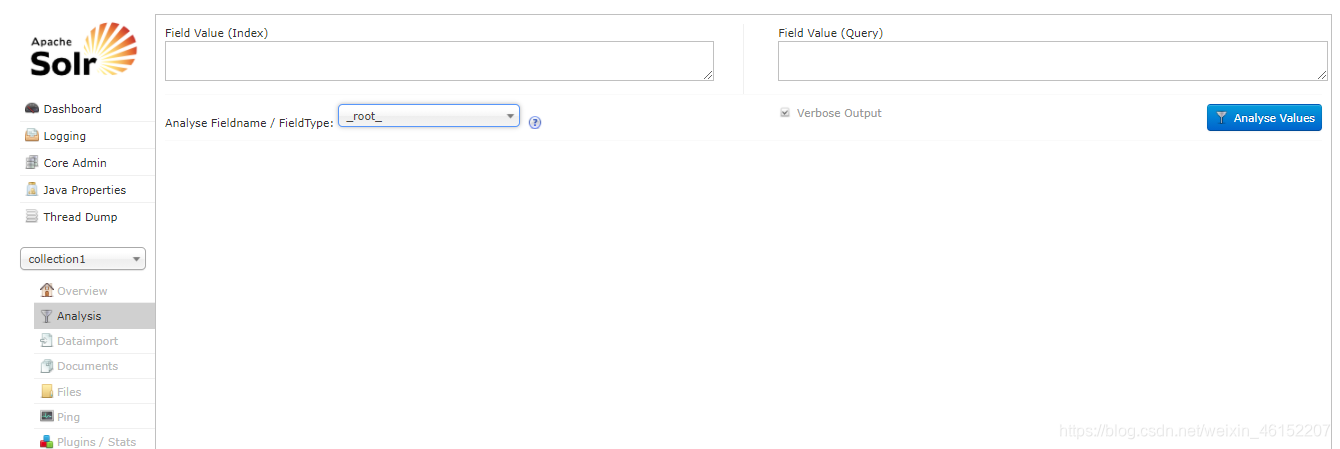
查看域的分词效果。
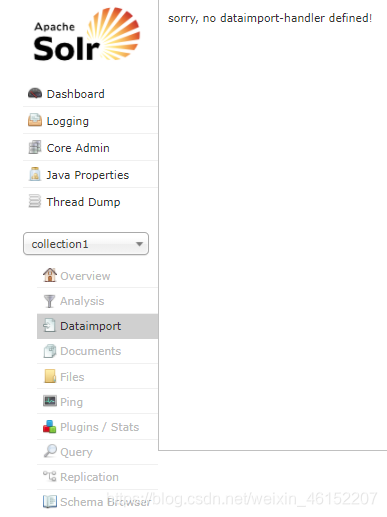
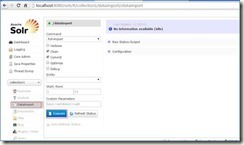
Dataimport
可以实现把数据库中的数据导入到索引库中。
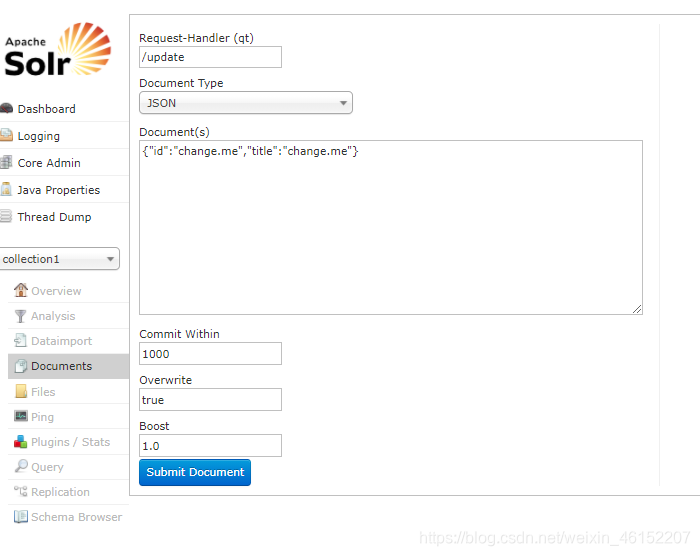
Documents
索引库维护功能。
增删改查
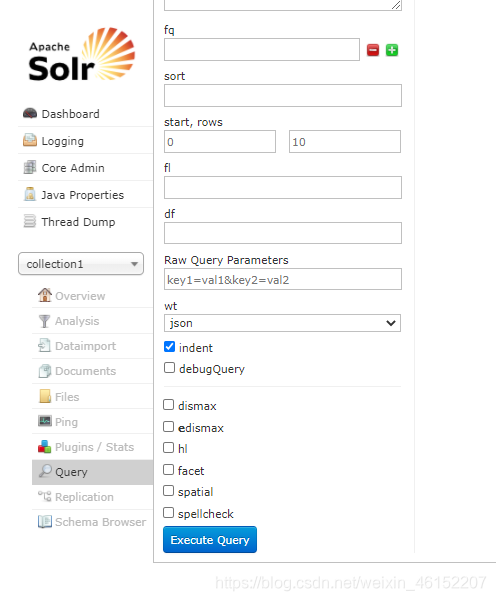
Query
索引查询功能。
索引的维护
在solr中域必须先定义后使用。而且每个document中必须有一个id域。
Schema.xml
Field:域的定义。
Name:域的名称
Type:域的类型
Indexed:是否索引
Stored:是否存储
multiValued:是否多值,如果是多值在一个域中可以保持多个值。
dynamicField动态域
Name:域的名称,是一个表达式。如果域的名称和表达式相匹配,此域名就可以使用。
Type:域的类型
Indexed:是否索引
Stored:是否存储
multiValued:是否多值,如果是多值在一个域中可以保持多个值。
uniqueKey
每个文档必须有一个uniqueKey,而且不能重复。相当于表中的主键。
copyField
复制域。
Source:源域
Dest:目标域。
创建文档时,solr会自动把源域的内容复制到目标域。使用复制域可以提供查询的性能。
fieldType
域的类型。
Name:域类型名。
Class:对应的实现类。solr.TextField类似于Lucene中的TextField。可以配置用户自定义的分析器。
自定义fieldType使用中文分析器
配置中文分析器
配置步骤:
第一步:把IKAnalyzer2012FF_u1.jar添加到solr工程的lib库中。
第二步:把配置文件和扩展词典、停用词词典添加到solr工程classpath下。Solr/WEB-INF/classes。保证字典的字符集是utf-8.
配置自定义fieldtype
在schema.xml中添加如下内容:
<!-- IKAnalyzer-->

<fieldType name="text_ik" class="solr.TextField">

<analyzer class="org.wltea.analyzer.lucene.IKAnalyzer"/>

</fieldType>

<!--IKAnalyzer Field-->
配置自定义的域
<field name="title_ik" type="text_ik" indexed="true" stored="true" />

<field name="content_ik" type="text_ik" indexed="true" stored="false" multiValued="true"/>
重启tomcat,查看效果
淘淘商城商品信息搜索域定义
<!--product-->

<field name="product_name" type="text_ik" indexed="true" stored="true"/>

<field name="product_price" type="float" indexed="true" stored="true"/>

<field name="product_description" type="text_ik" indexed="true" stored="false" />

<field name="product_picture" type="string" indexed="false" stored="true" />

<field name="product_catalog_name" type="string" indexed="true" stored="true" />

<field name="product_keywords" type="text_ik" indexed="true" stored="false" multiValued="true"/>

<copyField source="product_name" dest="product_keywords"/>

<copyField source="product_description" dest="product_keywords"/>
添加文档
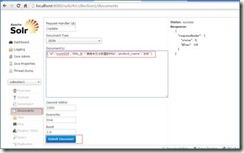
注意:每个文档必须有一个id域。而且域名必须在schema.xml中定义。
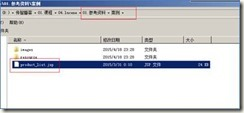
Dataimport插件
可以批量把数据库中的数据导入到索引库中。
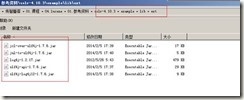
需要的jar包

安装步骤:
第一步:把dataimport插件依赖的jar包添加到collection1\lib文件夹下。
第二步:把mysql的数据库驱动也放到collection1\lib文件夹下
第三步:修改solrhome/collection1/conf/solrconfig.xml,添加一个requestHandler。
<requestHandler name="/dataimport"

class="org.apache.solr.handler.dataimport.DataImportHandler">

<lst name="defaults">

<str name="config">data-config.xml</str>

</lst>

</requestHandler>
第四步:创建一个data-config.xml。目录和solrconfig.xml在同一个目录下collection1\conf。
<?xml version="1.0" encoding="UTF-8" ?>

<dataConfig>

<dataSource type="JdbcDataSource"

driver="com.mysql.jdbc.Driver"

url="jdbc:mysql://192.168.33.10:3306/taotao"

user="root"

password="root"/>

<document>

<entity name="product" query="SELECT pid,name,catalog_name,price,description,picture FROM products ">

<field column="pid" name="id"/>

<field column="name" name="product_name"/>

<field column="catalog_name" name="product_catalog_name"/>

<field column="price" name="product_price"/>

<field column="description" name="product_description"/>

<field column="picture" name="product_picture"/>

</entity>

</document>

</dataConfig>
第五步:重启tomcat后,进入solr管理页面,执行数据导入
索引库的查询
查询语法支持的参数
q:主查询条件。完全支持lucene语法。还进行了扩展。
fq:过滤查询。是在主查询条件查询结果的基础上进行过滤。
sort:排序条件。排序的域asc。如果有多个排序条件使用半角逗号分隔。
start, rows:分页处理。Start起始记录rows每页显示的记录条数。
fl:返回结果中域的列表。使用半角逗号分隔。
df:默认搜索域
wt:响应结果的数据格式,可以是json、xml等。
hl:开启高亮显示。
hl.fl:要高亮显示的域。
hl.simple.pre:高亮显示的前缀
hl.simple.post:高亮显示的后缀
SolrJ客户端
可以实现对索引库的增删改查操作。
使用步骤:
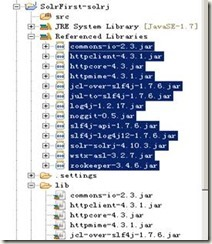
第一步:创建一java工程。
第二步:导入jar包。导入solrj的jar 包。
索引库的维护
添加文档
第1步:创建SolrServer对象和服务端建立连接。HttpSolrServer子类来完成。集群环境使用CloudSolrServer。
第2步:创建一文档对象。SolrInputDocument。
第3步:向文档对象中添加域。使用addField添加域。要求必须有id域,而且每个域必须在schema.xml中定义。
第4步:使用solrServer对象把文档提交到服务器。
代码实现
//添加文档对象

@Test

public void addDocument() throws Exception {


//创建一个SolrServer对象

//参数:solr服务器的url

SolrServer server = new HttpSolrServer("http://localhost:8080/solr");

//创建文档对象

SolrInputDocument document = new SolrInputDocument();

//添加域

document.addField("id", "num001");

document.addField("title_ik", "巧手DIY彩帘");

//把document对象写入索引库

server.add(document);

//提交修改

server.commit();

}
删除文档
根据id删除文档
//根据id删除文档

@Test

public void deleteDocumentById() throws Exception {


SolrServer server = new HttpSolrServer("http://localhost:8080/solr");

//删除文档

server.deleteById("num001");

//提交修改

server.commit();

}
根据查询删除文档
//根据查询删除文档

@Test

public void deleteDocumentByQuery() throws Exception {


SolrServer server = new HttpSolrServer("http://localhost:8080/solr");

//根据查询条件删除

server.deleteByQuery("*:*");

//提交修改

server.commit();

}
修改文档
Solrj并没有一个方法可以修改文档。还是使用add方法。只需要添加一个新的文档,保证新文档的id和被修改文档的id一致即可。
本质先删除后添加。
查询索引库
实现步骤
第一步:创建一个solrServer对象。
第二步:创建一个solrQuery对象。
第三步:向solrQuery对象中添加查询条件。
第四步:执行查询。返回文档列表。
第五步:遍历列表。
代码实现
//简单查询

@Test

public void queryIndex() throws Exception {


SolrServer server = new HttpSolrServer("http://localhost:8080/solr");

//创建一个查询对象

SolrQuery query = new SolrQuery();

//添加查询条件

//query.setQuery("*:*");

query.set("q", "*:*");

//执行查询

QueryResponse response = server.query(query);

//取文档列表

SolrDocumentList solrDocumentList = response.getResults();

System.out.println("查询结果的总数量:" + solrDocumentList.getNumFound());

//遍历列表

for (SolrDocument solrDocument : solrDocumentList) {


System.out.println(solrDocument.get("id"));

System.out.println(solrDocument.get("product_name"));

System.out.println(solrDocument.get("product_price"));

System.out.println(solrDocument.get("product_catalog_name"));

System.out.println(solrDocument.get("product_picture"));

}

}
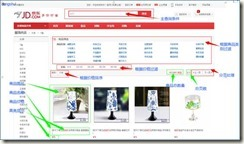
综合案例
需求
使用Solr实现电商网站中商品信息搜索功能,可以根据关键字、分类、价格范围搜索商品信息,也可以根据价格进行排序。
需求分析
开发需要的文档
1、数据库的表结构。
2、页面原型图。
3、业务流程图
页面原型分析
流程图
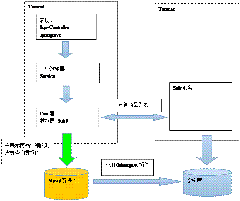
Dao层
功能:查询solr服务返回一个商品列表。需要一个query对象,执行query对象进行查询,返回商品列表。
参数:SolrQuery query
返回值:ResultModel 包含商品列表
商品的pojo:
public class ProductModel {


// 商品编号

private String pid;

// 商品名称

private String name;

// 商品分类名称

private String catalog_name;

// 价格

private float price;

// 商品描述

private String description;

// 图片名称

private String picture;

}
返回值Pojo:
public class ResultModel {


// 商品列表

private List<ProductModel> productList;

// 商品总数

private Long recordCount;

// 总页数

private int pageCount;

// 当前页

private int curPage;

}
方法定义:
ResultModel queryProduct(SolrQuery query) throws Exception;
Service
功能:接收controller传递过来的参数。创建一SolrQuery对象,拼装查询条件调用Dao层执行查询返回一个ResultModel对象。还需要计算商品列表的总页数。
参数:
1、查询条件:String queryString
2、商品分类名称:String catalog_name
3、价格区间过滤条件:使用一个字符串来描述一个区间例如:
-10,10-20,20-30,30-。
String price
4、排序条件:只需要接收一个排序的方式就可以了。0:升序1:降序。 String sort
5、分页条件:接收一个页码是一个Integer数据。需要我们确定每页显示商品的数量。可以定义在常量或者配置文件。每页显示60商品。Integer page
返回值:ResultModel
方法定义:
ResultModel queryProduct(String queryString, String catalog_name, String price,String sort, Integer page);
Controller
功能:接收页面传递过来的参数,调用service查询商品列表。把查询结果传递给页面。还需要参数回显。
参数:
-
查询条件:String queryString
-
商品分类名称:String catalog_name
-
价格区间过滤条件:使用一个字符串来描述一个区间例如:
-10,10-20,20-30,30-。
String price
-
排序条件:只需要接收一个排序的方式就可以了。0:升序1:降序。 String sort
-
分页条件:接收一个页码是一个Integer数据。需要我们确定每页显示商品的数量。可以定义在常量或者配置文件。每页显示60商品。Integer page
6、Model,传递参数使用。
返回值:String(逻辑视图名)
方法定义:
Public String queryProduct(String queryString, String catalog_name, String price,String sort, Integer page, Model model)
Jsp
代码实现
实现步骤
第一步:创建一web工程
第二步:导入jar包。需要springmvc、spring、solrj、solrj依赖的jar、日志相关的jar包。
第三步:编写dao
第四步:编写Service
第五步:编写Controller
第六步:配置前端控制器,创建springmvc.xml配置三大件。
代码实现
Dao
@Repository

public class ProductDaoImpl implements ProductDao {


@Autowired

private SolrServer solrServer;

@Override

public ResultModel queryProduct(SolrQuery query) throws Exception {


//根据query对象查询索引库

QueryResponse response = solrServer.query(query);

//取商品列表

SolrDocumentList documentList = response.getResults();

List<ProductModel> productList = new ArrayList<>();

for (SolrDocument solrDocument : documentList) {


//取商品信息

ProductModel productModel = new ProductModel();

productModel.setPid((String) solrDocument.get("id"));

//取高亮显示

String productName = "";

Map<String, Map<String, List<String>>> highlighting = response.getHighlighting();

List<String> list = highlighting.get(solrDocument.get("id")).get("product_name");

if (list != null && list.size() > 0) {


productName = list.get(0);

} else {


productName = (String) solrDocument.get("product_name");

}

productModel.setName(productName);

productModel.setCatalog_name((String) solrDocument.get("product_catalog_name"));

productModel.setPrice((float) solrDocument.get("product_price"));

productModel.setPicture((String) solrDocument.get("product_picture"));

//添加到商品列表

productList.add(productModel);

}

//返回值对象

ResultModel resultModel = new ResultModel();

resultModel.setProductList(productList);

//查询结果总数量

resultModel.setRecordCount(documentList.getNumFound());

return resultModel;

}

}
Service
@Service

public class ProductServiceImpl implements ProductService {


@Autowired

private ProductDao productDao;

@Override

public ResultModel queryProduct(String queryString, String catalog_name,

String price, String sort, Integer page) throws Exception {


//拼装查询条件

SolrQuery solrQuery = new SolrQuery();

//查询条件

if (null != queryString && !"".equals(queryString)) {


solrQuery.setQuery(queryString);

} else {


solrQuery.setQuery("*:*");

}

//分类名称过滤条件

if (null != catalog_name && !"".equals(catalog_name)) {


solrQuery.addFilterQuery("product_catalog_name:" + catalog_name);

}

//价格区间过滤条件

if (null != price && !"".equals(price)) {


String[] strings = price.split("-");

solrQuery.addFilterQuery("product_price:["+strings[0]+" TO "+strings[1]+"]");

}

//排序条件

if ("1".equals(sort)) {


solrQuery.setSort("product_price", ORDER.desc);

} else {


solrQuery.setSort("product_price", ORDER.asc);

}

//分页条件

if (page == null) page = 1;

int start = (page - 1) * Global.PAGE_SIZE;

solrQuery.setStart(start);

solrQuery.setRows(Global.PAGE_SIZE);

//设置默认搜索域

solrQuery.set("df", "product_keywords");

//高亮显示

solrQuery.setHighlight(true);

//高亮显示的域

solrQuery.addHighlightField("product_name");

//前缀

solrQuery.setHighlightSimplePre("<span style=\"color:red\">");

//后缀

solrQuery.setHighlightSimplePost("</span>");

//执行查询

ResultModel resultModel = productDao.queryProduct(solrQuery);

//计算总页数

Long recordCount = resultModel.getRecordCount();

int pageCount = (int) (recordCount / Global.PAGE_SIZE);

if (recordCount % Global.PAGE_SIZE > 0) {


pageCount ++;

}

resultModel.setPageCount(pageCount);

resultModel.setCurPage(page);

return resultModel;

}

}
Controller
@Controller

public class ProductController {


@Autowired

private ProductService productService;

@RequestMapping("/list")

public String queryProduct(String queryString, String catalog_name,

String price, String sort, Integer page, Model model) {


// 查询商品列表

ResultModel resultModel = null;

try {


resultModel = productService.queryProduct(queryString,

catalog_name, price, sort, page);

} catch (Exception e) {


// TODO Auto-generated catch block

e.printStackTrace();

}

// 传递给页面

model.addAttribute("result", resultModel);

// 参数回显

model.addAttribute("queryString", queryString);

model.addAttribute("catalog_name", catalog_name);

model.addAttribute("price", price);

model.addAttribute("sort", sort);

model.addAttribute("page", page);

// 返回jsp

return "product_list";

}

}
Springmvc
<?xml version="1.0" encoding="UTF-8"?>

<beans xmlns="http://www.springframework.org/schema/beans"

xmlns:xsi="http://www.w3.org/2001/XMLSchema-instance"xmlns:mvc="http://www.springframework.org/schema/mvc"

xmlns:context="http://www.springframework.org/schema/context"

xmlns:aop="http://www.springframework.org/schema/aop"xmlns:tx="http://www.springframework.org/schema/tx"

xsi:schemaLocation="http://www.springframework.org/schema/beans

http://www.springframework.org/schema/beans/spring-beans-3.1.xsd

http://www.springframework.org/schema/mvc

http://www.springframework.org/schema/mvc/spring-mvc-3.1.xsd

http://www.springframework.org/schema/context

http://www.springframework.org/schema/context/spring-context-3.1.xsd

http://www.springframework.org/schema/aop

http://www.springframework.org/schema/aop/spring-aop-3.1.xsd

http://www.springframework.org/schema/tx

http://www.springframework.org/schema/tx/spring-tx-3.1.xsd ">

<!-- 配置扫描包 -->

<context:component-scan base-package="cn..jd" />

<!-- 配置注解驱动 -->

<mvc:annotation-driven />

<!-- jsp视图解析器 -->

<bean

class="org.springframework.web.servlet.view.InternalResourceViewResolver">

<!-- 前缀 -->

<property name="prefix" value="/WEB-INF/jsp/"></property>

<!-- 后缀 -->

<property name="suffix" value=".jsp"></property>

</bean>

<bean class="org.apache.solr.client.solrj.impl.HttpSolrServer">

<constructor-arg value="http://localhost:8080/solr/"></constructor-arg>

</bean>

</beans>
Web.xml
<?xml version="1.0" encoding="UTF-8"?>

<web-app xmlns:xsi="http://www.w3.org/2001/XMLSchema-instance"

xmlns="http://java.sun.com/xml/ns/javaee"xmlns:web="http://java.sun.com/xml/ns/javaee/web-app_2_5.xsd"

xsi:schemaLocation="http://java.sun.com/xml/ns/javaee http://java.sun.com/xml/ns/javaee/web-app_2_5.xsd"

id="WebApp_ID" version="2.5">

<display-name>SolrJD0508</display-name>

<welcome-file-list>

<welcome-file>index.html</welcome-file>

<welcome-file>index.htm</welcome-file>

<welcome-file>index.jsp</welcome-file>

<welcome-file>default.html</welcome-file>

<welcome-file>default.htm</welcome-file>

<welcome-file>default.jsp</welcome-file>

</welcome-file-list>

<!-- 配置前端控制器 -->

<!-- SpringMVC配置 -->

<servlet>

<servlet-name>springmvc</servlet-name>

<servlet-class>org.springframework.web.servlet.DispatcherServlet</servlet-class>

<init-param>

<param-name>contextConfigLocation</param-name>

<param-value>classpath:springmvc.xml</param-value>

</init-param>

</servlet>

<servlet-mapping>

<servlet-name>springmvc</servlet-name>

<url-pattern>*.action</url-pattern>

</servlet-mapping>

<filter>

<filter-name>Character Encoding</filter-name>

<filter-class>org.springframework.web.filter.CharacterEncodingFilter</filter-class>

<init-param>

<param-name>encoding</param-name>

<param-value>UTF-8</param-value>

</init-param>

</filter>

<filter-mapping>

<filter-name>Character Encoding</filter-name>

<url-pattern>/*</url-pattern>

</filter-mapping>

</web-app>
发布者:全栈程序员-用户IM,转载请注明出处:https://javaforall.cn/101919.html原文链接:https://javaforall.cn
【正版授权,激活自己账号】: Jetbrains全家桶Ide使用,1年售后保障,每天仅需1毛
【官方授权 正版激活】: 官方授权 正版激活 支持Jetbrains家族下所有IDE 使用个人JB账号...
