1.入门程序
使用maven工程
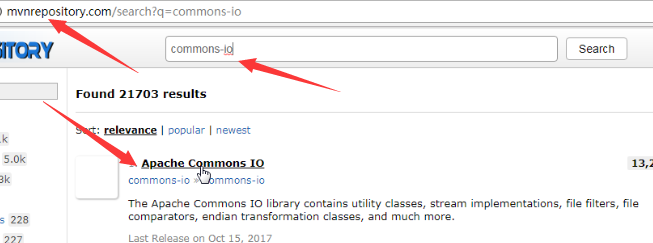
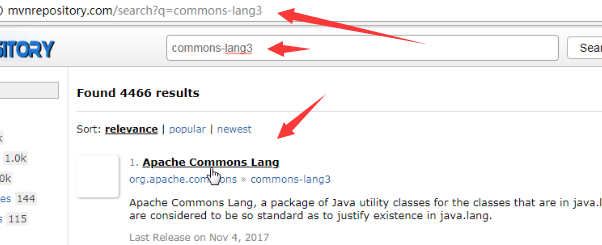
导入需要的jar坐标。
项目工程:https://github.com/Jonekaka/javaweb-crawler-1-62
httpclient
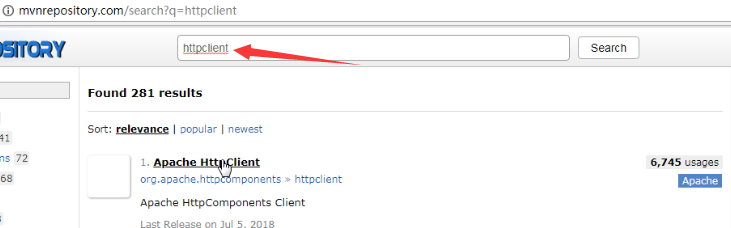

可以看到使用量信息,一般选择最多的

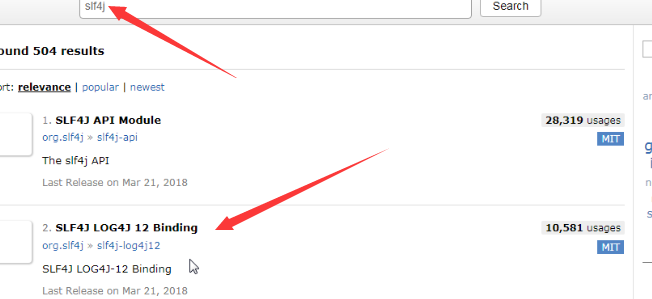
slf4j
日志还需要配置信息,放入资源文件夹下

log4j.rootLogger=DEBUG,A1
log4j.logger.cn.learn_java = DEBUG

log4j.appender.A1=org.apache.log4j.ConsoleAppender
log4j.appender.A1.layout=org.apache.log4j.PatternLayout
log4j.appender.A1.layout.ConversionPattern=%-d{yyyy-MM-dd HH:mm:ss,SSS} [%t] [%c]-[%p] %m%n
输入网址,请求,返回结果

用程序模拟用户即可
获得页面的html代码
public static void main(String[] args) throws Exception {
        //1. 打开浏览器,创建HttpClient对象
        CloseableHttpClient httpClient = HttpClients.createDefault();

        //2. 输入网址,发起get请求创建HttpGet对象
        HttpGet httpGet = new HttpGet("http://www.baidu.com");

        //3.按回车,发起请求,返回响应,使用HttpClient对象发起请求
        CloseableHttpResponse response = httpClient.execute(httpGet);

        //4. 解析响应,获取数据
        //判断状态码是否是200
        if (response.getStatusLine().getStatusCode() == 200) {
            HttpEntity httpEntity = response.getEntity();
            String content = EntityUtils.toString(httpEntity, "utf8");

            System.out.println(content);
        }
    }
2.网络爬虫介绍
网络爬虫(Web crawler),是一种按照一定的规则,自动地抓取万维网信息的程序或者脚本
应用
1.更方便个人从互联网抓取数据,获得更多数据源。数据源在大数据以及ai方面应用广泛
2.懂得原理更容易让自己的网站在排名中优化,搜索引擎优化(SEO)
3.HttpClient抓取数据
HTTP协议客户端 HttpClient,模拟用户访问
http的get请求
结束时务必关闭response,与client
 public static void main(String[] args)  {
        //创建HttpClient对象
        CloseableHttpClient httpClient = HttpClients.createDefault();

        //创建HttpGet对象,设置url访问地址
        HttpGet httpGet = new HttpGet("http://www.baidu.com");

        CloseableHttpResponse response = null;
        try {
            //使用HttpClient发起请求,获取response
             response = httpClient.execute(httpGet);

            //解析响应
            if (response.getStatusLine().getStatusCode() == 200) {
                String content = EntityUtils.toString(response.getEntity(), "utf8");
                System.out.println(content.length());
            }

        } catch (IOException e) {
            e.printStackTrace();
        }finally {
            //关闭response
            try {
                response.close();
            } catch (IOException e) {
                e.printStackTrace();
            }
            try {
                httpClient.close();
            } catch (IOException e) {
                e.printStackTrace();
            }
        }
    }
然而打印的结果并没有日志信息,这是因为从maven包复制的坐标中,有scope约定了test范围,注释掉即可
<dependency>
            <groupId>org.slf4j</groupId>
            <artifactId>slf4j-log4j12</artifactId>
            <version>1.7.25</version>
            <!--<scope>test</scope>-->
        </dependency>

get请求带参数显示在url链接中
使用uri
设置参数名,值
如果完成会回复请求方式,请求的主机,以及返回的状态


public static void main(String[] args) throws Exception {
        //创建HttpClient对象
        CloseableHttpClient httpClient = HttpClients.createDefault();
        //设置请求地址是:http://yun.learnCCC.com/search?keys=Java
        //创建URIBuilder
        URIBuilder uriBuilder = new URIBuilder("http://yun.learnCCC.com/search");
        //设置参数,如果有很多组,多次设置即可
        uriBuilder.setParameter("keys","Java");
        //创建HttpGet对象,设置url访问地址
        HttpGet httpGet = new HttpGet(uriBuilder.build());
        System.out.println("发起请求的信息:"+httpGet);
        CloseableHttpResponse response = null;
        try {
            //使用HttpClient发起请求,获取response
             response = httpClient.execute(httpGet);
            //解析响应
            if (response.getStatusLine().getStatusCode() == 200) {
                String content = EntityUtils.toString(response.getEntity(), "utf8");
                System.out.println(content.length());
            }
        } catch (IOException e) {
            e.printStackTrace();
        }finally {
            //关闭response
            try {
                response.close();
            } catch (IOException e) {
                e.printStackTrace();
            }
            try {
                httpClient.close();
            } catch (IOException e) {
                e.printStackTrace();
            }
        }
    }
http的post请求
和get方式相比区别仅仅有一个,就是http请求对象的声明
从结果中看请求方式, 请求结果,请求主机

public static void main(String[] args)  {
        //创建HttpClient对象
        CloseableHttpClient httpClient = HttpClients.createDefault();
        //创建HttpPost对象,设置url访问地址,唯一和get不同的
        HttpPost httpPost = new HttpPost("http://www.Learn_Java.cn");
        CloseableHttpResponse response = null;
        try {
            //使用HttpClient发起请求,获取response
             response = httpClient.execute(httpPost);
            //解析响应
            if (response.getStatusLine().getStatusCode() == 200) {
                String content = EntityUtils.toString(response.getEntity(), "utf8");
                System.out.println(content.length());
            }
        } catch (IOException e) {
            e.printStackTrace();
        }finally {
            //关闭response
            try {
                response.close();
            } catch (IOException e) {
                e.printStackTrace();
            }
            try {
                httpClient.close();
            } catch (IOException e) {
                e.printStackTrace();
            }
        }
    }
带参数的post请求
url地址没有参数,参数keys=java放到表单中进行提交
ctrl k查看继承接口的对象

查看结果输出的日志信息


 public static void main(String[] args) throws Exception {
        //创建HttpClient对象
        CloseableHttpClient httpClient = HttpClients.createDefault();
        //创建HttpPost对象,设置url访问地址
        HttpPost httpPost = new HttpPost("http://yun.learnCCC.com/search");
        //声明List集合,封装表单中的参数,NameValuePair内部为键值对
        List<NameValuePair> params = new ArrayList<NameValuePair>();
        //设置请求地址是:http://yun.learnCCC.com/search?keys=Java
        params.add(new BasicNameValuePair("keys","Java"));
        //创建表单的Entity对象,第一个参数就是封装好的表单数据,第二个参数就是编码
        UrlEncodedFormEntity formEntity = new UrlEncodedFormEntity(params,"utf8");
        //设置表单的Entity对象到Post请求中
        httpPost.setEntity(formEntity);
        CloseableHttpResponse response = null;
        try {
            //使用HttpClient发起请求,获取response
             response = httpClient.execute(httpPost);
            //解析响应
            if (response.getStatusLine().getStatusCode() == 200) {
                String content = EntityUtils.toString(response.getEntity(), "utf8");
                System.out.println(content.length());
            }
        } catch (IOException e) {
            e.printStackTrace();
        }finally {
            //关闭response
            try {
                response.close();
            } catch (IOException e) {
                e.printStackTrace();
            }
            try {
                httpClient.close();
            } catch (IOException e) {
                e.printStackTrace();
            }
        }
    }
连接池
每次请求都要创建HttpClient,会有频繁创建和销毁的问题,可以使用连接池来解决这个问题。
对client对象打断点,发现地址不一样,断点查看每次获取的HttpClient都是不一样的。
当然也不是关闭,而是归还client,也需要和数据库一样设置连接数
连接数有最大连接数以及主机最大连接数,前者表示一共有多少连接,后者表示某个网站最多分配多少连接
因为如果把所有连接都分配到一个网站,其他网站无连接,则影响总体性能

public static void main(String[] args) {
        //创建连接池管理器
        PoolingHttpClientConnectionManager cm = new PoolingHttpClientConnectionManager();
        //设置最大连接数
        cm.setMaxTotal(100);
        //设置每个主机的最大连接数
        cm.setDefaultMaxPerRoute(10);
        //使用连接池管理器发起请求
        doGet(cm);
        doGet(cm);
    }
    private static void doGet(PoolingHttpClientConnectionManager cm) {
        //不是每次创建新的HttpClient,而是从连接池中获取HttpClient对象
        CloseableHttpClient httpClient = HttpClients.custom().setConnectionManager(cm).build();
        HttpGet httpGet = new HttpGet("http://www.Learn_Java.cn");
        CloseableHttpResponse response = null;
        try {
            response = httpClient.execute(httpGet);
            if (response.getStatusLine().getStatusCode() == 200) {
                String content = EntityUtils.toString(response.getEntity(), "utf8");
                System.out.println(content.length());
            }
        } catch (IOException e) {
            e.printStackTrace();
        }finally {
            if (response != null) {
                try {
                    response.close();
                } catch (IOException e) {
                    e.printStackTrace();
                }
                //不能关闭HttpClient,由连接池管理HttpClient
                //httpClient.close();
            }
        }
    }
4.Jsoup解析数据
字符串处理和正则表达式可以处理网页数据,但是麻烦。Jsoup方便
jsoup的主要功能如下:
1.从一个URL,文件或字符串中解析HTML;
2.使用DOM或CSS选择器来查找、取出数据;
3.可操作HTML元素、属性、文本;
.解析url
Jsoup可以直接输入url,它会发起请求并获取数据,封装为Document对象
@Test
public void testJsoupUrl() throws Exception {
    //    解析url地址
    Document document = Jsoup.parse(new URL("http://www.learn_java.cn/"), 1000);

    //获取title的内容
    Element title = document.getElementsByTag("title").first();
    System.out.println(title.text());
}
虽然使用Jsoup可以替代HttpClient直接发起请求解析数据,但是往往不会这样用,因为实际的开发过程中,需要使用到多线程,连接池,代理等等方式,而jsoup对这些的支持并不是很好,所以我们一般把jsoup仅仅作为Html解析工具使用
解析字符串
先准备html文件
Jsoup可以直接输入字符串,并封装为Document对象
@Test
public void testJsoupString() throws Exception {
    //读取文件获取
    String html = FileUtils.readFileToString(new File("D:\\jsoup.html"), "UTF-8");

    //    解析字符串
    Document document = Jsoup.parse(html);

    //获取title的内容
    Element title = document.getElementsByTag("title").first();
    System.out.println(title.text());

}
解析文件
Jsoup可以直接解析文件,并封装为Document对象
@Test
public void testJsoupHtml() throws Exception {
    //    解析文件
    Document document = Jsoup.parse(new File("D:\\jsoup.html"),"UTF-8");

    //获取title的内容
    Element title = document.getElementsByTag("title").first();
    System.out.println(title.text());
}
使用dom方式遍历文档
元素获取
1.根据id查询元素getElementById
2.根据标签获取元素getElementsByTag
3.根据class获取元素getElementsByClass
4.根据属性获取元素getElementsByAttribute
//1.    根据id查询元素getElementById
Element element = document.getElementById("city_bj");

//2.   根据标签获取元素getElementsByTag
element = document.getElementsByTag("title").first();

//3.   根据class获取元素getElementsByClass
element = document.getElementsByClass("s_name").last();

//4.   根据属性获取元素getElementsByAttribute
element = document.getElementsByAttribute("abc").first();
element = document.getElementsByAttributeValue("class", "city_con").first();
元素中获取数据
1.从元素中获取id
2.从元素中获取className
3.从元素中获取属性的值attr
4.从元素中获取所有属性attributes
5.从元素中获取文本内容text
//获取元素
Element element = document.getElementById("test");

//1.   从元素中获取id
String str = element.id();

//2.   从元素中获取className
str = element.className();

//3.   从元素中获取属性的值attr
str = element.attr("id");

//4.   从元素中获取所有属性attributes
str = element.attributes().toString();

//5.   从元素中获取文本内容text
str = element.text();
使用选择器语法查找元素
jsoup elements对象支持类似于CSS (或jquery)的选择器语法,来实现非常强大和灵活的查找功能。这个select 方法在Document, Element,或Elements对象中都可以使用。且是上下文相关的,因此可实现指定元素的过滤,或者链式选择访问。
Select方法将返回一个Elements集合,并提供一组方法来抽取和处理结果。
Selector选择器概述
tagname: 通过标签查找元素,比如:span
#id: 通过ID查找元素,比如:# city_bj
.class: 通过class名称查找元素,比如:.class_a
[attribute]: 利用属性查找元素,比如:[abc]
[attr=value]: 利用属性值来查找元素,比如:[class=s_name]
//tagname: 通过标签查找元素,比如:span
Elements span = document.select("span");
for (Element element : span) {
    System.out.println(element.text());
}
//#id: 通过ID查找元素,比如:#city_bjj
String str = document.select("#city_bj").text();

//.class: 通过class名称查找元素,比如:.class_a
str = document.select(".class_a").text();

//[attribute]: 利用属性查找元素,比如:[abc]
str = document.select("[abc]").text();

//[attr=value]: 利用属性值来查找元素,比如:[class=s_name]
str = document.select("[class=s_name]").text();
Selector选择器组合使用
el#id: 元素+ID,比如: h3#city_bj
el.class: 元素+class,比如: li.class_a
el[attr]: 元素+属性名,比如: span[abc]
任意组合: 比如:span[abc].s_name
ancestor child: 查找某个元素下子元素,比如:.city_con li 查找"city_con"下的所有li
parent > child: 查找某个父元素下的直接子元素,比如:
.city_con > ul > li 查找city_con第一级(直接子元素)的ul,再找所有ul下的第一级li
parent > *: 查找某个父元素下所有直接子元素

//el#id: 元素+ID,比如: h3#city_bj
String str = document.select("h3#city_bj").text();

//el.class: 元素+class,比如: li.class_a
str = document.select("li.class_a").text();

//el[attr]: 元素+属性名,比如: span[abc]
str = document.select("span[abc]").text();

//任意组合,比如:span[abc].s_name
str = document.select("span[abc].s_name").text();

//ancestor child: 查找某个元素下子元素,比如:.city_con li 查找"city_con"下的所有li
str = document.select(".city_con li").text();

//parent > child: 查找某个父元素下的直接子元素,
//比如:.city_con > ul > li 查找city_con第一级(直接子元素)的ul,再找所有ul下的第一级li
str = document.select(".city_con > ul > li").text();

//parent > * 查找某个父元素下所有直接子元素.city_con > *
str = document.select(".city_con > *").text();
5.爬虫案例
学习了HttpClient和Jsoup,就掌握了如何抓取解析数据
访问京东,搜索手机,分析页面,我们抓取以下商品数据:
商品图片、价格、标题、商品详情页
SPU和SKU
SPU = Standard Product Unit (标准产品单位)
SPU是商品信息聚合的最小单位,属性值、特性相同的商品就可以称为一个SPU。例如苹果手机就是SPU,包括红色、深灰色、金色、银色
网页中会有标注

SKU=stock keeping unit(库存量单位)
SKU即库存进出计量的单位,SKU是物理上不可分割的最小存货单元。例如红色苹果手机,就是一个sku

Jsoup
单元测试类
若文件没有正常下载,点击右侧工程,重新手动下载即可

操作文件的工具类
fileutils
操作字符串的工具类
string utils
创建一个数据库表
将从网页抓取的数据放入数据库
CREATE TABLE `jd_item` (
  `id` bigint(10) NOT NULL AUTO_INCREMENT COMMENT '主键id',
  `spu` bigint(15) DEFAULT NULL COMMENT '商品集合id',
  `sku` bigint(15) DEFAULT NULL COMMENT '商品最小品类单元id',
  `title` varchar(100) DEFAULT NULL COMMENT '商品标题',
  `price` bigint(10) DEFAULT NULL COMMENT '商品价格',
  `pic` varchar(200) DEFAULT NULL COMMENT '商品图片',
  `url` varchar(200) DEFAULT NULL COMMENT '商品详情地址',
  `created` datetime DEFAULT NULL COMMENT '创建时间',
  `updated` datetime DEFAULT NULL COMMENT '更新时间',
  PRIMARY KEY (`id`),
  KEY `sku` (`sku`) USING BTREE
) ENGINE=InnoDB AUTO_INCREMENT=1 DEFAULT CHARSET=utf8 COMMENT='京东商品表';
添加依赖
使用Spring Boot+Spring Data JPA和定时任务进行开发,
需要创建Maven工程并添加以下依赖
<?xml version="1.0" encoding="UTF-8"?>
<project xmlns="http://maven.apache.org/POM/4.0.0"
         xmlns:xsi="http://www.w3.org/2001/XMLSchema-instance"
         xsi:schemaLocation="http://maven.apache.org/POM/4.0.0 http://maven.apache.org/xsd/maven-4.0.0.xsd">
    <modelVersion>4.0.0</modelVersion>
    <parent>
        <groupId>org.springframework.boot</groupId>
        <artifactId>spring-boot-starter-parent</artifactId>
        <version>2.0.2.RELEASE</version>
    </parent>
    <groupId>cn.learn_java.crawler</groupId>
    <artifactId>learn_java-crawler-jd</artifactId>
    <version>1.0-SNAPSHOT</version>

    <dependencies>
        <!--SpringMVC-->
        <dependency>
            <groupId>org.springframework.boot</groupId>
            <artifactId>spring-boot-starter-web</artifactId>
        </dependency>

        <!--SpringData Jpa-->
        <dependency>
            <groupId>org.springframework.boot</groupId>
            <artifactId>spring-boot-starter-data-jpa</artifactId>
        </dependency>

        <!--MySQL连接包-->
        <dependency>
            <groupId>mysql</groupId>
            <artifactId>mysql-connector-java</artifactId>
        </dependency>

        <!-- HttpClient -->
        <dependency>
            <groupId>org.apache.httpcomponents</groupId>
            <artifactId>httpclient</artifactId>
        </dependency>

        <!--Jsoup-->
        <dependency>
            <groupId>org.jsoup</groupId>
            <artifactId>jsoup</artifactId>
            <version>1.10.3</version>
        </dependency>

        <!--工具包-->
        <dependency>
            <groupId>org.apache.commons</groupId>
            <artifactId>commons-lang3</artifactId>
        </dependency>
    </dependencies>
</project>
添加配置文件
加入application.properties配置文件
#DB Configuration:
spring.datasource.driverClassName=com.mysql.jdbc.Driver
spring.datasource.url=jdbc:mysql://127.0.0.1:3306/crawler
spring.datasource.username=root
spring.datasource.password=root

#JPA Configuration:
spring.jpa.database=MySQL
spring.jpa.show-sql=true
编写pojo
根据数据库表,编写pojo
@Entity
@Table(name = "jd_item")
public class Item {
    //主键
    @Id
    @GeneratedValue(strategy = GenerationType.IDENTITY)
    private Long id;
    //标准产品单位(商品集合)
    private Long spu;
    //库存量单位(最小品类单元)
    private Long sku;
    //商品标题
    private String title;
    //商品价格
    private Double price;
    //商品图片
    private String pic;
    //商品详情地址
    private String url;
    //创建时间
    private Date created;
    //更新时间
    private Date updated;
set/get
}
编写dao
public interface ItemDao extends JpaRepository<Item,Long> {

}
编写Service
ItemService接口
public interface ItemService {

    //根据条件查询数据
    public List<Item> findAll(Item item);

    //保存数据
    public void save(Item item);
}
ItemServiceImpl实现类
@Service
public class ItemServiceImpl implements ItemService {

    @Autowired
    private ItemDao itemDao;

    @Override
    public List<Item> findAll(Item item) {
        Example example = Example.of(item);
        List list = this.itemDao.findAll(example);
        return list;
    }

    @Override
    @Transactional
    public void save(Item item) {
        this.itemDao.save(item);
    }
}
编写引导类
@SpringBootApplication
//设置开启定时任务
@EnableScheduling
public class Application {

    public static void main(String[] args) {
        SpringApplication.run(Application.class, args);
    }
}
封装HttpClient
我们需要经常使用HttpClient,所以需要进行封装,方便使用
@Component
public class HttpUtils {

    private PoolingHttpClientConnectionManager cm;

    public HttpUtils() {
        this.cm = new PoolingHttpClientConnectionManager();

        //    设置最大连接数
        cm.setMaxTotal(200);

        //    设置每个主机的并发数
        cm.setDefaultMaxPerRoute(20);
    }

    //获取内容
    public String getHtml(String url) {
        // 获取HttpClient对象
        CloseableHttpClient httpClient = HttpClients.custom().setConnectionManager(cm).build();

        // 声明httpGet请求对象
        HttpGet httpGet = new HttpGet(url);
        // 设置请求参数RequestConfig
        httpGet.setConfig(this.getConfig());

        CloseableHttpResponse response = null;
        try {
            // 使用HttpClient发起请求,返回response
            response = httpClient.execute(httpGet);
            // 解析response返回数据
            if (response.getStatusLine().getStatusCode() == 200) {
                String html = "";

                // 如果response。getEntity获取的结果是空,在执行EntityUtils.toString会报错
                // 需要对Entity进行非空的判断
                if (response.getEntity() != null) {
                    html = EntityUtils.toString(response.getEntity(), "UTF-8");
                }

                return html;
            }

        } catch (Exception e) {
            e.printStackTrace();
        } finally {
            try {
                if (response != null) {
                    // 关闭连接
                    response.close();
                }
                // 不能关闭,现在使用的是连接管理器
                // httpClient.close();
            } catch (Exception e) {
                e.printStackTrace();
            }
        }

        return null;
    }

    //获取图片
    public String getImage(String url) {
        // 获取HttpClient对象
        CloseableHttpClient httpClient = HttpClients.custom().setConnectionManager(cm).build();

        // 声明httpGet请求对象
        HttpGet httpGet = new HttpGet(url);
        // 设置请求参数RequestConfig
        httpGet.setConfig(this.getConfig());

        CloseableHttpResponse response = null;
        try {
            // 使用HttpClient发起请求,返回response
            response = httpClient.execute(httpGet);
            // 解析response下载图片
            if (response.getStatusLine().getStatusCode() == 200) {
                // 获取文件类型
                String extName = url.substring(url.lastIndexOf("."));
                // 使用uuid生成图片名
                String imageName = UUID.randomUUID().toString() + extName;

                // 声明输出的文件
                OutputStream outstream = new FileOutputStream(new File("D:/images/" + imageName));
                // 使用响应体输出文件
                response.getEntity().writeTo(outstream);

                // 返回生成的图片名
                return imageName;
            }

        } catch (Exception e) {
            e.printStackTrace();
        } finally {
            try {
                if (response != null) {
                    // 关闭连接
                    response.close();
                }
                // 不能关闭,现在使用的是连接管理器
                // httpClient.close();
            } catch (Exception e) {
                e.printStackTrace();
            }
        }

        return null;
    }

    //获取请求参数对象
    private RequestConfig getConfig() {
        RequestConfig config = RequestConfig.custom().setConnectTimeout(1000)// 设置创建连接的超时时间
                .setConnectionRequestTimeout(500) // 设置获取连接的超时时间
                .setSocketTimeout(10000) // 设置连接的超时时间
                .build();

        return config;
    }

}
实现数据抓取
使用定时任务,可以定时抓取最新的数据
@Component
public class ItemTask {

    @Autowired
    private HttpUtils httpUtils;
    @Autowired
    private ItemService itemService;

    public static final ObjectMapper MAPPER = new ObjectMapper();


    //设置定时任务执行完成后,再间隔100秒执行一次
    @Scheduled(fixedDelay = 1000 * 100)
    public void process() throws Exception {
        //分析页面发现访问的地址,页码page从1开始,下一页oage加2
        String url = "https://search.jd.com/Search?keyword=%E6%89%8B%E6%9C%BA&enc=utf-8&qrst=1&rt=1&stop=1&vt=2&cid2=653&cid3=655&s=5760&click=0&page=";

        //遍历执行,获取所有的数据
        for (int i = 1; i < 10; i = i + 2) {
            //发起请求进行访问,获取页面数据,先访问第一页
            String html = this.httpUtils.getHtml(url + i);

            //解析页面数据,保存数据到数据库中
            this.parseHtml(html);

        }
        System.out.println("执行完成");
    }


    //解析页面,并把数据保存到数据库中
    private void parseHtml(String html) throws Exception {
        //使用jsoup解析页面
        Document document = Jsoup.parse(html);

        //获取商品数据
        Elements spus = document.select("div#J_goodsList > ul > li");

        //遍历商品spu数据
        for (Element spuEle : spus) {
            //获取商品spu
            Long spuId = Long.parseLong(spuEle.attr("data-spu"));

            //获取商品sku数据
            Elements skus = spuEle.select("li.ps-item img");
            for (Element skuEle : skus) {
                //获取商品sku
                Long skuId = Long.parseLong(skuEle.attr("data-sku"));

                //判断商品是否被抓取过,可以根据sku判断
                Item param = new Item();
                param.setSku(skuId);
                List<Item> list = this.itemService.findAll(param);
                //判断是否查询到结果
                if (list.size() > 0) {
                    //如果有结果,表示商品已下载,进行下一次遍历
                    continue;
                }

                //保存商品数据,声明商品对象
                Item item = new Item();

                //商品spu
                item.setSpu(spuId);
                //商品sku
                item.setSku(skuId);
                //商品url地址
                item.setUrl("https://item.jd.com/" + skuId + ".html");
                //创建时间
                item.setCreated(new Date());
                //修改时间
                item.setUpdated(item.getCreated());


                //获取商品标题
                String itemHtml = this.httpUtils.getHtml(item.getUrl());
                String title = Jsoup.parse(itemHtml).select("div.sku-name").text();
                item.setTitle(title);

                //获取商品价格
                String priceUrl = "https://p.3.cn/prices/mgets?skuIds=J_"+skuId;
                String priceJson = this.httpUtils.getHtml(priceUrl);
                //解析json数据获取商品价格
                double price = MAPPER.readTree(priceJson).get(0).get("p").asDouble();
                item.setPrice(price);

                //获取图片地址
                String pic = "https:" + skuEle.attr("data-lazy-img").replace("/n9/","/n1/");
                System.out.println(pic);
                //下载图片
                String picName = this.httpUtils.getImage(pic);
                item.setPic(picName);

                //保存商品数据
                this.itemService.save(item);
            }
        }
    }
}
发布者:全栈程序员-用户IM,转载请注明出处:https://javaforall.cn/100227.html原文链接:https://javaforall.cn
【正版授权,激活自己账号】: Jetbrains全家桶Ide使用,1年售后保障,每天仅需1毛
【官方授权 正版激活】: 官方授权 正版激活 支持Jetbrains家族下所有IDE 使用个人JB账号...
